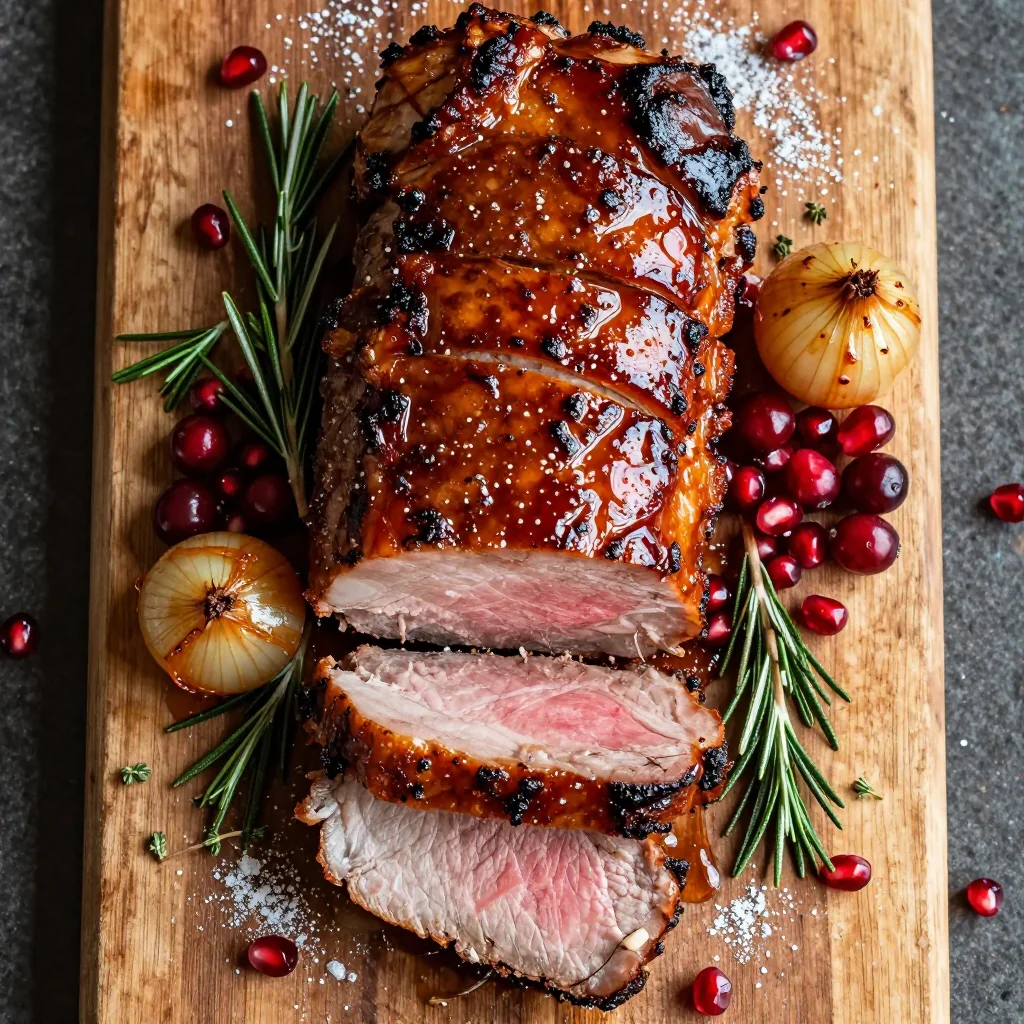
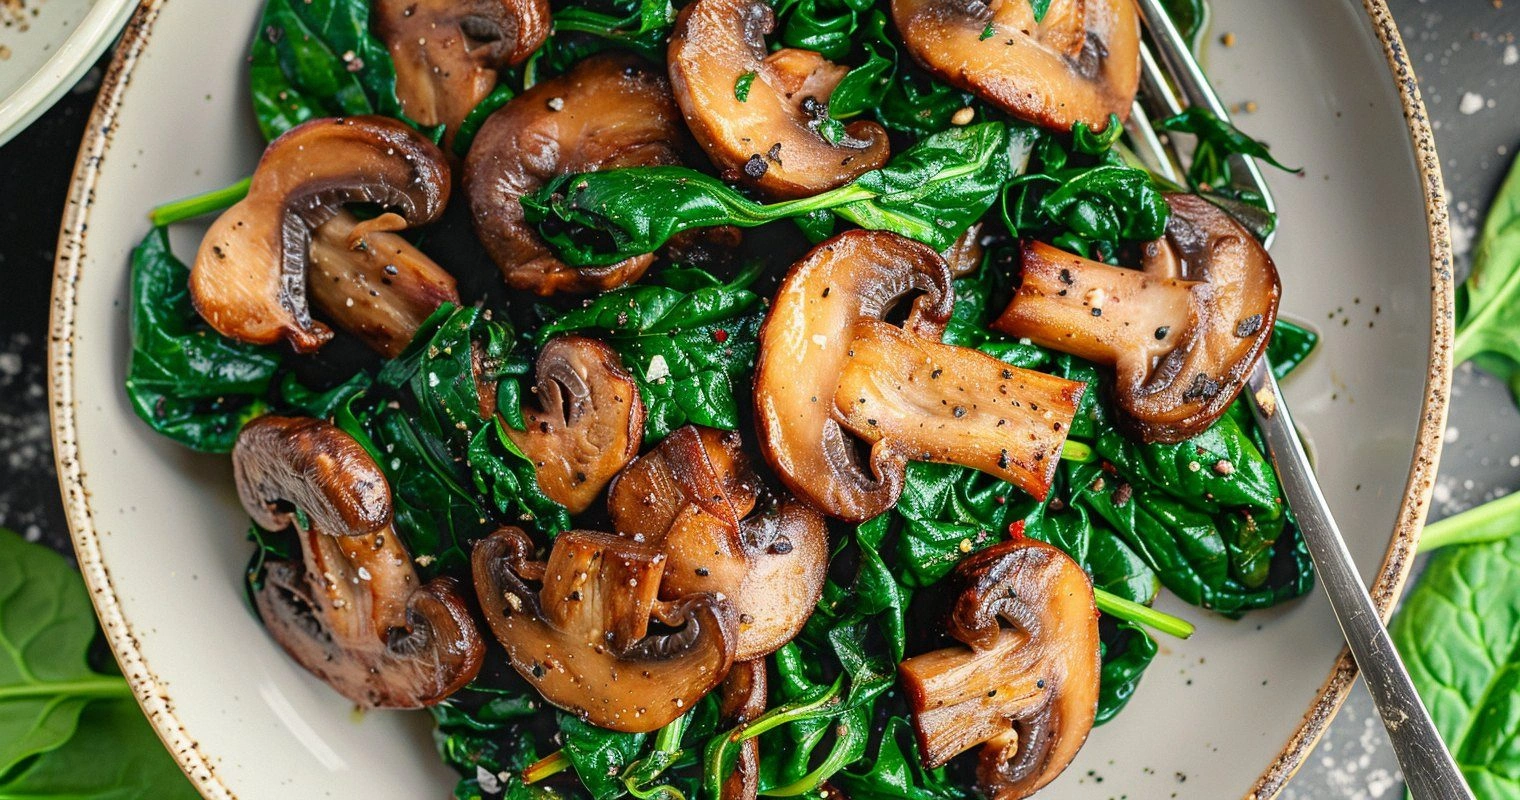
I still remember the night I ruined three pans of soggy, gray spinach that tasted like the bottom of a compost bin. My dinner guests were politely picking at their plates while I mentally planned my escape to a country without extradition treaties. Fast forward to last weekend when I served the exact same dish—sautéed spinach and mushrooms—and watched my notoriously vegetable-phobic nephew ask for thirds. The difference? A few counterintuitive techniques I stumbled upon after way too many test batches and one slightly dramatic kitchen fire (long story, but everyone's fine).
Picture this: It's 7:30 on a Tuesday, you're still wearing your work badge, and the only thing standing between you and Netflix is the need to feed yourself something that won't make your doctor weep. You open the fridge and see that sad bag of spinach wilting next to mushrooms that have seen better days. Most recipes would have you chuck both into a pan, add some oil, and pray. That approach is why so many people think they hate vegetables. Instead, I'm going to show you how to coax out the deep, almost meaty richness hiding inside those mushrooms while keeping the spinach vibrant and tender—never slimy, never bitter, never that depressing army-green color.
Here's the kicker: this whole transformation happens in under fifteen minutes with ingredients you probably already own. No fancy equipment, no obscure spices you can't pronounce, no technique that requires a culinary degree. Just a few simple moves that make all the difference between "meh" and "how did you make vegetables taste like this?" The aroma alone—garlicky, buttery, with that unmistakable earthy perfume of properly browned mushrooms—will have neighbors knocking on your door with empty plates.
Let me walk you through every single step—by the end, you'll wonder how you ever made it any other way.
What Makes This Version Stand Out
This isn't your grandmother's steamed spinach, and it sure isn't that sad pile of veggies you push around on restaurant plates. This version takes humble produce and turns it into something that steals the show.
Depth Bomb: We're talking layers of flavor here—first the mushrooms get a proper sear that creates those caramelized edges packed with umami, then garlic hits the hot fat and blooms into something almost sweet, and finally the spinach wilts in this flavor bath, absorbing every bit of goodness. It's like a flavor concerto where every instrument gets a solo.
Texture Tango: Most versions end up with uniformly mushy vegetables that feel like eating wet paper. Not here. The mushrooms maintain a satisfying bite with crispy edges, while the spinach keeps just enough structure to remind you it's actually a plant. That contrast between tender and toothsome? Pure magic.
Speed Demon Approved: From fridge to plate in twelve minutes flat. This recipe respects your time and your hunger. No pre-boiling, no multi-step processes, no waiting around while your stomach eats itself. Perfect for those "I need food now but refuse to order takeout again" moments.
Ingredient Minimalism: Eight ingredients total, and three of them are salt, pepper, and oil. Everything pulls double duty, creating complexity without cluttering your shopping list or your counter. Your wallet and your dishwasher will thank you.
Leftover Legend: Make extra because this stuff transforms everything it touches. Stuff it into omelets, pile it on toast, fold it into pasta, or eat it cold straight from the fridge at 2 AM while contemplating life's mysteries. It somehow tastes even better the next day.
Crowd Confuser: Serve this at a dinner party and watch guests try to guess the secret ingredient. There isn't one—it's just technique done right. But let them think you're a wizard; culinary magic is all about perception.
Alright, let's break down exactly what goes into this masterpiece...
Inside the Ingredient List
Every ingredient here earns its keep. Nothing's just along for the ride, and skipping anything will make you miss out on a layer of flavor. Trust me, I've tried the shortcuts—they all lead to disappointment and takeout menus.
The Flavor Foundation
Extra-Virgin Olive Oil: This isn't just for preventing sticking—it's your primary flavor carrier. When it hits the hot pan, it creates a base layer that helps the mushrooms brown instead of steam. Go for a decent quality oil; this isn't the place for that ancient bottle that's been sitting above your stove since college. The oil should smell fruity and peppery, not like old fryer grease.
Unsalted Butter: Here's where we get sneaky. Butter adds richness and helps develop those gorgeous browned bits on the bottom of the pan (called fond if you're feeling fancy). Using unsalted lets you control the seasoning precisely—nobody wants to bite into a salt lair when they're expecting vegetables. Plus, the milk solids in butter help create that restaurant-quality sheen on the finished dish.
The Umami Duo
Cremini Mushrooms: Also sold as baby bellas, these are just young portobellos with actual flavor. They have a meaty density that stands up to high heat, developing those crave-worthy crispy edges. White button mushrooms work in a pinch, but they're basically the tofu of fungi—bland and boring. Creminis bring an earthy depth that makes omnivores question whether there's actually meat in here.
Fresh Garlic: Jarred garlic tastes like disappointment and regret. Fresh garlic, when added at the right moment, transforms from sharp and aggressive to sweet and complex. Watch closely as it turns golden—this is your flavor backbone. Too pale and it's harsh, too dark and it's bitter. That perfect moment? It's like catching a sunset; blink and you miss it.
The Green Star
Baby Spinach: Skip the tough, mature stuff that comes in bunches with the roots still attached. Baby spinach is tender, sweet, and wilts evenly. Older spinach can turn stringy and bitter faster than you can say "healthy eating." Look for leaves that are bright green with no yellowing or slimy spots—they should smell fresh and grassy, not like the inside of a compost bin.
The Seasoning Squad
Sea Salt: Not all salt is created equal. Table salt has additives that can make vegetables taste metallic. Sea salt has minerals that enhance natural flavors. We're adding it in layers—first to the mushrooms to draw out moisture, then to the finished dish for final seasoning. This builds complexity instead of just salty punches.
Black Pepper: Freshly cracked, not that pre-ground dust that's been sitting in your cabinet since the Obama administration. Pepper adds heat and floral notes that wake up the other flavors. Add it at the end so the volatile oils don't cook off and leave you with one-note heat.
Everything's prepped? Good. Let's get into the real action...
The Method — Step by Step
- Start with a cold, dry pan. I know, every recipe tells you to heat the pan first, but here's the thing—mushrooms are like sponges. If they hit a screaming hot pan, they seize up and refuse to release their moisture. Instead, spread them in a single layer in a cold skillet, add a tablespoon of oil, then turn the heat to medium-high. As the pan gradually heats, the mushrooms have time to release their liquid and then reabsorb it as they brown. This technique, which I learned after ruining approximately forty-seven batches, creates the most beautiful caramelization you've ever seen on a fungus.
- Resist the urge to stir for at least four minutes. I know it's hard. You'll want to poke, prod, and fuss. Don't. Let them sit undisturbed while they develop that gorgeous golden crust. You should hear a gentle sizzling, not violent popping. If it's loud enough to wake the neighbors, your heat's too high. When the edges start looking caramelized and the bottoms are golden-brown, give them a gentle toss. They should release easily; if they're sticking, they're not ready yet.
- Clear a small space in the center of the pan and add the butter. Watch it foam and turn nutty brown in about thirty seconds. This is your flavor bomb moment. Add the garlic directly into the melted butter and stir constantly for exactly fifteen seconds. Count it out—fifteen seconds is the sweet spot where garlic turns sweet and aromatic without crossing into bitter territory. If it starts turning darker than golden, you've gone too far and there's no coming back.
- Now comes the spinach avalanche. Add it all at once—even though it looks like way too much, it'll shrink dramatically. Use tongs to turn and coat the leaves with the garlicky, mushroomy fat. They should start wilting within thirty seconds. Keep everything moving so nothing sits in one spot long enough to overcook. You're looking for bright green, tender but not mushy spinach that still has some body to it.
- Season with salt and pepper, tasting as you go. The mushrooms might need more salt than you'd expect—they're basically sponges for seasoning. Add a pinch, taste, add more if needed. Same with pepper, but remember you can always add more, you can't take it out. The whole cooking process should take about ten minutes from start to finish.
- Transfer to a serving dish immediately. Leaving it in the hot pan will continue cooking it, turning your perfect vegetables into the sad, overcooked version we've all endured. If you're not serving right away, spread it on a plate to cool quickly, then reheat gently just before serving.
That's it—you did it. But hold on, I've got a few more tricks that'll take this to another level...
Insider Tricks for Flawless Results
After making this dish what might be an unhealthy number of times, I've discovered some nuances that separate good from restaurant-quality. These aren't in the recipe because they're optional, but once you try them, you'll never go back.
The Temperature Rule Nobody Follows
Room temperature vegetables cook more evenly. I know, you just pulled everything from the fridge and you're hungry. But letting mushrooms and spinach sit on the counter for fifteen minutes while you change clothes and pour a glass of wine makes a dramatic difference. Cold vegetables hit the pan and immediately drop the temperature, leading to uneven cooking and steamed instead of seared surfaces. That quarter-hour wait is the difference between amateur and professional results.
Why Your Nose Knows Best
Trust your sense of smell more than the clock. When the garlic hits the butter, start sniffing. The moment it turns from sharp and aggressive to sweet and nutty—about fifteen seconds—you're golden. Same with the mushrooms. When they stop smelling raw and earthy and start smelling almost meaty and caramelized, they're ready to flip. This sensory checkpoint is more reliable than any timer because every stove, pan, and mushroom is slightly different.
The 5-Minute Rest That Changes Everything
After cooking, let the mixture rest for five minutes off heat before serving. This isn't just chef pretension—the flavors meld and intensify as the residual heat finishes gentle cooking. It's like the difference between a good salsa right after chopping versus one that's had time for the ingredients to get acquainted. Those five minutes also let you set the table, pour drinks, and pretend you're not hovering over the stove like a starving raccoon.
The Salt Layering Secret
Season in stages, not all at once. Salt the mushrooms when they first hit the pan—this draws out moisture and helps them brown. Then taste and adjust at the end. This two-stage salting builds depth instead of just making things salty. Think of it like painting—you don't dump all the paint on at once. You build layers for richness and complexity.
Creative Twists and Variations
This recipe is a playground. Here are some of my favorite ways to switch things up:
The Mediterranean Vacation
Toss in some halved cherry tomatoes during the last two minutes of cooking, just until they start to burst. Add a handful of Kalamata olives and finish with crumbled feta cheese. Suddenly you're eating dinner on a Greek island, not in your kitchen with a pile of bills on the counter. The tomatoes add sweetness and acidity that brightens the whole dish.
The Steakhouse Fake-Out
Add a splash of balsamic vinegar during the last minute of cooking and finish with a pat of blue cheese on top. The vinegar reduces to a syrupy glaze that makes everything taste expensive, while the blue cheese melts into the hot vegetables creating little pockets of creamy, funky goodness. Serve alongside a cheap steak and suddenly you're at a fancy steakhouse without the fancy steakhouse bill.
The Breakfast Bandit
Make the base recipe, then crack two eggs directly into the pan and cover for three minutes. The eggs poach in the flavorful fat, creating a one-pan breakfast that'll make you cancel your brunch reservations. The runny yolks mix with the vegetables to create an accidental sauce that'll have you licking your fork like an animal.
The Spicy Rebel
Add a pinch of red pepper flakes with the garlic for gentle heat, or go wild with a diced jalapeño if you're feeling dangerous. The spice wakes up your palate and makes the vegetables taste more intense. It's like turning up the contrast on a photo—suddenly all the flavors are more vivid and exciting.
The Umami Bomb
Add a teaspoon of miso paste dissolved in a tablespoon of warm water during the last minute of cooking. It dissolves into a silky sauce that coats everything with deep, savory flavor. Your guests will taste it and swear you added meat or some exotic ingredient. Nope—just fermented soybeans doing the lord's work.
The Decadent Version
Replace half the olive oil with truffle oil and finish with a shower of freshly grated Parmesan. Suddenly this humble vegetable dish tastes like something from a Michelin-starred restaurant. Save this for date night or when you need to impress your in-laws without actually knowing how to cook anything complicated.
Storing and Bringing It Back to Life
Fridge Storage
Store leftovers in an airtight container for up to four days. The flavors actually intensify as they meld, making it perfect for meal prep. Line the container with a paper towel to absorb excess moisture that could make everything soggy. Don't pack it while still warm—let it cool completely first to prevent condensation that turns your beautiful vegetables into a sad, wet mess.
Freezer Friendly
This dish freezes surprisingly well for up to three months. Spread it in a single layer on a sheet pan to freeze individually, then transfer to freezer bags. This prevents clumping and lets you grab exactly what you need. It won't have quite the same texture after thawing, but it's perfect for tossing into soups, omelets, or pasta where texture matters less than flavor.
Best Reheating Method
Skip the microwave—it turns everything rubbery and sad. Instead, reheat in a dry skillet over medium heat for about three minutes, stirring occasionally. Add a tiny splash of water to create steam that rehydrates without making things soggy. It'll taste almost as good as fresh, which is more than you can say for most leftover vegetables that usually end up feeding the garbage disposal.