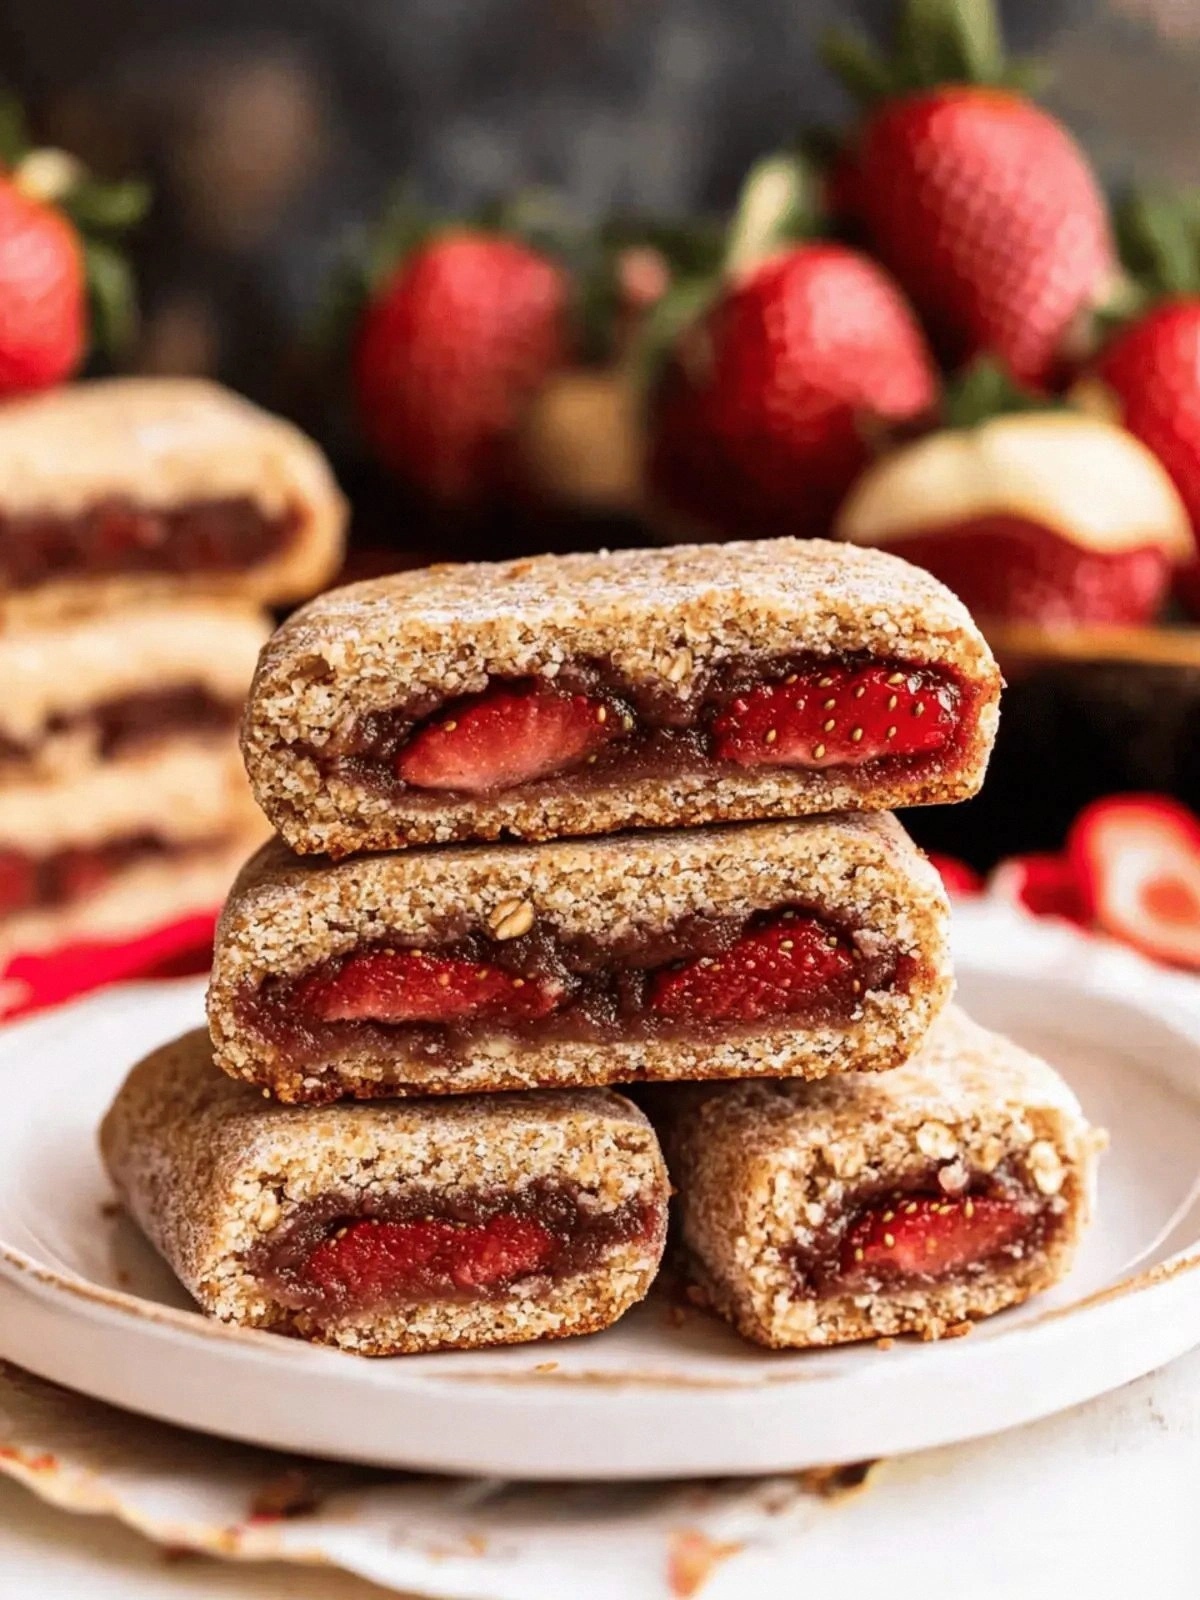
I was halfway through a midnight snack raid when the kitchen turned into a battlefield. The blender had just exploded, sending fresh strawberries and dates flying like confetti. My friends had called it a disaster, but as the sweet, sticky mess settled, a new idea sparked: a chewy, berry‑laden bar that could turn that chaos into triumph. Picture a kitchen that smells like fresh fruit, butter, and a hint of spiced rum, with the sound of sizzling butter in a pan—this is the sensory start of a culinary adventure that will change your snack game forever. By the end of this post, you’ll be able to create a bar so irresistible that I dare you to taste it and not go back for seconds.
I can almost hear the crunch of the first bite, the soft snap of a date as it melts into the buttery base, and the faint pop of lemon zest. The aroma that fills the room is a bright, citrusy bouquet that cuts through the richness of honey and rum. The texture is a perfect balance—crisp edges that crackle like thin ice, a chewy center that stretches with each chew, and a glossy glaze that glistens like dew on a summer morning. If you’ve ever struggled with making a bar that’s both sweet and satisfying, you’re not alone, and I’ve got the fix. The secret? A blend of whole‑wheat flour, a splash of spiced rum, and a careful timing that locks in freshness.
Most recipes for fruit bars rely on pre‑made mixes or too much sugar, but this version strips back to the essentials and elevates them. The use of Medjool dates as natural sweeteners keeps the bars moist without overpowering the strawberry flavor. A touch of cinnamon and nutmeg gives the bars a subtle warmth that contrasts beautifully with the tartness of fresh fruit. The spiced rum isn’t just a flavor enhancer; it adds a depth that feels like a summer celebration in every bite. The result is a bar that’s chewy, buttery, and bursting with berry flavor—hands down the best version you’ll ever make at home.
Now, picture yourself pulling these out of the oven, the whole kitchen smelling incredible, and the first bite sending a wave of joy through your senses. The technique I’ll show you involves a unique method of binding that keeps the bars from crumbling, and a finish that gives them a glossy, professional look. Stay with me here—this is worth it. Let me walk you through every single step, and by the end, you’ll wonder how you ever made it any other way.
What Makes This Version Stand Out
- Flavor: The marriage of fresh strawberries, sweet dates, and a splash of spiced rum creates a complex profile that feels both sweet and slightly boozy. The lemon zest adds brightness that cuts through the richness, making each bite feel fresh. The result is a flavor that lingers on the palate like a summer breeze.
- Texture: The combination of all‑purpose and whole‑wheat flour gives the bars a chewy core while the butter creates a crisp, buttery crust. The dates act as a natural binder, preventing the bars from falling apart. The final glaze locks in moisture, giving a glossy finish that’s almost cinematic.
- Simplicity: No need for fancy equipment or obscure ingredients. The recipe uses pantry staples and fresh produce you can find at any grocery store. The steps are straightforward, making it ideal for novice cooks and busy families.
- Uniqueness: Few bars incorporate spiced rum, cinnamon, and nutmeg together in a fruit bar. The spice blend adds depth and makes the bars stand out from typical granola or cookie bars. It’s a flavor twist that keeps people guessing.
- Crowd Reaction: Friends who’ve tasted these bars say they’re “addictive” and “the best snack for a road trip.” The bars are perfect for parties, potlucks, or a quiet afternoon. They’re a conversation starter that will keep guests coming back for more.
- Ingredient Quality: Using fresh strawberries and Medjool dates instead of dried fruit or sweeteners means the bars are healthier and taste better. The honey and butter add natural sweetness without the need for refined sugar. The recipe is a step toward mindful snacking.
- Cooking Method: Baking the bars at a moderate temperature ensures even browning and prevents the edges from burning. The technique of letting the batter rest before baking helps the flavors meld. This method is a game‑changer for achieving the perfect crumb.
- Make‑Ahead Potential: Once cooled, the bars can be stored in an airtight container for up to a week, or frozen for longer. They’re a great pre‑packaged snack for busy mornings or travel. The bars keep their texture and flavor even after refrigeration.
Inside the Ingredient List
The Flavor Base
All‑purpose flour and whole‑wheat flour create the backbone of the bars, giving them structure and a subtle nutty undertone. The combination balances the dense sweetness of dates and honey, preventing the bars from becoming overly sticky. If you skip the whole‑wheat flour, the bars will be lighter but lose some of their chewy depth. A good tip: use organic flour if possible; it has a milder flavor that lets the fruit shine.
The Texture Crew
Unsalted butter, honey, and Medjool dates work together to create a moist, chewy interior. The butter melts into a buttery crust that crisps during baking, while the honey adds a natural sheen. Dates act as a binder, holding everything together without the need for eggs alone. If you’re vegan, replace the butter with coconut oil and the eggs with flaxseed gel for a similar texture.
The Unexpected Star
Spiced rum isn’t just for flavor; it lowers the freezing point of the mixture, keeping the bars from becoming too hard in the fridge. The rum’s caramel notes complement the nutmeg and cinnamon, creating a depth that feels like a warm summer evening. If you prefer a non‑alcoholic version, use a splash of vanilla extract and a pinch of ginger for a similar warmth.
The Final Flourish
Fresh strawberries provide the burst of juiciness and bright flavor that defines the bars. The lemon zest and juice brighten the overall taste, cutting through the richness of butter and honey. Cinnamon, cloves, and nutmeg add subtle warmth that balances the tartness. If you’re short on fresh fruit, frozen strawberries work fine; just thaw and drain them before mixing.
Everything’s prepped? Good. Let’s get into the real action.
The Method — Step by Step
- Preheat your oven to 350°F (175°C). Line a 9×13 inch baking pan with parchment paper and set aside. The parchment will keep the bars from sticking and make cleanup a breeze. While the oven heats, let’s combine the dry ingredients.
- In a large mixing bowl, whisk together the all‑purpose flour, whole‑wheat flour, brown sugar, baking powder, and kosher salt until well blended. The dry mix should look like a fine, sandy texture. This step ensures the spices are evenly distributed, preventing clumpy pockets. Trust me, a uniform base is key to consistent bars.
- In a separate saucepan, melt the butter over low heat. Once melted, stir in honey, vanilla extract, and the spiced rum. Let the mixture simmer for a minute, allowing the alcohol to evaporate slightly while the flavors mingle. The mixture should look glossy and slightly thickened. This is the moment of truth for the buttery crust.
- Combine the wet and dry mixtures in a large bowl. Stir until just combined; overmixing can make the bars tough. The batter should be thick but pourable. The batter should not be too runny, or the bars will spread too much. The goal is a cohesive, silky mixture that holds together.
- Fold in the chopped strawberries, diced Medjool dates, lemon zest, and lemon juice. The fruit will release juices that mingle with the batter, adding moisture and flavor. Make sure to distribute the fruit evenly to avoid pockets of dry batter. This step is where the bars start to look like a work of art.
- Press the batter into the prepared pan with a spatula, ensuring an even layer. The edges should be smooth and the surface level for uniform baking. This will help the bars bake evenly and not crack on the top. A level surface also makes cutting them later a breeze.
- Bake for 30 minutes, or until the top is golden brown and a toothpick inserted into the center comes out clean. The aroma will fill the kitchen, and you’ll know the bars are done when they smell like a warm summer day. Let them cool in the pan for 10 minutes before cutting.
- Once cooled, cut into bars or squares with a sharp knife. The bars should hold together without breaking apart. Store them in an airtight container for up to a week, or freeze for longer. The next time you open the container, the bars will still taste fresh and chewy.
- Serve immediately for the best texture, or let them sit at room temperature for a few hours to soften. The bars are perfect for a quick snack, a dessert, or a party favor. And if you’re feeling adventurous, drizzle a little extra honey or rum on top for a decadent twist.
That's it — you did it. But hold on, I've got a few more tricks that'll take this to another level. These insider tips will help you avoid common pitfalls and elevate the flavor profile even further.
Insider Tricks for Flawless Results
The Temperature Rule Nobody Follows
Many bakers bake at 375°F, but 350°F is the sweet spot for these bars. The lower temperature ensures the edges brown without burning while the center cooks through. If you’re using a convection oven, reduce the temperature by 25°F to account for the fan’s extra heat. A consistent temperature gives you a uniform crumb and a golden crust.
Why Your Nose Knows Best
When the butter starts to bubble, that’s the cue to add the honey and rum. The scent of caramelized butter is a sign that the fats are ready to bind the dry ingredients. If the mixture doesn’t smell buttery, the butter might not have melted fully, leading to uneven texture. Trust your senses; they’re the best quality control.
The 5-Minute Rest That Changes Everything
After mixing the batter, let it rest for five minutes before baking. This rest allows the flour to hydrate fully, which means a softer crumb and better flavor absorption. Skipping the rest can lead to a denser, drier bar. The five minutes are worth the wait.
The Secret to a Cracking Edge
If you want that perfect crack on the top, sprinkle a thin layer of powdered sugar just before baking. The sugar will caramelize slightly, giving a subtle crunch. Don’t overdo it; a light dusting is all you need. This trick turns a simple bar into a showstopper.
The Quick Chill Trick
After baking, place the pan on a wire rack for 10 minutes, then transfer to a cooler. The rapid temperature drop locks in the moisture, keeping the bars from drying out. If you’re in a hurry, you can also pop them in the fridge for 5 minutes to firm up before cutting. This is a lifesaver for busy mornings.
Creative Twists and Variations
This recipe is a playground. Here are some of my favorite ways to switch things up:
Tropical Twist
Swap the strawberries for diced mango and add a splash of coconut milk. The tropical fruit pairs well with the rum, creating a beach‑in‑your‑kitchen vibe. The coconut milk adds a creamy undertone that balances the tartness. Perfect for a summer afternoon.
Chocolate Lover’s Delight
Fold in 1/2 cup of dark chocolate chips after the fruit. The chocolate melts slightly during baking, creating pockets of gooey flavor. Add a pinch of sea salt to enhance the chocolate’s richness. This version is a hit with kids and adults alike.
Almond Crunch Variation
Add 1/2 cup of slivered almonds to the batter for a nutty crunch. Toast the almonds first for extra flavor. The almonds also add protein and a satisfying bite. This twist is great for those who love a bit of texture.
Spicy Heat Edition
Incorporate a pinch of cayenne pepper or a dash of hot sauce into the batter. The heat balances the sweetness and adds a surprising kick. The spice works well with the nutmeg and cinnamon for a complex flavor profile. Ideal for adventurous palates.
Gluten-Free Adaptation
Replace the all‑purpose flour with a gluten‑free blend and use a gluten‑free baking powder. The bars will still hold together, though the texture may be slightly different. Be sure to use a gluten‑free date variety for consistency. This version is safe for those with gluten sensitivities.
Vegan Version
Swap the butter for coconut oil and the eggs for flaxseed meal mixed with water. Use maple syrup instead of honey for sweetness. The bars will be slightly denser but still chewy. This vegan take keeps the flavor intact while accommodating dietary needs.
Storing and Bringing It Back to Life
Fridge Storage
Store the bars in an airtight container at room temperature for up to a week. The airtight seal prevents moisture loss, keeping the bars chewy. If you notice any dryness, add a teaspoon of water to the container and seal it again. This simple trick keeps the bars fresh.
Freezer Friendly
Wrap each bar individually in parchment paper and place them in a freezer bag. They’ll keep for up to three months. When you’re ready to eat, let them thaw at room temperature for 20 minutes. The texture will be almost as good as fresh.
Best Reheating Method
To revive frozen bars, preheat the oven to 350°F and bake for 8–10 minutes. Add a tiny splash of water before reheating; it steams the bars back to perfection. If you’re in a hurry, microwave on low for 20 seconds, but the oven gives the best texture. Enjoy a warm, chewy snack in seconds.