Love this? Pin it for later! 📌
A rainbow of vegetables, protein-packed beans, and the perfect balance of spices come together in this make-ahead burrito filling that will transform your weekly meal prep routine. Whether you're feeding a hungry family, stocking your freezer for busy weeks, or simply trying to eat more plants, this versatile filling is about to become your new best friend in the kitchen.
My Love Letter to Meal Prep
Last Tuesday at 6:47 AM, as I frantically searched through my freezer for something—anything—that could pass as lunch, I found myself face-to-face with a bag of this veggie burrito filling I'd prepped three weeks earlier. In that moment of morning chaos, I could have cried with relief. Three minutes in the microwave, tucked into a tortilla with some cheese and salsa, and I had a lunch that made my coworkers jealous and kept me full until dinner.
This recipe was born during my daughter's first year of college, when she'd call every Sunday night asking for "something healthy I can make in my dorm microwave." What started as a simple mix of beans and vegetables has evolved into the backbone of our family's meal planning. We've taken it camping, brought it to potlucks, and I've taught this recipe to more friends than I can count. The beauty lies not just in its simplicity, but in how it freezes like a dream and thaws like it was made yesterday.
Every batch makes enough for eight generous burritos, which means one afternoon of cooking translates to weeks of effortless meals. The combination of black beans and quinoa provides complete protein, while the variety of vegetables ensures you're getting a spectrum of nutrients in every bite. Plus, it's completely customizable—I've made versions with sweet potato, corn, different beans, and various spice blends depending on what was in season and what my family was craving.
Why This Recipe Works
- Freezer Magic: The combination of sturdy vegetables and beans means this filling maintains its texture and flavor even after three months in the freezer
- Nutritional Powerhouse: Each serving provides 12g of plant-based protein and 8g of fiber, keeping you satisfied for hours
- One-Pot Wonder: Everything cooks in a single large skillet, meaning minimal cleanup and maximum flavor development
- Budget-Friendly: Using seasonal vegetables and dried beans brings the cost to under $1.50 per serving
- Versatile Base: Transform it into tacos, bowl meals, stuffed peppers, or even a hearty soup with simple additions
- Meal Prep Champion: Make a double batch on Sunday and enjoy stress-free meals for the entire month
- Family-Approved: The mild spice level and familiar vegetables make this a hit with kids and adults alike
- Zero Waste: Use up vegetables that are starting to look tired—this recipe is forgiving and flexible
Ingredients You'll Need
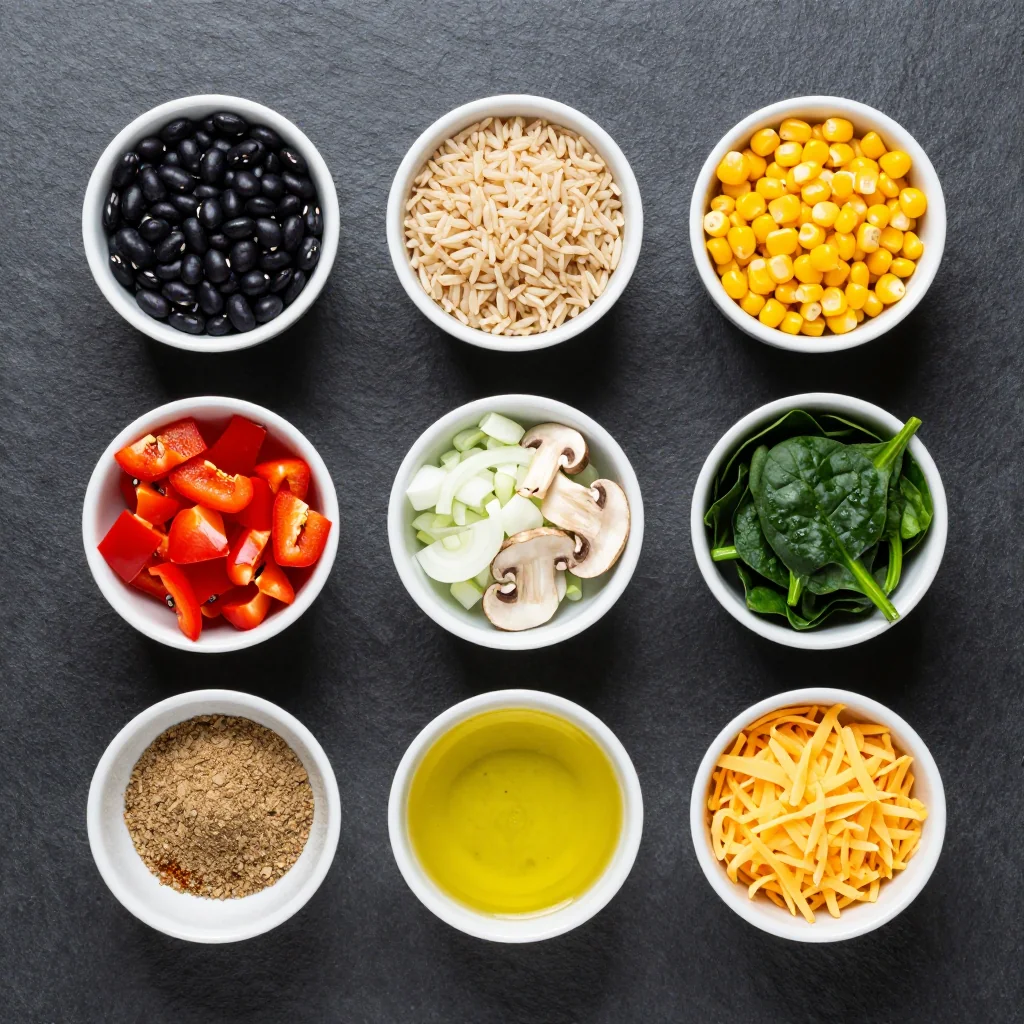
This recipe celebrates the beauty of simple, wholesome ingredients. Each component has been carefully selected not just for flavor, but for how well it freezes and reheats. Let's break down what you'll need and why each ingredient matters.
The Vegetable Foundation
2 tablespoons olive oil – Choose a good quality extra virgin olive oil for the best flavor. This is our cooking fat and flavor base. If you're watching oil intake, you can substitute with 1/4 cup vegetable broth, but the oil helps prevent freezer burn.
1 large yellow onion, diced – The aromatic backbone of our filling. Yellow onions are preferred for their balanced sweetness, but white onions work in a pinch. Dice uniformly so they cook evenly and freeze well.
3 bell peppers (1 each red, yellow, green) – This tricolor combination isn't just visually appealing; each color brings different nutrients to the party. Red peppers are sweetest and highest in Vitamin C, while green peppers add a pleasant bitterness that balances the dish.
2 medium zucchini, diced – Choose firm zucchini with shiny skin. They add moisture and a tender texture without becoming mushy after freezing. If zucchini isn't in season, substitute with yellow squash or even diced sweet potato.
1 cup frozen corn – Frozen corn actually works better than fresh here because it's been flash-frozen at peak ripeness, maintaining its sweetness and texture. No need to thaw before adding to the pan.
The Protein Powerhouses
2 cans (15 oz each) black beans – Look for beans with no added salt so you can control the seasoning. Black beans hold their shape beautifully during freezing and provide that gorgeous contrast against the colorful vegetables.
1 cup cooked quinoa – This ancient grain adds complete protein and a pleasant nuttiness. Cook it in vegetable broth instead of water for extra flavor. Make a big batch and freeze extra for future meals.
The Flavor Enhancers
3 cloves garlic, minced – Fresh garlic makes all the difference. Mince it finely so it distributes evenly throughout the filling.
2 teaspoons ground cumin – The warm, earthy flavor that screams "Mexican comfort food." Toast it briefly in the oil before adding other ingredients to bloom the flavor.
2 teaspoons chili powder – Choose a mild variety unless you like heat. This adds complexity without overwhelming the other flavors.
1 teaspoon smoked paprika – My secret ingredient for adding depth and a subtle smokiness that makes the filling taste like it's been simmering all day.
1/2 teaspoon dried oregano – Mexican oregano if you can find it, but regular works too. It adds a peppery, slightly citrusy note.
Salt and pepper to taste – Season generously, but remember you can always add more when reheating.
How to Make Freezer Friendly Veggie Burrito Filling For Meal Prep
Prep Your Vegetables
Start by washing all your vegetables thoroughly. Dice the onion into 1/4-inch pieces—this ensures they cook quickly and freeze without forming large ice crystals. Seed and dice your bell peppers into similar-sized pieces. For the zucchini, cut into quarters lengthwise, then slice into 1/2-inch pieces. The key is uniform sizing so everything cooks evenly.
Heat Your Pan
Place your largest skillet or Dutch oven over medium heat. Add the olive oil and let it heat until shimmering—about 90 seconds. To test if it's ready, add a single piece of onion. If it sizzles gently, you're good to go. If it browns immediately, turn the heat down slightly.
Sauté the Aromatics
Add the diced onion to the hot oil. Sauté for 3-4 minutes, stirring occasionally, until the edges start to turn translucent. Add the minced garlic and cook for another 30 seconds, just until fragrant. Be careful not to let the garlic brown—it turns bitter quickly.
Toast the Spices
Push the onions and garlic to the edges of the pan. In the center, add the cumin, chili powder, smoked paprika, and oregano. Let them toast for 30-45 seconds, stirring constantly. You'll know they're ready when your kitchen smells like a Mexican restaurant and the spices have darkened slightly. This step blooms the essential oils in the spices, intensifying their flavor.
Add the Bell Peppers
Stir in the diced bell peppers. Cook for 5-6 minutes, stirring every minute or so. They should soften but still retain some bite. The goal is to drive off some moisture while maintaining their structure for freezing.
Incorporate the Zucchini and Corn
Add the diced zucchini and frozen corn. Increase the heat slightly to medium-high. Cook for 4-5 minutes, stirring frequently. The zucchini should start to soften but not become mushy. The corn adds a pleasant pop and natural sweetness that balances the other vegetables.
Add Beans and Quinoa
Drain and rinse the black beans thoroughly—this removes up to 40% of the sodium and eliminates that canned taste. Add them along with the cooked quinoa to the pan. Gently fold everything together, being careful not to smash the beans. Cook for another 3-4 minutes until everything is heated through.
Season and Cool
Taste and season with salt and pepper. Remember that flavors dull slightly during freezing, so be generous. Remove from heat and let cool completely—this is crucial for preventing ice crystals during freezing. Spread the mixture on a large baking sheet to speed up cooling if you're in a hurry.
Expert Tips
Portion Control
Use a 1/2 cup measuring cup to portion filling for freezer bags. This ensures consistent serving sizes and helps with meal planning.
Flash Freeze Method
Spread portions on a baking sheet, freeze for 2 hours, then transfer to bags. This prevents clumping and allows you to use exactly what you need.
Moisture Management
If your vegetables seem watery after thawing, drain excess liquid before reheating. This prevents soggy burritos.
Quick Thaw Hack
Place frozen portions in the refrigerator the night before. If you forget, submerge the sealed bag in room temperature water for 20 minutes.
Double Batch Benefits
Always make a double batch. The active cooking time is the same, and you'll thank yourself later when dinner is ready in 3 minutes.
Color Matters
Use vegetables of different colors. Not only is it more nutritious, but it makes the filling visually appealing even after freezing.
Variations to Try
Spicy Southwest
Add 1 diced jalapeño, 1 teaspoon chipotle powder, and substitute fire-roasted tomatoes for the corn. Perfect for those who like it hot!
- +1 jalapeño, seeded and diced
- +1 tsp chipotle powder
- Replace corn with 1 cup fire-roasted tomatoes
Mediterranean Twist
Swap black beans for chickpeas, add spinach and sun-dried tomatoes, and season with oregano and basil.
- Black beans → Chickpeas
- +2 cups fresh spinach
- +1/2 cup sun-dried tomatoes
- Cumin → Italian seasoning
Harvest Edition
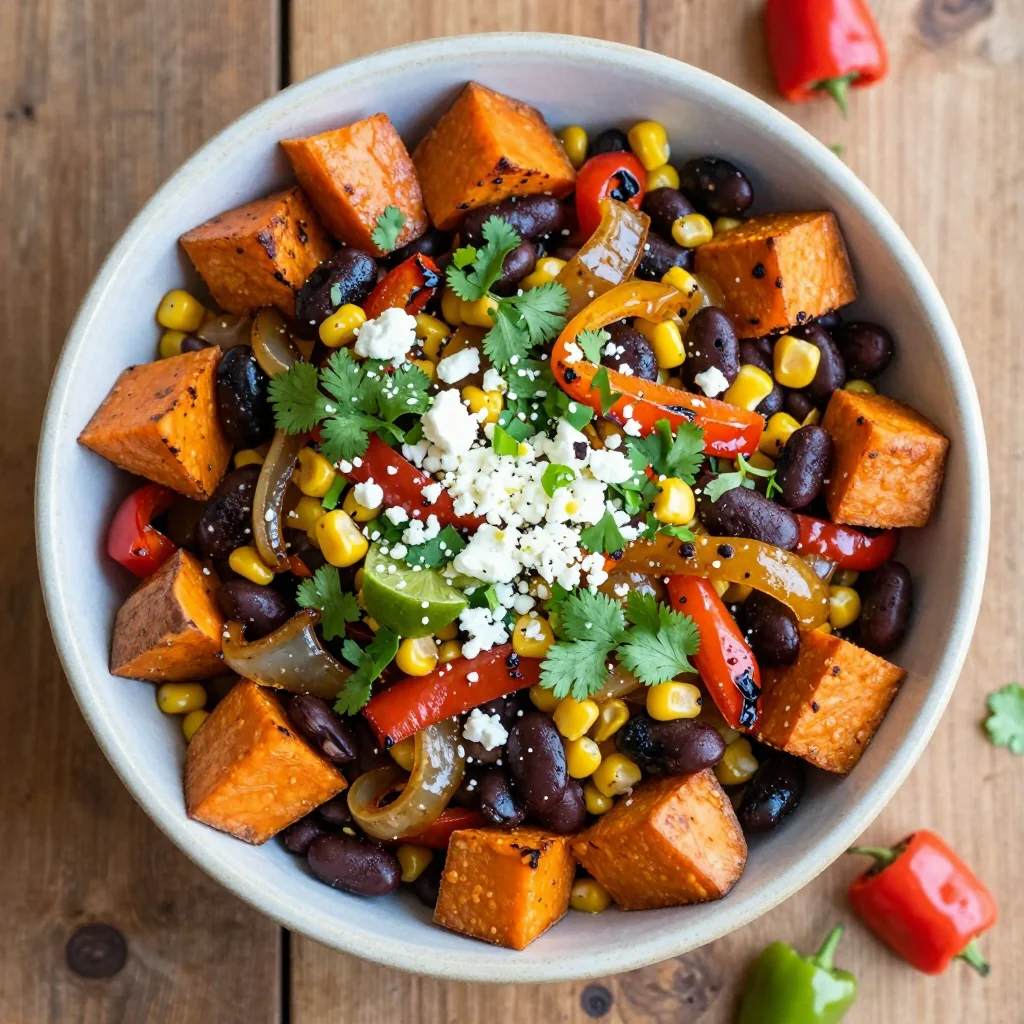
Perfect for fall! Add diced sweet potato, replace zucchini with butternut squash, and include fresh sage.
- +2 cups diced sweet potato
- Zucchini → Butternut squash
- +1 tsp fresh sage
- +1/2 tsp cinnamon
Summer Garden
Featuring fresh corn, cherry tomatoes, and basil. Light, fresh, and perfect for warmer months.
- +2 cups fresh corn kernels
- +1 cup halved cherry tomatoes
- +1/4 cup fresh basil
- +1 tsp lime zest
Storage Tips
Freezing Instructions
Cool the filling completely before freezing. Divide into meal-sized portions using quart-size freezer bags or reusable silicone bags. Remove as much air as possible to prevent freezer burn. Lay bags flat in the freezer for efficient storage. Properly stored, the filling will maintain best quality for 3 months, though it's safe indefinitely.
Pro tip: Label bags with contents, date, and quantity. Trust me, you'll thank yourself later when you're staring at a freezer full of mystery bags!
Reheating Methods
Microwave: Place frozen filling in a microwave-safe bowl, cover with a damp paper towel, and heat on 70% power for 3-4 minutes, stirring halfway through.
Stovetop: Thaw overnight in the refrigerator, then reheat in a skillet over medium heat, adding a splash of water or broth if needed.
Oven: Perfect for feeding a crowd. Place thawed filling in a baking dish, cover with foil, and heat at 350°F for 20-25 minutes.
Make-Ahead Strategy
Sunday meal prep just got easier. Make a double batch while you're already cooking, portion into individual servings, and you'll have grab-and-go meals for the entire month. The filling works for more than just burritos—use it in quesadillas, over rice bowls, stuffed into baked potatoes, or as a dip with chips.
For ultimate convenience, assemble complete burritos with cheese and salsa, wrap individually in foil, and freeze. These ready-to-eat meals can go straight from freezer to oven at 375°F for 25-30 minutes.
Frequently Asked Questions
Absolutely! Just rinse them thoroughly under cold water. This removes up to 40% of the sodium. Start with less salt when seasoning the filling, taste, and adjust as needed. You can always add more salt, but you can't take it away!
This is totally normal! Vegetables release moisture when frozen. Simply drain the excess liquid before reheating, or better yet, embrace it as a flavorful broth for rice or quinoa. Next time, make sure to cook down your vegetables a bit more before freezing, especially zucchini and bell peppers.
Yes, but quinoa works better for freezing because it maintains its texture. If using brown rice, slightly undercook it (al dente) so it doesn't become mushy when reheated. Wild rice is another excellent option that holds up beautifully to freezing.
For best quality, use within 3 months. However, it's safe to eat indefinitely if kept at 0°F. After 3 months, you might notice some texture degradation, but the flavor remains excellent. I've personally eaten filling that was 8 months old, and it was still delicious!
I recommend adding cheese when you're ready to serve rather than before freezing. Frozen cheese can become crumbly and separate when thawed. However, if you're making complete frozen burritos, go ahead and add cheese—the tortilla helps protect it, and it melts beautifully when reheated.
No, this recipe is not safe for water-bath canning due to the low acidity. For pressure canning, you'd need to follow a tested recipe from a reliable source like the USDA Complete Guide to Home Canning. Stick with freezing for this recipe—it's safer and preserves the texture better anyway!
Freezer Friendly Veggie Burrito Filling For Meal Prep
Ingredients
Instructions
- Prep vegetables: Dice onion, bell peppers, and zucchini into uniform 1/4-inch pieces. Mince garlic.
- Heat oil: Warm olive oil in a large skillet over medium heat until shimmering.
- Sauté aromatics: Cook onion for 3-4 minutes until translucent. Add garlic and cook 30 seconds more.
- Bloom spices: Push vegetables to edges, add spices to center, toast 30-45 seconds.
- Add vegetables: Stir in bell peppers, cook 5-6 minutes. Add zucchini and corn, cook 4-5 minutes more.
- Finish and cool: Fold in beans and quinoa, cook 3-4 minutes. Cool completely before freezing.
Recipe Notes
Cool completely before freezing for best texture. Filling keeps 3 months frozen, 1 week refrigerated. Each 1/2 cup serving makes 1 generous burrito.