It started with a midnight snack that turned into a culinary crisis. I had just opened a bag of dates, rolled oats, and flour, and the kitchen smelled like a sweet, nutty storm. The oven was already preheated, but the pan was empty—no butter, no sugar, just a handful of ingredients that seemed too ordinary. That moment of culinary panic became the spark that ignited this Date and Oat Slice recipe.
Picture the scene: a gleaming countertop, a rhythmic clack of the mixer, and the faint scent of caramelized dates drifting through the air. The sound of the spoon scraping the bowl is a gentle reminder that every ingredient is in motion, each one dancing toward perfection. The texture of the dough feels like a soft, buttery cloud that promises a crunch when it hits the heat. And the anticipation of that first bite—sweet, chewy, with a hint of spice—makes the kitchen feel like a laboratory of flavor.
Why does this version stand out? Because it’s a masterclass in balance: the dates provide natural sweetness and a chewy contrast, while the oats add wholesome crunch and depth. The buttery crust melts into a golden glaze, and the subtle vanilla undertone ties everything together. Every bite delivers a symphony of textures that feels both comforting and adventurous. I dare you to taste this and not go back for seconds.
There’s a secret technique that most recipes miss—a gentle whisking of the dry and wet components that creates a silky crumb. I’ll walk you through each step, from the first stir to the final bake, so that by the end, you’ll wonder how you ever made it any other way. Picture yourself pulling this out of the oven, the whole kitchen smelling incredible, and a slice that shatters like thin ice when you bite into it. Let’s dive in.
What Makes This Version Stand Out
- Flavor: The dates are caramelized to release their natural sugars, giving each slice a deep, almost bourbon-like sweetness that sets it apart from ordinary oat bars.
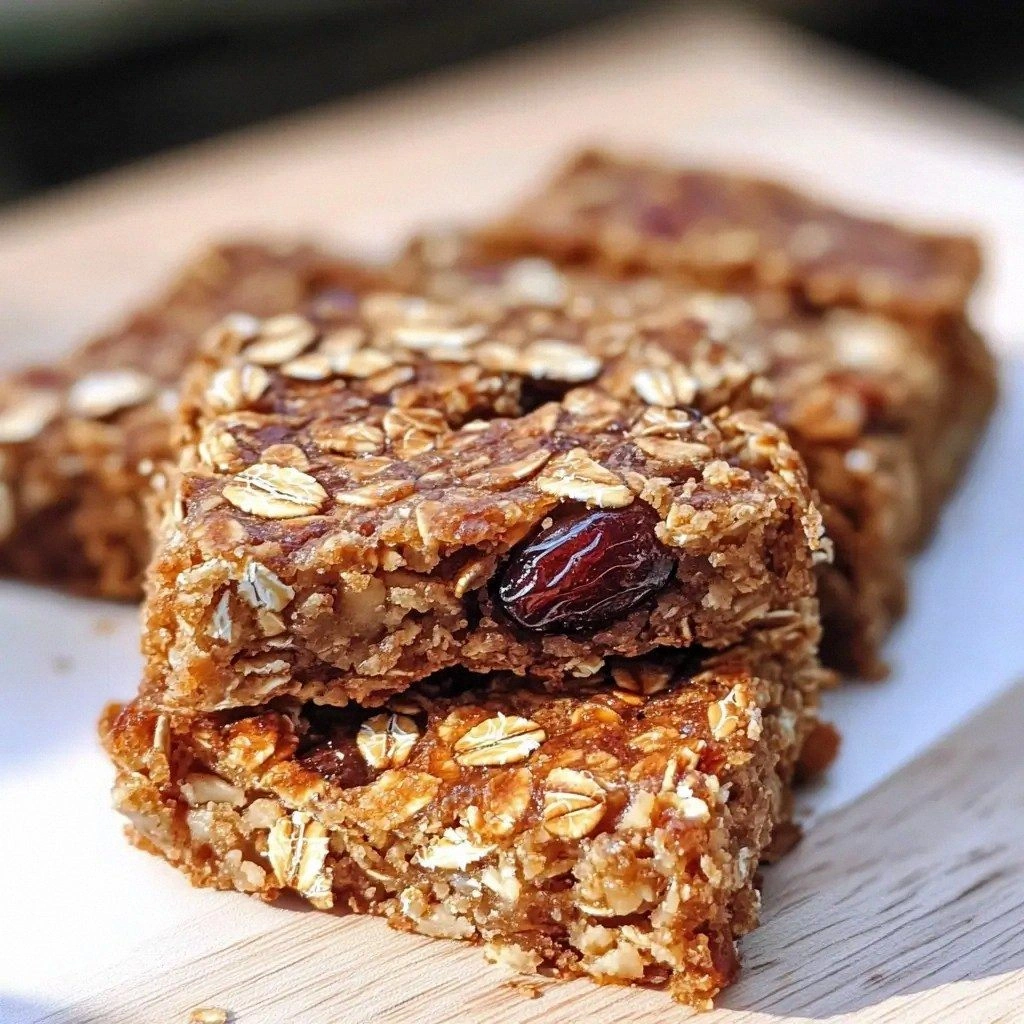
- Texture: The combination of rolled oats and a touch of almond flour creates a chewy center with a crisp, buttery edge that shatters like thin ice when you bite.
- Health: With no refined sugar, this recipe delivers a protein punch from the oats and a dose of healthy fats from the butter, making it a guilt‑free indulgence.
- Ease: All the steps are straightforward, and the dough can be assembled in under ten minutes—ideal for a quick snack or a last‑minute dessert.
- Versatility: The base can be customized with nuts, spices, or dried fruits, so each batch can feel fresh and new.
- Make‑Ahead: These slices hold up well; they’re perfect for packing into lunchboxes or storing for a weekend treat.
- Presentation: The golden glaze and dusting of sea salt give a sophisticated finish that looks as good as it tastes.
- Community Love: Friends who try this version rave about the perfect balance of sweet and savory, and the recipe quickly becomes a staple in their cooking rotation.
Alright, let's break down exactly what goes into this masterpiece...
Inside the Ingredient List
The Flavor Base
Dates are the heart of this recipe. They bring natural sweetness, a hint of caramel, and a chewy texture that contrasts beautifully with the crisp edges. If you skip them, the slices lose that signature depth and become a bland oat bar. For a different flavor profile, try using dried figs or prunes—they’ll offer a unique twist while maintaining the chewy center.
The Texture Crew
Rolled oats are the workhorse that adds body and a wholesome crunch. They absorb moisture, giving the slices a firm yet tender bite. Substituting quick oats will make the texture too soft, while steel‑cut oats will create a nutty chew that might overpower the dates. When selecting oats, look for those with a slightly toasted flavor for an extra layer of aroma.
The Unexpected Star
Almond flour sneaks into the mix to provide a subtle nutty undertone and improve the crumb structure. It also reduces gluten, making the slices lighter and more crumbly. If you’re allergic, oat flour can replace almond flour, though the flavor will shift slightly toward a sweeter, milder profile. The key is to keep the ratio balanced; too much almond flour will make the dough dry.
The Final Flourish
Butter is the secret to that glorious golden crust. It melts into a silky glaze, creating a shiny, caramelized surface that’s both inviting and delicious. A touch of vanilla extract adds a fragrant sweetness that ties the whole recipe together. If you prefer a dairy‑free version, coconut oil works well, but be aware it will alter the flavor slightly.
Everything's prepped? Good. Let's get into the real action...
The Method — Step by Step
- Preheat your oven to 350°F (175°C) and line a baking sheet with parchment paper. This step ensures a non‑stick surface and even heat distribution. I’ve found that a lightly greased sheet works best for a crisp edge. Let the sheet cool slightly before adding the dough to prevent sticking.
- In a medium bowl, combine 2 cups rolled oats, 1 cup all‑purpose flour, 1 teaspoon baking powder, and a pinch of salt. Whisk the dry ingredients until they’re well mixed. This dry blend is the backbone that holds the slices together. Make sure the baking powder is evenly distributed to avoid uneven rising.
- In a separate bowl, melt 1/2 cup butter until it’s just liquid. Add 1/2 cup honey, 1 teaspoon vanilla extract, and 1 cup chopped dates. Stir until the dates are fully coated in the buttery honey mixture. The heat from the butter helps the honey caramelize slightly, enhancing the date flavor.
- Pour the wet mixture into the dry ingredients and mix with a wooden spoon or spatula until a sticky dough forms. It should feel tacky but hold together. If it’s too dry, add a splash of milk or water; if too wet, add a tablespoon more flour.
- Roll the dough into a log about 2 inches thick, then slice it into 1/2‑inch thick rounds. Place the slices on the prepared baking sheet, spacing them about 1 inch apart. The slices should be snug but not touching to allow even baking.
- Bake for 25–30 minutes, or until the edges are golden brown and the center is set. The slices should emit a warm, nutty aroma. Flip them halfway through to ensure even browning. Watch the color closely; you want a deep amber, not a burnt brown.
- Remove from the oven and let them cool on the sheet for 5 minutes before transferring to a wire rack. Cooling on the sheet preserves the crisp edges. The slices will continue to set as they cool, becoming firm and chewy.
- Once cooled, dust the slices lightly with sea salt and serve. The salt enhances the sweet flavors and creates a delightful contrast. Store any leftovers in an airtight container at room temperature for up to a week.
That's it — you did it. But hold on, I've got a few more tricks that'll take this to another level...
Insider Tricks for Flawless Results
The Temperature Rule Nobody Follows
Many bakers bake at 375°F, but that temperature can cause the edges to brown too quickly, leaving the center undercooked. By setting the oven to 350°F, you allow the heat to penetrate evenly, ensuring a golden crust without sacrificing a chewy core. If your oven runs hot, place the baking sheet on a lower rack for a more even bake. This simple tweak guarantees consistent results every time.
Why Your Nose Knows Best
Before you open the oven door, take a deep breath of the aroma. The sweet scent of caramelized dates is a cue that the slices are nearly done. If the smell is more metallic, the dough may need a few more minutes. Trusting your nose is a secret skill that seasoned bakers use to avoid overcooking.
The 5-Minute Rest That Changes Everything
After baking, let the slices rest on the sheet for 5 minutes. This brief pause allows the moisture to redistribute, giving the slices a firmer bite. Skipping this step often results in a gummy center. The rest also helps the glaze set, creating a glossy finish that’s irresistible.
A Touch of Sea Salt
Dusting the slices with sea salt after baking isn’t just for show; it activates the sweet flavors and adds a subtle crunch. The salt should be light, just enough to enhance, not overpower. If you’re watching sodium, use a pinch of Himalayan pink salt instead.
Cooling on a Wire Rack
Transferring the slices to a wire rack immediately after baking prevents steam from making the crust soggy. The air circulation keeps the edges crisp and the center chewy. If you’re short on rack space, place a second sheet on top of the first to maintain airflow.
The Quick Chill Trick
For a crispier texture, place the cooled slices in the fridge for 20 minutes before serving. The cold helps the butter solidify slightly, creating a pleasant snap when you bite. This is especially useful on hot summer days when you want a refreshing snack.
Creative Twists and Variations
This recipe is a playground. Here are some of my favorite ways to switch things up:
Nutty Crunch
Add 1/2 cup chopped walnuts or pecans to the dough for an extra crunch and nutty flavor. The nuts provide healthy fats and a satisfying bite that pairs well with the sweet dates. Toast the nuts lightly before adding to enhance their aroma. This variation is perfect for a protein‑rich snack.
Spiced Delight
Stir in 1 teaspoon ground cinnamon and a pinch of nutmeg to the dry mix. The warm spices elevate the sweetness and add depth. This version is especially comforting during fall and winter months. Serve with a dollop of Greek yogurt for a balanced treat.
Citrus Twist
Zest a lemon or orange into the dough to introduce a bright, tangy note that cuts through the sweetness. The citrus pairs wonderfully with the buttery crust. Add a tablespoon of orange juice to keep the dough moist. This variation is ideal for brunch or a midday pick‑me‑up.
Chocolate Lover’s Edition
Fold in 1/2 cup dark chocolate chips or cacao nibs for a rich, bittersweet experience. The chocolate melts slightly in the warm dough, creating pockets of gooey delight. Pair with a drizzle of melted dark chocolate on top for an extra indulgent finish. This version is a crowd‑pleaser at parties.
Almond Butter Boost
Replace regular butter with almond butter for a nutty flavor and a boost of protein. The almond butter adds a silky texture and a subtle almond aroma. If you prefer a dairy‑free version, this swap works beautifully. The result is a slice that feels both indulgent and healthy.
Vegan Version
Swap the butter for coconut oil and use maple syrup instead of honey. This keeps the recipe dairy‑free while preserving the caramelized sweetness. Ensure the dates are fresh and not overly dried to maintain moisture. The vegan version is just as satisfying and can be served at any gathering.
Storing and Bringing It Back to Life
Fridge Storage
Place the cooled slices in an airtight container and store them in the refrigerator for up to a week. The cold helps preserve the buttery texture and prevents mold. When you’re ready to enjoy them, let them sit at room temperature for 10 minutes to regain their full flavor. Avoid stacking slices to maintain crispness.
Freezer Friendly
For longer storage, wrap each slice individually in parchment paper and place them in a freezer bag. They’ll stay fresh for up to 3 months. When thawing, let the slices come to room temperature for about 15 minutes. This method is great for meal prep or for guests on short notice.
Best Reheating Method
Reheat slices in a 350°F oven for 5 minutes to restore crispness. Add a tiny splash of water to the bottom of the baking sheet to create steam, which keeps the dough from drying out. For a quick microwave option, heat on medium for 30 seconds, then let them cool for a minute. The result is a slice that tastes freshly baked.