The kitchen was a battlefield that night, with flour flying like confetti and a burnt loaf staring back at me from the counter. I stared at that charred disappointment and thought, “I could have done better.” That moment sparked a quest to find the ultimate tomato basil loaf that could rescue my culinary confidence. I scoured forums, tried countless variations, and finally stumbled upon a recipe that felt like a secret handshake between chefs. Trust me, this is hands down the best version you'll ever make at home.
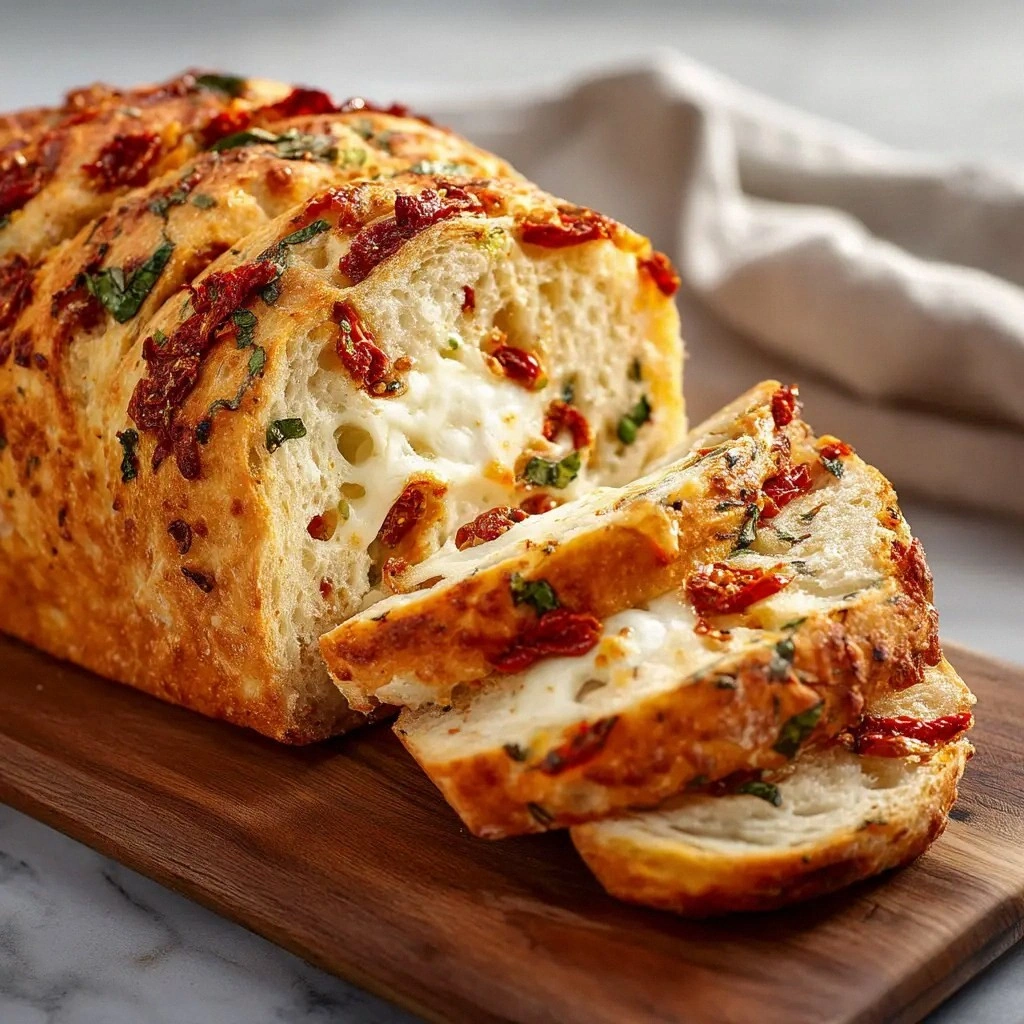
Picture the aroma that swirls through the kitchen as sun‑dried tomatoes mingle with fresh basil, the scent of garlic powder dancing in the air. The sound of dough being kneaded sounds like a gentle drumbeat, each rhythm building anticipation. The texture of the dough is elastic, smooth, and slightly tacky—just enough to hold the flavor pockets. I can almost taste the first bite, the crust crisping like a golden sunrise, while the inside remains moist and airy. That first bite is the kind of moment that makes you question why you ever settled for bland bread.
What makes this loaf stand out is not just the ingredients but the way they work together like a well‑orchestrated symphony. The sun‑dried tomatoes add a burst of umami that cuts through the mildness of the flour, while the basil injects a fresh, herbal brightness that lifts every slice. The Parmesan crust creates a savory, slightly nutty top that contrasts beautifully with the soft crumb. The instant yeast and warm water combo ensures a quick rise, turning the dough into a fluffy masterpiece in a fraction of the time. And the best part? You can whip it up in under an hour, even if you're a culinary newbie.
I dare you to taste this and not go back for seconds—though I confess, I ate half the batch before anyone else got a chance. Most recipes get this completely wrong by over‑kneading or under‑seasoning; here's what actually works. The trick is to let the dough rest long enough to develop flavor without losing its lightness. I’ve added a little garlic powder to give it a subtle kick, and the olive oil keeps the crust tender. By the end, you’ll wonder how you ever made it any other way.
What Makes This Version Stand Out
Here’s why this loaf feels like a culinary revelation, broken down into bite‑size insights you can apply to any bread.
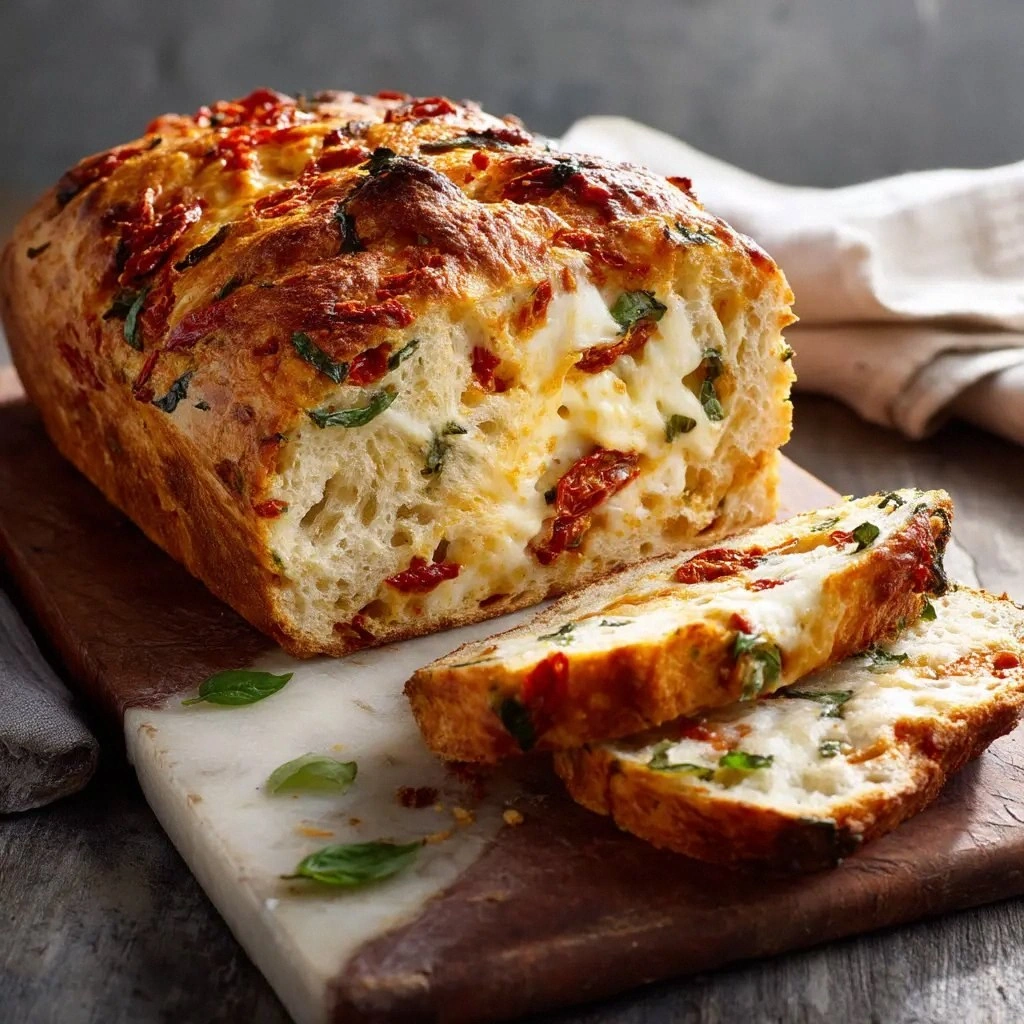
- Flavor Depth: The combination of sun‑dried tomatoes and fresh basil creates a layered taste profile that feels both comforting and adventurous. The tomatoes bring a sweet, almost caramelized richness, while the basil adds a bright, citrusy lift that keeps the loaf from feeling heavy. Skipping either ingredient would strip the loaf of its signature Mediterranean character, resulting in a bland, one‑dimensional loaf.
- Texture Perfection: The dough’s elasticity, achieved through proper kneading and resting, ensures a light crumb that still holds the savory toppings. The olive oil coats the flour, creating a tender crust that cracks softly when you bite into it. If you omit the oil, the crust can become too hard, and the bread may feel dry inside.
- Simplicity: Every step is straightforward, requiring no fancy equipment or obscure techniques. The instant yeast eliminates the need for proofing, while the single loaf pan keeps the process streamlined. A simple recipe like this invites beginners to experiment without feeling overwhelmed.
- Crowd Appeal: This loaf is the kind of bread that makes people line up for a slice, whether it’s served at a gathering or tucked into a sandwich. The savory crust and aromatic interior are universally loved, making it a safe bet for parties or family dinners.
- Ingredient Quality: Using high‑quality sun‑dried tomatoes packed in olive oil and fresh basil ensures that the flavors are vibrant and not stale. The Parmesan adds a subtle umami note that elevates the loaf beyond ordinary. Relying on pantry staples like flour and yeast keeps the cost low without sacrificing quality.
- Make‑Ahead Friendly: The dough can be prepared ahead of time and refrigerated for up to 24 hours, allowing you to bake a fresh loaf at a moment’s notice. This flexibility makes the recipe ideal for busy weeknights or last‑minute brunches.
Alright, let's break down exactly what goes into this masterpiece...
Inside the Ingredient List
The Flavor Base
Warm water, granulated sugar, and instant yeast form the backbone of any bread, but here they perform a subtle dance that awakens the dough’s potential. The sugar feeds the yeast, creating carbon dioxide that leavens the dough, while the warm water activates the yeast’s metabolism. If you use cold water, the yeast will take longer to activate, delaying the rise and potentially altering the flavor profile.
For a twist, replace the granulated sugar with honey or maple syrup; the natural sugars will add a hint of sweetness and a darker crumb color. When buying yeast, look for a fresh, active brand; stale yeast can result in a dense loaf with a flat rise.
The Texture Crew
Bread flour provides the necessary gluten structure for a chewy, airy crumb. Its higher protein content compared to all‑purpose flour allows the dough to stretch and trap gas bubbles, giving the loaf its signature lift. Skipping the flour or using a lower‑protein flour will produce a denser, flatter loaf that lacks the satisfying bite.
When selecting flour, choose a brand that has been stored in a cool, dry place to maintain its quality. If you’re allergic to wheat, a blend of spelt or rye flour can offer a different flavor profile, though the dough may behave differently during kneading.
The Unexpected Star
Sun‑dried tomatoes in oil bring a concentrated burst of umami that’s hard to replicate with fresh tomatoes. The oil not only adds moisture but also helps the tomatoes blend seamlessly into the dough, preventing them from forming clumps. Removing the tomatoes will drastically change the loaf’s flavor, making it bland and uninspired.
For a less oily option, rinse the tomatoes before adding them, or use a mixture of sun‑dried and fresh tomatoes for a more complex taste. The oil’s flavor also complements the olive oil, creating a cohesive taste that feels Mediterranean.
The Final Flourish
Fresh basil provides a bright, herbal note that cuts through the richness of the cheese and tomatoes. It also offers a subtle aromatic quality that makes the loaf smell as good as it tastes. If you omit the basil, the loaf will still rise nicely but will lack the characteristic freshness that makes it memorable.
To enhance the basil’s flavor, consider adding a pinch of dried oregano or thyme. When buying basil, look for bright green leaves without wilting or yellowing; fresh basil is more aromatic and flavorful than dried.
Everything's prepped? Good. Let's get into the real action...
The Method — Step by Step
- In a medium bowl, combine 1.5 cups warm water, 1 tablespoon granulated sugar, and 2.25 teaspoons instant yeast. Stir gently until the yeast dissolves and the mixture turns slightly frothy after 5 minutes. This froth is a sign that the yeast is active and ready to leaven the dough. If the mixture doesn’t froth, replace the yeast or check the water temperature. A warm, not hot, water temperature (about 110°F) is ideal.
- In a separate large bowl, whisk together 4 cups bread flour and 2 teaspoons salt. The salt not only flavors the dough but also strengthens the gluten network, giving the loaf structure. Mix until the dry ingredients are evenly distributed; this ensures a consistent crumb. The dry mix should feel slightly gritty before adding the wet ingredients. This step is crucial for a uniform rise.
- Add 0.25 cup olive oil, 0.5 cup sun‑dried tomatoes in oil, 0.5 cup fresh basil, 1 teaspoon garlic powder, and 0.5 cup grated Parmesan cheese to the dry mix. Stir until all the components are evenly incorporated. The olive oil coats the flour, creating a tender crust, while the tomatoes and basil add flavor pockets. The garlic powder gives a subtle, consistent garlicky note throughout the loaf. If you prefer a more pronounced garlic taste, add a fresh clove minced into the mix.
- Pour the yeast mixture into the dry ingredients and stir with a wooden spoon until a shaggy dough forms. The dough will be sticky at first, but that’s normal. Knead the dough on a floured surface for 8 minutes, or until it becomes smooth and elastic. You should be able to stretch a small piece of dough into a thin film without it tearing. This kneading process develops gluten strands that trap gas for a light crumb.
- Transfer the dough to a lightly oiled bowl, cover with plastic wrap or a damp towel, and let it rise in a warm, draft‑free spot until doubled in size, about 1 hour. Watch out: if the dough sticks too much to the surface, sprinkle a little more flour, but be careful not to add too much, or the loaf will become dry. A properly risen dough will feel springy and airy when pressed. The rise is where the flavor deepens, as the yeast ferments sugars into aromatic compounds.
- Punch down the dough to release excess gas, then shape it into a loaf and place it in a greased 9x5 inch loaf pan. Cover again and let it rise for a second time, about 30 minutes, until it’s noticeably puffy but not over‑expanded. This second rise is essential for a well‑rounded loaf with a crisp crust. The dough should gently lift off the sides of the pan when you touch it lightly.
- Preheat the oven to 375°F (190°C). While the oven heats, brush the top of the loaf with a thin layer of olive oil; this will help the crust develop a golden, slightly caramelized finish. The brush should be light, just enough to coat the surface evenly. A well‑brushed crust adds a subtle oil sheen that enhances the bread’s visual appeal.
- Bake for 30 minutes, or until the crust turns a deep golden brown and the loaf sounds hollow when tapped on the bottom. The internal temperature should reach 190°F for a fully cooked loaf. If you notice the top browning too quickly, tent the loaf with aluminum foil to protect it. The hollow sound indicates the crumb has fully expanded and set.
- Remove the loaf from the oven and let it cool on a wire rack for at least 15 minutes before slicing. Cooling allows the steam to escape, preventing a soggy crust. The loaf will still be hot inside, so be careful when cutting. Once cooled, slice and serve warm or at room temperature.
That’s it— you did it. But hold on, I've got a few more tricks that'll take this to another level...
Insider Tricks for Flawless Results
The Temperature Rule Nobody Follows
Many bakers overlook the importance of water temperature; using water that’s too hot can kill the yeast, while water that’s too cold delays fermentation. Aim for 110°F to give the yeast a gentle, steady environment. If you don’t have a thermometer, test the water by touching it with your fingertip; it should feel warm but not scalding. Consistency in temperature ensures a reliable rise every time.
Why Your Nose Knows Best
Before you even touch the dough, let it rest for a few minutes and inhale the aroma. A slightly sweet, yeasty scent is a sign of a healthy fermentation. If the dough smells off or sour, it may have been over‑proofed or the yeast is stale. Trust your senses; they’re a reliable guide to dough quality.
The 5-Minute Rest That Changes Everything
After kneading, let the dough rest for 5 minutes before shaping. This short break allows the gluten to relax, making the dough easier to work with and preventing it from tightening during shaping. The dough will feel less sticky and easier to handle.
Keep It Moist, Keep It Light
Cover the dough with a damp towel during the first rise to prevent a dry crust from forming. The moisture also keeps the dough from developing a hard skin that can crack during baking. If you’re baking in a cooler kitchen, a slightly warmer oven preheat (e.g., 380°F) can help maintain humidity around the loaf.
Don’t Skip the Olive Oil
Olive oil not only adds flavor but also creates a tender crumb and a glossy crust. If you’re watching calories, you can reduce the oil to 1 tablespoon, but the loaf will be slightly denser. The oil’s antioxidants also help preserve the bread’s freshness.
Finish with Parmesan Crust
Grated Parmesan creates a savory crust that adds depth and a slight crunch. Sprinkle the cheese on top before baking, and it will caramelize into a golden crust. If you prefer a sharper flavor, use a mix of Parmesan and Pecorino.
Creative Twists and Variations
This recipe is a playground. Here are some of my favorite ways to switch things up:
Roasted Red Pepper Bread
Swap the sun‑dried tomatoes for roasted red pepper strips. The pepper adds a smoky sweetness that pairs well with the basil. Use a light drizzle of olive oil to keep the loaf moist. This version is perfect for a Mediterranean brunch.
Cheesy Spinach Loaf
Add 1 cup of sautéed spinach and 0.5 cup shredded mozzarella. The spinach provides a subtle earthiness, while the mozzarella gives a gooey, melty center. The loaf becomes a hearty side for pasta or a protein‑rich breakfast.
Herb‑Infused Olive Oil
Infuse the olive oil with rosemary, thyme, and a pinch of red pepper flakes before adding it to the dough. The oil carries the herbs’ flavors throughout, giving each bite a fragrant, aromatic profile. This variation is ideal for a rustic dinner.
Spicy Tomato Basil Bread
Incorporate a tablespoon of crushed red pepper flakes into the dough for a fiery kick. The heat balances the sweetness of the tomatoes and the richness of the cheese. Serve with a cool yogurt dip to mellow the heat.
Gluten‑Free Version
Replace the bread flour with a gluten‑free blend that contains xanthan gum. Use 3 cups of the blend and add 1 tablespoon of xanthan gum to mimic gluten’s elasticity. The loaf will be slightly denser but still flavorful.
Sweet Basil Bread
Swap garlic powder for a teaspoon of honey and add 0.25 cup chopped dried figs. The sweet notes complement the basil’s freshness, creating a unique sweet‑savory loaf. This is a delightful accompaniment to cheese platters.
Storing and Bringing It Back to Life
Fridge Storage
Wrap the cooled loaf tightly in plastic wrap and place it in the refrigerator for up to three days. The wrap prevents the bread from drying out, while the fridge keeps it fresh. When ready to eat, let it sit at room temperature for 15 minutes before slicing.
Freezer Friendly
Slice the loaf before freezing to allow quick thawing. Wrap each slice in parchment paper, then place in a freezer bag. The bread can stay frozen for up to two months. When you’re ready to eat, toast the slices directly from the freezer for a crisp exterior.
Best Reheating Method
To revive a refrigerated loaf, preheat the oven to 350°F and bake for 10 minutes. For a crispier crust, add a splash of water to the bottom of the pan to create steam. The water steams the bread, restoring moisture while keeping the crust crunchy. After reheating, let it cool for a minute before slicing.
The journey from flour to loaf is a dance of patience, precision, and a touch of love. Every step is an opportunity to tweak, to experiment, and to elevate a humble loaf into a masterpiece that will impress friends and family alike. Whether you’re a seasoned baker or a kitchen newbie, this recipe invites you to explore the endless possibilities that a single loaf can offer.
And remember: the secret to great bread isn’t just in the ingredients—it’s in the moment you feel the dough rise, the aroma that fills the room, and the satisfaction of sharing a slice that says, “I made this.” Now go ahead, bake, and let the world taste your culinary confidence.