Picture this: it’s a rainy Saturday, the kind of day that makes you crave something sweet and comforting, yet you’re still half‑sitting at the kitchen counter, scrolling through endless recipe blogs. I was on a mission to create a caramel that’s silky on the inside, with a golden, buttery crust that snaps just enough to give you that satisfying crunch. I stared at the old, dusty recipe book on my shelf, flipped to a page that promised “soft caramels,” and thought, “This is a disaster waiting to happen.” That’s when I decided to rewrite the entire approach from scratch.
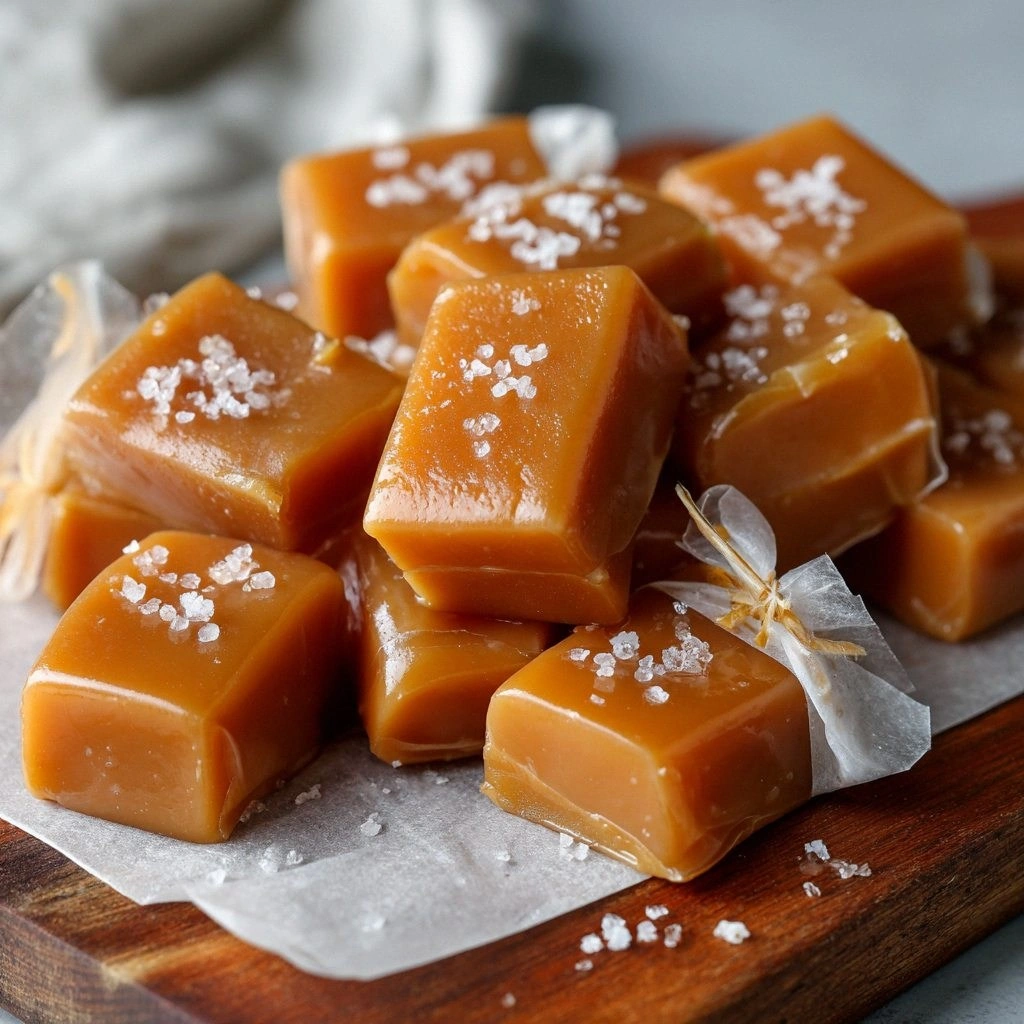
The first bite was a revelation. The caramel slid across the tongue, melting like a cloud of sugar, while the edges held a subtle snap that made my teeth echo. The aroma was a warm, buttery caramel that seemed to hug the kitchen, turning the whole room into a cozy sweet haven. The texture was a perfect balance: soft, almost custard‑like, but with a caramelized crust that gave it depth. And the flavor? It was rich, buttery, with a hint of sea salt that lifted the sweetness just enough to keep you coming back for more.
What makes this version stand out from every other caramel recipe you’ll find online? First, I swapped the standard sugar for a blend of granulated and brown sugar to introduce molasses undertones. Second, I used heavy cream instead of milk for a richer mouthfeel. Third, I added a splash of espresso powder to deepen the chocolate notes without turning it into a coffee candy. Fourth, the finishing touch of sea salt flakes on top creates a contrast that’s both visual and gustatory. And finally, I made the entire process scalable, so you can whip up a batch for a party or a solo indulgence with the same confidence.
I dare you to taste this and not go back for seconds. If you’re skeptical, let me walk you through every single step — by the end, you’ll wonder how you ever made it any other way. Trust me, this is hands down the best version you’ll ever make at home. And if you’ve ever struggled with caramels that turn out too hard or too soft, you’re not alone — and I’ve got the fix.
What Makes This Version Stand Out
- Blend of Sugars: Combining granulated and brown sugar introduces a subtle molasses depth that standard caramel recipes miss. The result is a caramel that feels richer and more complex in every bite. This blend also helps control the crystallization process, ensuring a smooth finish.
- Heavy Cream: Switching from milk to heavy cream adds fat content, giving the caramel a velvety mouthfeel and a richer taste profile. It also helps stabilize the sugar crystals, preventing the caramel from becoming grainy.
- Espresso Infusion: A teaspoon of espresso powder deepens the chocolate undertones without turning it into a coffee candy. The espresso brings a slight bitterness that balances the sweetness, making each bite more sophisticated.
- Sea Salt Finish: Sprinkling sea salt flakes on top creates a satisfying contrast between salty and sweet. The crunch of the flakes adds a textural element that elevates the caramel from simple to gourmet.
- Scalable Recipe: The recipe’s proportions are designed to scale cleanly, whether you’re making a small batch for a snack or a large batch for a gathering. The ingredient ratios remain consistent, so the caramel’s quality never dips.
- Texture Control: By carefully monitoring temperature and stirring technique, this recipe maintains a soft interior with a firm, caramelized crust. The result is a caramel that melts in your mouth but still holds its shape.
- Quick Prep: The prep time is under 15 minutes, making it ideal for busy evenings or last‑minute dessert needs. The cooking time is just 25 minutes, so you can have fresh caramels on the counter in no time.
- Make‑Ahead Friendly: Once set, these caramels keep their texture for up to a week in the fridge or a month in the freezer. They’re perfect for batch cooking and can be reheated to restore their melt‑away softness.
Inside the Ingredient List
The Flavor Base
Granulated Sugar (2 cups): The backbone of any caramel, granulated sugar provides the necessary sweetness and structure. If you skip it, your caramel will lack the classic caramel flavor. Use a fine-grain sugar for a smoother melt. A heavier sugar can lead to a denser caramel, so keep it light.
Brown Sugar (1 cup): Adds a subtle molasses note that deepens the caramel’s flavor profile. If you don’t have brown sugar, you can substitute with an equal amount of dark corn syrup, but the texture will differ slightly. The molasses in brown sugar also helps prevent crystallization during cooking.
The Creamy Crew
Unsalted Butter (1 cup): Butter brings richness and a silky mouthfeel. Use unsalted to control the salt level. If you’re lactose intolerant, a dairy-free butter alternative works, but the flavor will change. Butter also helps create that glossy caramel surface.
Heavy Cream (1 cup): The fat content in heavy cream creates a creamy texture and smooth finish. Replace with whole milk for a lighter version, but it will be less rich. Heavy cream also helps keep the caramel from becoming too hard when cooled.
The Unexpected Star
Espresso Powder (1 tsp): A small amount of espresso powder adds depth without turning the caramel into a coffee candy. If you’re a chocolate lover, you can increase it to 2 tsp for a mocha twist. Avoid using fresh espresso; the powder ensures even distribution.
The Final Flourish
Sea Salt Flakes (1/4 tsp): A finishing touch that balances sweetness with a hint of salt. If you prefer a milder flavor, use fine sea salt or sprinkle after cutting. The flakes also add a pleasing crunch and visual appeal.
Optional Add‑Ins: Chopped hazelnuts (1/2 cup), toasted coconut (1/4 cup), or a pinch of cayenne pepper for heat. These variations allow you to tailor the caramel to your taste buds. Each add‑in brings its own texture and flavor profile.
Everything’s prepped? Good. Let’s get into the real action.
The Method — Step by Step
- Heat the Sugar: In a heavy saucepan, combine the granulated and brown sugar. Heat over medium heat, stirring constantly until the mixture dissolves and turns a light amber color. The sugar should start to bubble gently. This is the moment of truth; if it burns, you’ll have to start over. The aroma will be unmistakably caramel.
- Add Butter: Once the sugar is fully melted, add the butter in one go. Stir until the butter is completely melted and the mixture becomes smooth. The butter will give the caramel a silky sheen. Watch the temperature rise; it should reach around 350°F (175°C). Keep an eye on the color; it should be a deep amber.
Slowly pour in the heavy cream while stirring continuously. The mixture will bubble vigorously—this is normal. Stir until the mixture is homogenous and starts to thicken. Let it simmer for a minute to allow the flavors to meld. This step is crucial for achieving that soft interior. - Add Espresso and Salt: Sprinkle in the espresso powder and sea salt flakes. Stir until fully integrated. The espresso will deepen the flavor, while the salt will balance the sweetness. Taste a tiny bit to ensure the salt isn’t overpowering. Adjust if necessary.
Use a candy thermometer to keep the mixture at 245°F (118°C) for a soft caramels stage. This temperature ensures a chewy center that softens in the mouth. If you’re not using a thermometer, look for a light golden brown color. Keep stirring to prevent scorching. Remove the pan from heat and pour the caramel into a greased silicone mold or a parchment‑lined baking sheet. Spread it evenly with a spatula. The surface should be smooth and glossy. Let it sit at room temperature until it starts to firm up, about 10–15 minutes. Avoid touching it prematurely. Do not leave the caramel in the pan for too long; it will harden. The caramel should set in a firm yet pliable state. If you wait too long, it becomes brittle. Once set, carefully lift it out of the mold. If it sticks, use a butter knife to gently loosen. Slice the caramel into squares using a hot knife for clean cuts. Place the pieces on a parchment sheet to cool completely. Once cooled, transfer them to an airtight container. Store at room temperature for up to a week or freeze for longer storage. If you want a glossy finish, brush the top with a thin coat of melted butter before the caramel sets. This seals the surface and gives a beautiful sheen. It also prevents the caramel from drying out. Once cooled, serve the caramels on a platter or individually in a small dish. Pair them with a glass of milk, espresso, or a splash of bourbon for an adult twist. The caramel will melt in your mouth, revealing a buttery, slightly salty sweetness. And that’s it — you did it. But hold on, I’ve got a few more tricks that will take this to another level.
Insider Tricks for Flawless Results
The Temperature Rule Nobody Follows
Why it matters: Many cooks rely solely on visual cues, but temperature is the secret to perfect caramels. Use a candy thermometer to hit 245°F (118°C). If you’re over 250°F, the caramel will harden too quickly. If it’s under 240°F, it might stay too soft. My friend tried skipping the thermometer once—let’s just say the result was a sticky mess.
Why Your Nose Knows Best
Smell test: The caramel should emit a deep, nutty aroma. If it smells like burnt sugar, it’s too hot. A fresh, buttery scent indicates the right stage. Trust your nose; it’s a reliable guide when you’re new to candy making.
The 5‑Minute Rest That Changes Everything
What happens: Letting the caramel rest for five minutes after removing it from heat allows the flavors to settle. The sugars re‑crystallize just enough for a smooth finish. Skipping this step can lead to uneven texture. I’ve seen batches that were too runny until I added the rest period.
Use a Silicone Mold for Easy Release
Why it helps: Silicone molds are flexible, so the caramel slides out effortlessly. They also maintain a consistent thickness, ensuring uniform bite sizes. If you use a metal pan, the caramel may stick and break apart.
Cool on a Wire Rack
Ventilation matters: Placing the caramel on a wire rack allows air to circulate around it, preventing condensation. Condensation can make the caramel soggy. My first batch was soggy because I cooled it on a flat surface. The rack made all the difference.
Creative Twists and Variations
This recipe is a playground. Here are some of my favorite ways to switch things up:
Chocolate Drizzle Caramels
What to swap: Drizzle melted dark chocolate over the set caramels. The chocolate adds a rich, bittersweet layer. This version is perfect for chocolate lovers and pairs well with a glass of red wine.
Coconut Crunch Caramels
What to swap: Sprinkle toasted coconut flakes on top before the caramel sets. The coconut adds a tropical crunch and a subtle sweetness. It’s a hit at summer gatherings.
Spiced Pumpkin Caramels
What to swap: Add a tablespoon of pumpkin puree and a pinch of pumpkin pie spice. The pumpkin gives a warm, autumnal flavor. This variation is a must‑try for fall celebrations.
Salted Caramel Popcorn
What to swap: Toss popcorn in the caramel mixture after it’s set. The caramel coats the popcorn, creating a crunchy snack. The sea salt flakes add the perfect salty kick.
Nutty Caramel Bars
What to swap: Layer chopped almonds or pecans between two caramel layers. The nuts add crunch and flavor depth. These bars are great for a quick energy boost.
Peppery Caramel Tarts
What to swap: Add a pinch of cayenne pepper to the caramel. The heat contrasts with the sweetness, creating a complex flavor profile. This is a daring twist for adventurous palates.
Storing and Bringing It Back to Life
Fridge Storage
How to keep them fresh: Store caramels in an airtight container in the refrigerator for up to two weeks. The cool environment slows down the crystallization process, maintaining softness. When you’re ready to serve, let them sit at room temperature for 10 minutes.
Freezer Friendly
Long‑term storage: Pack the caramels in a freezer‑safe bag, separating layers with parchment paper. They stay fresh for up to three months. Thaw slowly in the fridge before serving to preserve texture.
Best Reheating Method
How to restore softness: Warm the caramel pieces in a microwave on low power for 5–10 seconds. Add a tiny splash of water to create steam, which helps rehydrate the caramel. Gently stir before serving to ensure even heating.