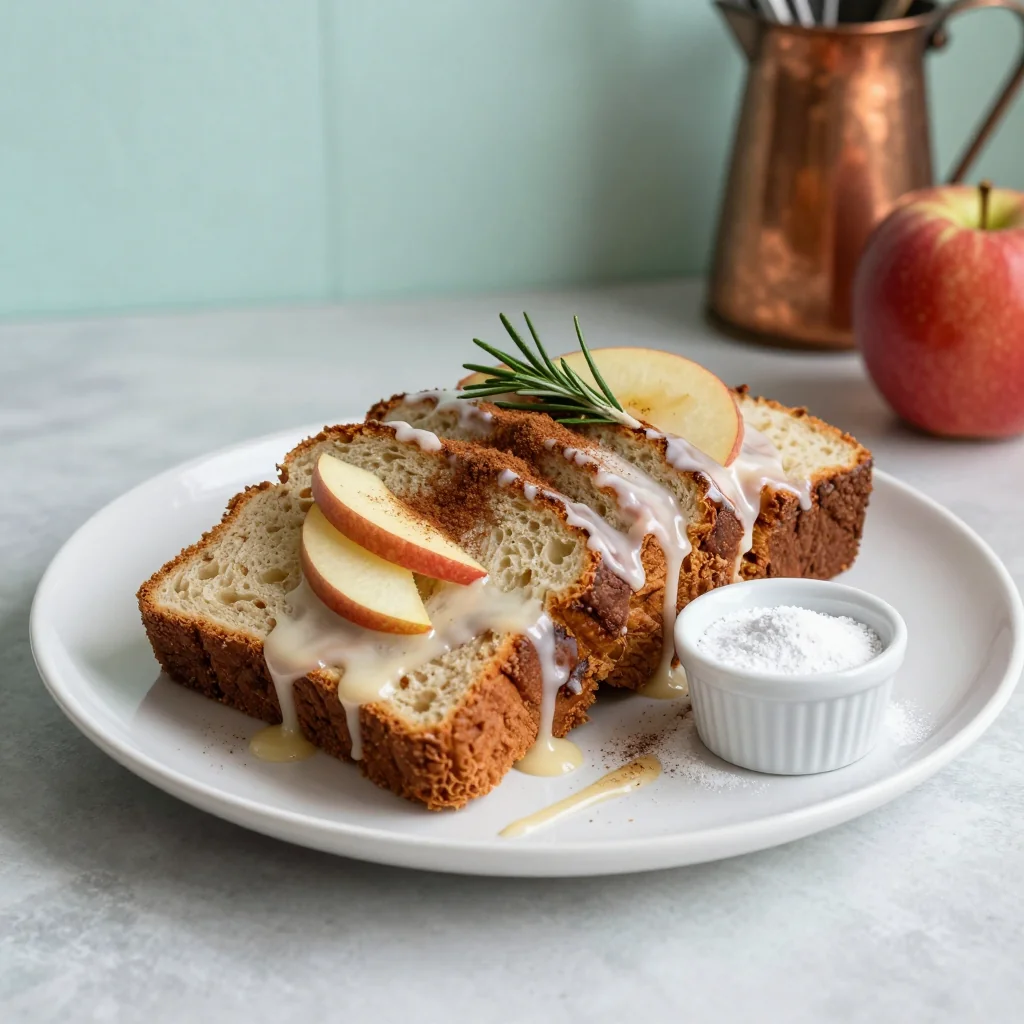
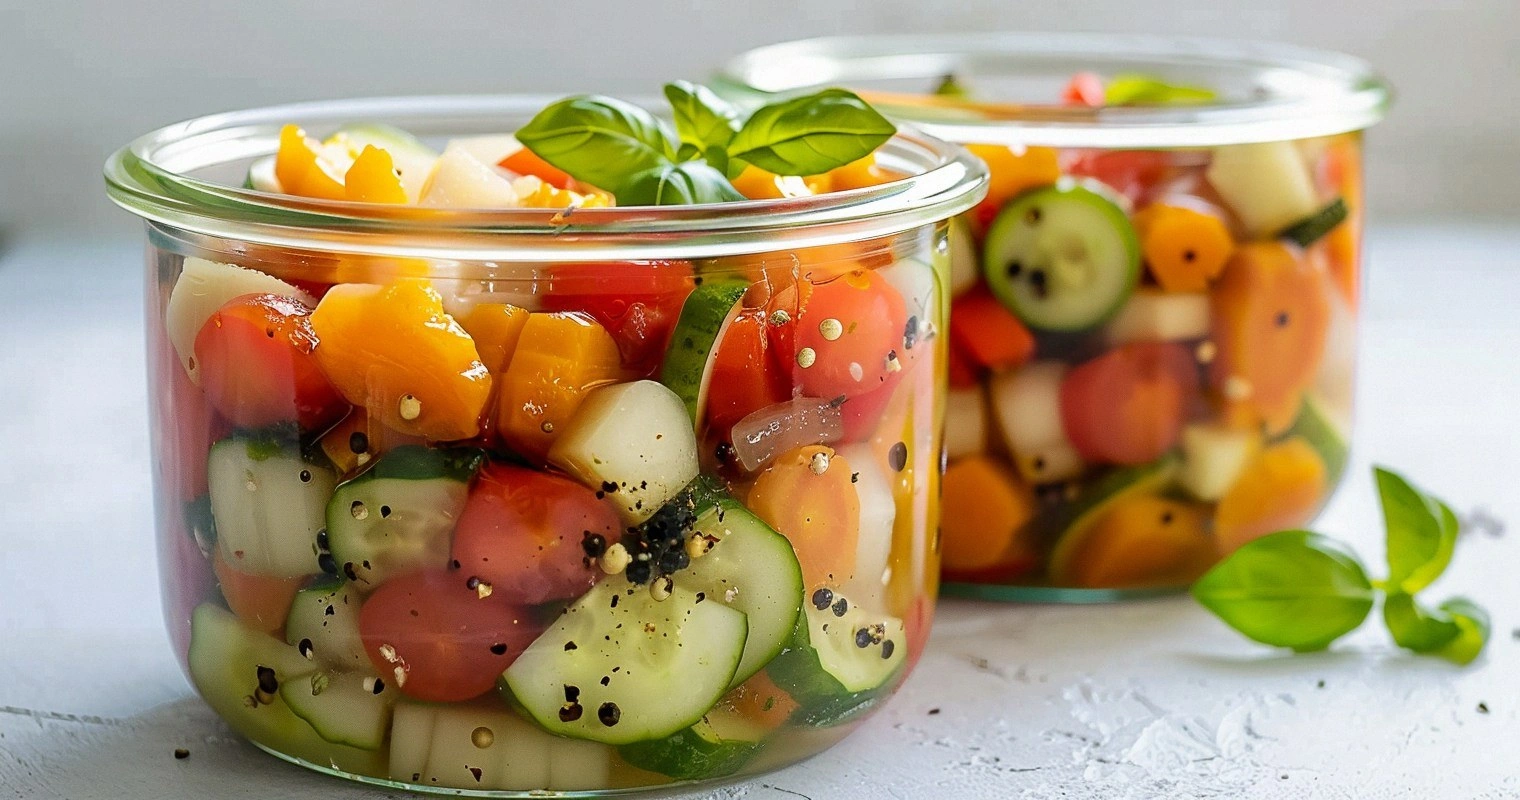
Picture this: It's 2 AM and I'm standing in my kitchen in pajamas, clutching a fork and staring at a jar of pickled vegetables that's somehow half-empty despite being sealed an hour ago. The vinegar perfume fills the air, the crunch echoes like a potato chip commercial, and I'm wondering how something so simple has become my newest obsession. Giardiniera isn't just another condiment — it's a flavor bomb that turns ordinary sandwiches into Italian deli masterpieces and transforms sad desk lunches into something worth celebrating.
Most people know giardiniera as that mysterious stuff floating in olive oil next to Italian beef sandwiches, but they're missing the whole story. This isn't just pickled vegetables thrown together like some sad jarred peppers from the grocery store. No, this is carefully orchestrated acidity, a symphony of textures that snap and crunch, and oils that carry flavors deeper into every vegetable than you thought possible. The first time I tasted proper giardiniera, it was like someone turned the volume up on my taste buds — suddenly, every other pickled thing tasted flat and lifeless.
What makes this version different? I spent three months testing, tweaking, and yes, eating my way through jar after jar to crack the code. I discovered why most recipes taste like harsh vinegar water (spoiler: they're missing the crucial brine temperature that opens vegetable pores), why some giardiniera turns mushy after a week (it's all about the salt timing), and why restaurant versions always taste better (they're using a technique that takes exactly 4 extra minutes but changes everything). The result is a giardiniera so addictive, you'll find yourself adding it to foods you never considered — trust me, scrambled eggs will never be the same.
Stay with me here — this is worth it. By the time we're done, you'll have a jar of pickled vegetables that tastes like it came straight from a Chicago Italian deli, with flavors so vibrant and textures so perfectly crisp that you'll wonder how you ever settled for anything less. Let me walk you through every single step — by the end, you'll wonder how you ever made it any other way.
What Makes This Version Stand Out
Flavor Explosion: This isn't your grandmother's vinegary pickle mix. The brine hits that perfect balance between tart and savory, with layers of garlic, oregano, and just enough heat to make your taste buds dance without overwhelming the natural sweetness of the vegetables. Each bite delivers a different combination of flavors depending on what vegetables you scoop up.
Perfect Crunch: Most giardiniera recipes turn your vegetables into sad, floppy messes after a week. Not this one. The vegetables stay crisp for up to three months because we're using a technique that draws out excess moisture before pickling, creating a snap that's music to your ears when you bite into a cauliflower floret.
Zero Waste Hero: You know those vegetables languishing in your crisper drawer? The slightly wrinkled carrots, the cauliflower that's starting to brown, the celery that's lost its snap? This recipe transforms them into something spectacular. It's like vegetable resurrection in a jar.
Make-Ahead Champion: Once you taste this, you'll want it on everything. Good news — it actually gets better with age. The flavors marry and deepen over time, so you can make a big batch and enjoy it for months. I always have at least two jars going so I never run out.
Crowd-Pleasing Magic: Bring a jar of this to any gathering and watch what happens. People who claim they don't like pickled vegetables suddenly can't stop eating it. I've literally watched guests hover around the appetizer table, ignoring expensive cheeses and charcuterie to focus entirely on these humble pickled vegetables.
Restaurant-Quality Oil: The oil isn't just a byproduct — it's liquid gold infused with all the flavors from the vegetables and spices. Smart cooks save every drop for salad dressings, marinades, or just drizzling over crusty bread. It's like getting two recipes in one.
Customizable Heat: Whether you're a spice wimp or a chili head, this recipe adapts to your preference. I'll show you exactly how to adjust the heat level without compromising the flavor balance, so everyone from grandmas to heat-seekers will be happy.
Alright, let's break down exactly what goes into this masterpiece...
Inside the Ingredient List
The Flavor Base
The foundation of exceptional giardiniera starts with vegetables that play well together, each bringing something unique to the party. Cauliflower forms the backbone — its nooks and crannies catch all the flavorful oil and spices like tiny flavor sponges. Choose firm, white cauliflower with tight florets; avoid any with brown spots or a strong smell. When you break it into bite-sized pieces, aim for variety — some tiny florets, some larger chunks, so every scoop offers different textures.
Carrots bring natural sweetness that balances the acidity, plus they stay satisfyingly crunchy long after pickling. Skip the baby carrots (they're too sweet and lack character) and go for full-size carrots. Peel them first — the skin can turn bitter in the brine — and cut them into thin coins or matchsticks depending on your preference. Pro tip: use the sweetest carrots you can find, usually the ones with the greens still attached.
Celery adds an herby, slightly bitter note that cuts through the richness of the oil. Use the inner, paler stalks — they're more tender and have a milder flavor. Slice them on the diagonal for visual appeal and better oil coverage. Don't discard the leaves either; their intense celery flavor intensifies beautifully in the pickling process.
The Texture Crew
Italian green beans (also called Romano beans) provide a meaty texture that stands up to the pickling process better than regular green beans. They're slightly flatter and have a more robust flavor that won't get lost among the other vegetables. Look for crisp, bright green pods about 4-5 inches long. Trim the ends but leave them whole — they look gorgeous jutting out of the jar and hold their shape perfectly.
Bell peppers add pops of color and a fresh, vegetal sweetness. Use a mix of red and yellow for visual appeal, but avoid green peppers — their bitterness intensifies during pickling and throws off the balance. Cut them into thin strips rather than chunks; they pack better into jars and absorb flavors more evenly. Remove every bit of white pith — it turns bitter and mushy.
Onions bring sharpness and complexity, but they need to be treated right. Sweet onions like Vidalia or Walla Walla work best because they mellow beautifully in the brine while maintaining their crunch. Slice them pole-to-pole rather than across the equator — they hold their shape better and look more elegant in the jar. A quick salt treatment before pickling removes their harsh bite.
The Unexpected Star
Here's where most recipes go wrong — they skip the fennel. Just a small amount of thinly sliced fennel bulb transforms the entire profile, adding a subtle anise note that makes people ask "what's that amazing flavor?" It's not enough to make it taste like licorice, just enough to add complexity. If you absolutely hate fennel, you can skip it, but I dare you to try it once. The fronds make beautiful garnish too.
Garlic is non-negotiable, but how you prepare it matters. Smash the cloves rather than mincing — minced garlic turns harsh and bitter over time, while smashed cloves infuse gently and can be easily removed if desired. Use fresh, firm garlic with no green shoots. The amount might seem excessive, but trust the process — it mellows and sweetens in the oil.
The Final Flourish
The oil isn't just any oil — it's extra-virgin olive oil, but not the super expensive stuff. You want something with character but not so precious you'll feel bad using a cup of it. The oil carries all the flavors and preserves everything, so quality matters, but price doesn't always equal quality. Avoid anything labeled "light" or "pure" — they lack the flavor compounds that make this special.
White wine vinegar provides the acid backbone, but here's the secret — use a mixture of white wine vinegar and champagne vinegar for the best flavor. The champagne vinegar is milder and more complex, preventing that harsh vinegar bite that makes supermarket giardiniera taste cheap. If you can't find champagne vinegar, a splash of white balsamic works too.
Everything's prepped? Good. Let's get into the real action...
The Method — Step by Step
- Start by creating a salt brine that will transform your vegetables from ordinary to extraordinary. Dissolve 1/4 cup of kosher salt in 4 cups of ice water — the ice keeps the vegetables crisp while the salt draws out excess moisture. Submerge all your cut vegetables in this brine for exactly 2 hours. This step is crucial — skip it and your vegetables will turn mushy within days. Set a timer and don't rush it; this is where most home cooks fail by being impatient.
- While your vegetables bathe in their salty spa, it's time to create the flavor base that makes this recipe legendary. In a large saucepan, combine 2 cups white wine vinegar, 1 cup water, 6 smashed garlic cloves, 2 bay leaves, 1 tablespoon whole black peppercorns, 2 teaspoons dried oregano, and 1 teaspoon red pepper flakes. Bring this mixture to a gentle simmer — not a rolling boil — and let it bubble quietly for 15 minutes. Your kitchen will start smelling like an Italian grandmother's pantry, and that's exactly what we want.
- Here's the game-changer that separates amateur giardiniera from restaurant-quality: strain the hot brine over your now-drained vegetables, but here's the key — the brine should be hot but not boiling. Around 180°F is perfect. Pour it over the vegetables in a heat-proof bowl and let them steep for exactly 10 minutes. This brief heat treatment opens the vegetable pores just enough to accept flavor but preserves their crunch. Set another timer — walk away now and you'll have vegetable mush.
- Drain the vegetables immediately after 10 minutes and spread them on clean kitchen towels. They need to dry completely before the next step, and I mean completely — any remaining water will dilute the oil and create an environment for bacteria. I use a fan on low speed to speed this up, turning the vegetables once. They should feel cool and dry to the touch, with no visible moisture.
- Now comes the fun part — layering flavors in your sterilized jars. Start with a layer of vegetables, then sprinkle in some of the reserved garlic and peppercorns from the brine. Add a few slices of fresh jalapeño if you want heat, or omit for mild. Press everything down gently — you want it packed but not crushed. The vegetables should fit snugly, with minimal gaps for the oil to fill later.
- Prepare the oil infusion while your vegetables rest in the jars. In a clean saucepan, heat 1 cup of extra-virgin olive oil with 4 additional smashed garlic cloves and 1 teaspoon dried oregano over very low heat. You want to warm the oil, not cook it — around 120°F is perfect. You'll know it's ready when the garlic just starts to sizzle gently. Remove from heat immediately and let it cool to room temperature. This infused oil carries all the aromatic compounds deep into every vegetable.
- Pour the cooled, infused oil over the vegetables in the jars, using a spoon to press everything down. The oil should completely cover the vegetables by at least 1/2 inch — this prevents air exposure and spoilage. Tap the jars gently on the counter to release air bubbles, then add more oil if needed. The vegetables will float initially, but they'll settle as they absorb the flavors.
- Seal the jars and let them sit at room temperature for 24 hours — this is when the magic happens. The flavors begin to meld, the oil penetrates the vegetables, and the transformation from good to extraordinary begins. After 24 hours, move them to the refrigerator for at least 3 days before tasting. I know it's torture, but trust me on this. The flavors need time to develop their full complexity.
- Before serving, let the giardiniera come to room temperature for 30 minutes. Cold mutes flavors, and you want to experience the full symphony. Use a clean fork every time you serve — introducing bacteria from used utensils is the fastest way to spoil your precious creation. Properly made, this will keep for up to 3 months in the refrigerator, though mine never lasts more than a few weeks.
That's it — you did it. But hold on, I've got a few more tricks that'll take this to another level...
Insider Tricks for Flawless Results
The Temperature Rule Nobody Follows
Here's the difference between amateur and pro-level giardiniera: temperature control at every step. Most recipes tell you to pour hot brine over vegetables and call it a day, but that's why they turn to mush. The magic happens when the brine hits exactly 180°F — hot enough to open the vegetable pores for flavor absorption, but cool enough to preserve cell structure. I use a digital thermometer because guessing here is like guessing whether your bread is done by looking at it. Too hot and your cauliflower turns to baby food; too cool and the flavors never penetrate past the surface.
Why Your Nose Knows Best
Your sense of smell is your secret weapon for perfect giardiniera. When the oil is infusing, lean over the pot and take a deep breath — you should smell garlic and oregano prominently, with a subtle peppery note. If the garlic smells sharp or acrid, your heat is too high. The oil should smell warm and inviting, not harsh or bitter. This sounds woo-woo, but trust your nose — it knows when flavors are developing correctly versus when they're being destroyed by heat.
The 5-Minute Rest That Changes Everything
After your giardiniera has aged for the minimum 3 days, there's one final step that elevates it from great to legendary. Remove the jar from the refrigerator, let it sit at room temperature for exactly 5 minutes, then give it a gentle shake. This redistributes the flavors that have settled, ensuring every spoonful has the perfect balance of oil, acid, and spices. Don't skip this — it's the difference between a jar where the top tastes mild and the bottom tastes intense, versus every bite being perfectly balanced.
Creative Twists and Variations
This recipe is a playground. Here are some of my favorite ways to switch things up:
The Calabrian Fire Edition
For heat seekers who want to feel alive, substitute Calabrian chili paste for the red pepper flakes and add a handful of whole Calabrian chilies to each jar. The flavor is deeper, more complex heat that builds slowly rather than hitting you all at once. I also add a strip of lemon zest to each jar — the citrus oil cuts through the heat and adds brightness. Fair warning: this version is addictive, and regular giardiniera will taste boring after this.
The Sweet Heat Symphony
Add 2 tablespoons of honey to the warm brine and substitute golden raisins for half the carrots. The sweetness balances beautifully with the acid, creating a sweet-and-sour profile that's incredible on grilled meats or cheese boards. I also add a cinnamon stick to each jar — just one, removed after a week — which adds warmth without making it taste like dessert.
The Garden Glut Version
When your garden is exploding with vegetables, this recipe adapts beautifully. Add zucchini coins, summer squash, green tomatoes, or even thinly sliced kohlrabi. The key is maintaining the ratio of firm vegetables to softer ones — aim for 70% firm vegetables (cauliflower, carrots, celery) to 30% softer ones. This ensures you still get that satisfying crunch even with more delicate vegetables.
The Mediterranean Dream
Replace half the olive oil with a fruity Greek olive oil and add Kalamata olives, capers, and fresh oregano sprigs. Add a splash of white wine to the brine and throw in a few fennel seeds. This version tastes like summer in the Mediterranean and pairs beautifully with grilled fish or as part of an antipasto platter.
The Asian Fusion Twist
Substitute rice vinegar for white wine vinegar and add slices of fresh ginger, star anise, and a splash of sesame oil to the finished product. Add some daikon radish cubes and substitute Thai chilies for the red pepper flakes. This version is incredible on ramen, rice bowls, or even as a topping for grilled salmon.
The Everything Bagel Edition
Add everything bagel seasoning to the oil infusion — the sesame seeds toast beautifully and add nuttiness, while the garlic and onion flakes intensify the flavor. This version is incredible on breakfast sandwiches or mixed into cream cheese for the ultimate bagel spread.
Storing and Bringing It Back to Life
Fridge Storage
Properly stored giardiniera will keep for up to 3 months in the refrigerator, though the flavors are best within the first 6 weeks. Always use a clean fork when serving — introducing bacteria from used utensils is the fastest way to spoil your creation. Store the jars in the coldest part of your refrigerator, not in the door where temperatures fluctuate. If you notice the oil becoming cloudy or developing off smells, it's time to say goodbye.
Freezer Friendly
While you can freeze giardinira, I don't recommend it — the vegetables turn mushy when thawed. However, you can freeze the infused oil in ice cube trays for later use in cooking. The oil maintains its flavor beautifully and these flavor cubes are perfect for starting soups or stews. Just remember that frozen oil should be used within 3 months for best flavor.
Best Reheating Method
Giardiniera is meant to be served cold or at room temperature, but if you want to use it in hot dishes, add it at the very end of cooking. The vegetables just need to be warmed through — any prolonged heat will destroy their crunch and mute the bright flavors. For room temperature serving, remove from refrigerator 30 minutes before using to allow the flavors to bloom.