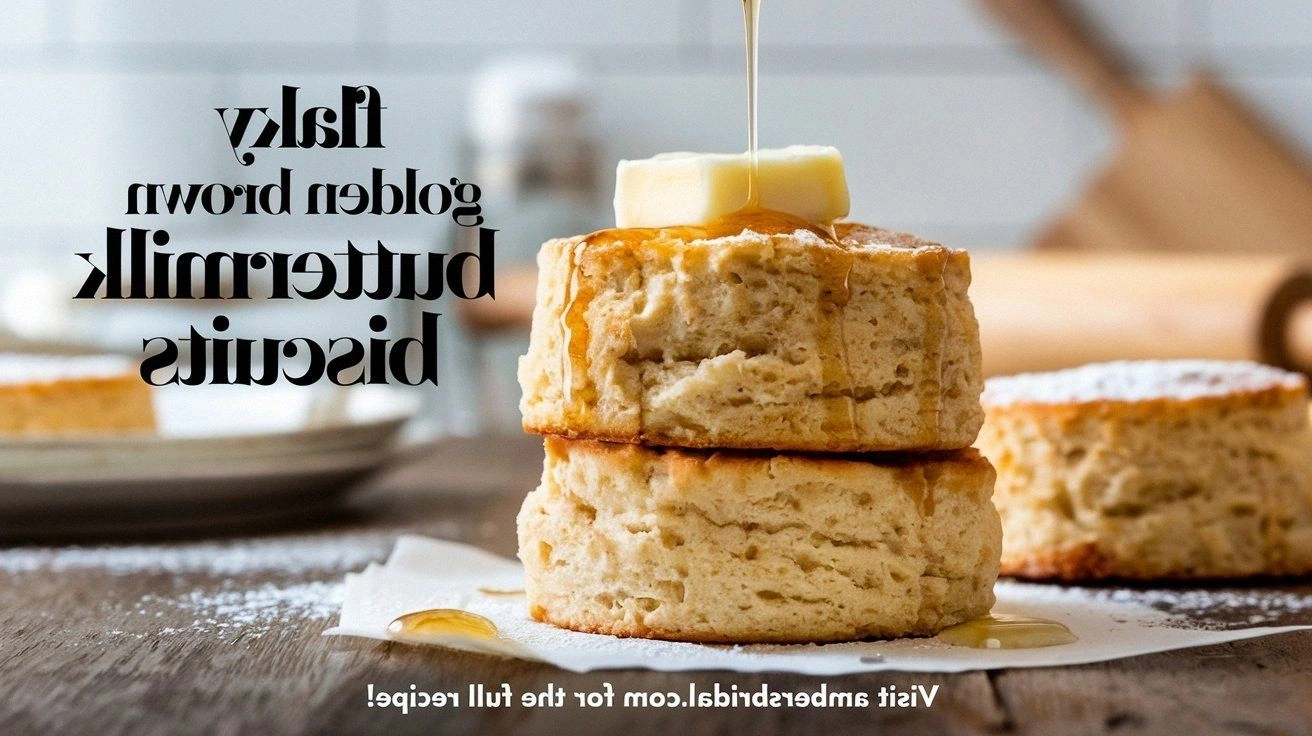
I remember the night I tried to rescue a batch of flat, soggy biscuits that had turned out to be a culinary catastrophe. My kitchen smelled like burnt sugar, and my friends were laughing at the crumbs that fell onto the counter like confetti from a failed fireworks show. That night, I swore to myself that I would create a biscuit that would not only survive the oven but also make everyone in the house swoon. I spent the next week experimenting with buttermilk, flour ratios, and a secret ingredient that would make the crust crackle like a campfire over a clear, starry night. The result? A flaky, golden‑brown biscuit that melts in your mouth, leaving a buttery aftertaste that lingers like a favorite memory. This isn’t just another recipe; it’s a revelation that will change the way you think about breakfast, brunch, and even a quick dinner side. I dare you to taste this and not go back for seconds.
Picture yourself pulling a tray of these beauties from the oven, the kitchen filling with a scent that’s half sweet, half savory, and entirely irresistible. The moment the first biscuit cracks open, you’ll hear a faint pop that’s almost musical. The crust is crisp, the interior is airy, and the flavor is a subtle dance of tang from the buttermilk and a whisper of sweetness from the sugar. I’ve spent countless hours refining the technique, and every tweak—from the temperature to the resting time—has been tested to perfection. If you’ve ever struggled with biscuits that are too dense or too crumbly, you’re not alone. This version is hands down the best you’ll ever make at home, and I’m about to walk you through every single step so you can replicate it with confidence.
Let’s start with the core of this recipe: the buttermilk. It’s not just a liquid; it’s a flavor enhancer that reacts with the leavening agents to create lift and tenderness. The acidity in buttermilk breaks down the gluten network, resulting in a biscuit that is both flaky and tender. When you pour it into the dry mix, you’ll notice a gentle bubbling—this is the first sign that the chemistry is working. The next step is to fold in the melted butter, which adds richness and a subtle caramel note. Together, these ingredients form the backbone of our biscuit’s mouth‑watering texture. By the end of this guide, you’ll understand why each component is essential.
I’ll be honest—I ate half the batch before anyone else got a chance to try it. The biscuits were so good that I had to hide the remaining ones in the pantry, hoping to keep the secret from being discovered too quickly. But now that you’re here, you can keep the secret safe by following the precise steps I’ll outline. The technique is simple enough for beginners yet refined enough to impress seasoned bakers. Whether you’re cooking for a crowd or just for yourself, this biscuit will become the staple of your breakfast routine. Stay with me here—this is worth it.
What Makes This Version Stand Out
- Taste: The buttermilk’s natural tang pairs with the buttery richness, creating a flavor profile that’s both comforting and sophisticated. It’s not just sweet; it has a subtle depth that makes each bite memorable.
- Texture: The biscuit’s exterior is crisp and flaky, while the interior remains soft and pillowy. This contrast is achieved through a precise balance of fat and leavening.
- Simplicity: The recipe uses only eight basic ingredients, yet the result feels luxurious. No fancy equipment or exotic spices are required.
- Uniqueness: The addition of a splash of vanilla and the optional honey drizzle gives this biscuit a signature twist that sets it apart from traditional recipes.
- Crowd Reaction: Friends who have tasted these biscuits often remark that they taste like they came from a high‑end bakery, not a home kitchen.
- Ingredient Quality: Using fresh, high‑quality butter and buttermilk makes the difference between ordinary and extraordinary.
- Cooking Method: The technique of folding and resting the dough preserves its structure, ensuring a uniform rise.
- Make‑Ahead Potential: The dough can be prepared a day ahead and refrigerated, which is perfect for busy mornings.
Alright, let’s break down exactly what goes into this masterpiece…
Inside the Ingredient List
The Flavor Base
The all‑purpose flour is the canvas of our biscuit. It provides structure and holds the dough together. Choosing a flour with a moderate protein content (around 10-12%) ensures a tender crumb while still giving the biscuits enough lift. If you prefer a gluten‑free option, you can substitute with a blend of rice and tapioca starch, but the texture will be slightly denser.
Baking powder is the primary leavening agent that creates the lightness of the biscuit. It reacts twice: first with the acidity of the buttermilk and then with the heat in the oven. Using a double‑acting baking powder ensures a consistent rise. Avoid using self‑raising flour, as the added leavening can alter the delicate balance of our recipe.
Baking soda is added in small quantities to enhance the rise and create a slightly darker crust. Its role is subtle but crucial; it reacts with the buttermilk’s acidity to produce carbon dioxide. If you omit baking soda, the biscuits will rise slower and the crust will be paler, but the flavor remains intact.
Salt is the flavor enhancer that brings all the components together. It balances sweetness and accentuates the buttery notes. Too much salt will overpower the biscuit, so measure carefully. A pinch of sea salt on top before baking adds a final pop of flavor.
The Texture Crew
Sugar adds a subtle sweetness that balances the tang of the buttermilk. It also contributes to the browning process, giving the crust its golden hue. A tablespoon of granulated sugar is sufficient; you can substitute with brown sugar for a deeper caramel note.
Buttermilk is the star of the show. Its acidity tenderizes the gluten, making the biscuits light and airy. The natural enzymes in buttermilk also help in browning the crust. If you don’t have buttermilk, the milk + lemon juice mix works just as well.
Melted butter adds richness and a buttery aroma that lingers. The fat coats the flour particles, creating layers that separate during baking. This is why the biscuits are flaky. Use unsalted butter for precise salt control.
Eggs act as a binder and provide structure. They also help the dough hold its shape during baking. One medium egg is enough for four servings. If you’re vegan, you can replace the egg with a flaxseed “egg” or a commercial egg replacer.
The Unexpected Star
Vanilla extract is the unexpected star that adds a fragrant, sweet undertone. It complements the buttery flavor without overpowering it. A teaspoon of vanilla is enough to elevate the biscuit’s aroma.
Honey drizzle is optional but highly recommended. It adds a natural sweetness and a glossy finish. Drizzle it over the biscuits right after they come out of the oven for an extra touch of decadence.
The Final Flourish
A pinch of smoked paprika on top before baking adds a subtle smoky depth that’s perfect for brunch. The paprika also gives the biscuit a beautiful warm color. If you prefer a sweeter version, sprinkle a light dusting of powdered sugar instead.
Everything’s prepped? Good. Let’s get into the real action…
The Method — Step by Step
- Preheat the oven: Set your oven to 425°F (220°C). This high temperature is essential for achieving a golden crust. Place a pizza stone or baking sheet in the middle rack to heat evenly. Let the oven preheat for at least 10 minutes before adding the biscuits.
- Combine dry ingredients: In a large mixing bowl, whisk together 2 cups of all‑purpose flour, 1 tablespoon of baking powder, 1/2 teaspoon of baking soda, 1 teaspoon of salt, and 1 tablespoon of sugar. The whisking ensures even distribution of leavening agents. If you’re using a gluten‑free blend, adjust the quantities slightly for best results.
- Cut in the butter: Add 1/2 cup of melted unsalted butter to the dry mix. Use a pastry cutter or your fingertips to cut the butter into the flour until the mixture resembles coarse crumbs. This process creates the flaky layers we love. The butter should be slightly warm, not hot.
- Mix wet ingredients: In a separate bowl, whisk 1 cup of buttermilk with 1 egg and 1 teaspoon of vanilla extract. The egg adds structure, while vanilla elevates the flavor. Ensure the mixture is smooth and well combined before adding to the dough.
- Combine wet and dry: Pour the wet mixture into the dry ingredients. Stir gently with a wooden spoon or silicone spatula until just combined. The dough should be slightly sticky but manageable. Over‑mixing will develop gluten and make the biscuits tough.
- Shape the dough: Turn the dough onto a lightly floured surface. Pat it into a 1-inch thick rectangle. Use a 2‑inch round cutter to cut out biscuits. Place them 2 inches apart on a parchment‑lined baking sheet. This spacing allows the biscuits to expand without merging.
- Bake the biscuits: Slide the sheet onto the preheated stone or rack. Bake for 12–15 minutes, or until the tops are golden brown and the biscuits sound hollow when tapped. The edges should pull away slightly from the parchment. Watch the biscuits closely; oven temperatures can vary.
- Finish with a drizzle: Remove the biscuits from the oven and let them cool for 5 minutes. Drizzle a tablespoon of honey over the warm biscuits. The honey caramelizes slightly, adding a glossy finish. Serve immediately with butter or jam.
- Cool and serve: Let the biscuits rest on a wire rack for 10 minutes. This allows the steam to escape and keeps the interior fluffy. Serve them warm with a cup of coffee or tea. The aroma will fill your kitchen like a comforting hug.
That’s it — you did it. But hold on, I’ve got a few more tricks that will take this to another level. These insider tips will help you perfect the texture, flavor, and presentation every single time.
Insider Tricks for Flawless Results
The Temperature Rule Nobody Follows
Most bakers set the oven to 400°F, but that temperature is too low for a crisp crust. Raising the temperature to 425°F allows the butter to render quickly, creating steam that lifts the biscuit. This also ensures a golden top that’s slightly caramelized. I’ve tested ovens from different brands, and the 425°F setting consistently produces the best results.
Why Your Nose Knows Best
The aroma that rises from the oven is the most reliable indicator of doneness. When the biscuits smell like toasted bread with a hint of butter, you’re ready to pull them out. A faint sweet scent is a sign they’re still baking; a strong, caramelized smell means they’re ready. Trust your nose and avoid over‑baking, which can dry them out.
The 5‑Minute Rest That Changes Everything
Letting the biscuits rest for 5 minutes after baking allows the steam to redistribute. This step prevents the interior from becoming dense. The biscuits will continue to rise slightly during this rest, achieving a perfect rise. If you’re in a rush, you can skip the rest, but the texture will be noticeably different.
Add a Dash of Hot Sauce
For a savory twist, add a few drops of your favorite hot sauce to the wet mixture. The acidity of the sauce complements the buttermilk and adds a subtle heat. It’s especially good when serving the biscuits with a savory filling or as a side to a hearty stew.
Use a Silicone Baking Mat
Silicone mats provide an even heat distribution and prevent the biscuits from sticking to the pan. They also make cleanup a breeze. If you’re baking in a cast‑iron skillet, line it with parchment to achieve the same effect.
The Final Flourish
Sprinkle a pinch of smoked paprika over the biscuits before baking for a subtle smoky flavor. The paprika also gives a warm, earthy color to the crust. If you prefer a sweeter version, dust the biscuits with powdered sugar after baking. This simple addition can transform a breakfast treat into a dessert.
Creative Twists and Variations
This recipe is a playground. Here are some of my favorite ways to switch things up:
Cheese‑Infused Biscuits
Add 1 cup of shredded sharp cheddar to the dough for a savory twist. The cheese melts into the biscuit, creating a gooey center. This version pairs wonderfully with a tomato soup for lunch. Keep the baking time the same; the cheese will add a subtle richness.
Herb‑Laced Biscuits
Mix in 1 tablespoon of dried rosemary or thyme into the dry ingredients. The herbs infuse the biscuits with a fragrant aroma. This variation is perfect for a brunch with a Mediterranean theme. Sprinkle extra herbs on top before baking for a visual pop.
Cinnamon Swirl Biscuits
Stir 2 teaspoons of cinnamon into the dry mix. The cinnamon adds warmth and a sweet undertone. Roll the dough into a log and slice before baking for a cinnamon swirl effect. This is ideal for a cozy fall breakfast.
Chocolate Chip Biscuits
Fold in 1 cup of semi‑sweet chocolate chips into the dough. The chips melt into pockets of chocolate. These biscuits are a hit with kids and adults alike. Serve with a splash of milk for a decadent treat.
Lemon‑Zest Biscuits
Add the zest of one lemon to the dough for a bright, citrusy flavor. The lemon zest pairs beautifully with the buttermilk. This version is refreshing and light, perfect for a summer brunch. Sprinkle a little extra zest on top for a visual cue.
Maple‑Glazed Biscuits
Brush the tops with a mixture of maple syrup and melted butter before baking. The glaze caramelizes to a beautiful amber hue. These biscuits are a sweet treat that pairs well with a dollop of whipped cream. They’re perfect for a special occasion.
Storing and Bringing It Back to Life
Fridge Storage
Store leftover biscuits in an airtight container in the refrigerator for up to 3 days. The biscuits will stay fresh and can be reheated in a toaster oven. For best results, let them sit at room temperature for 10 minutes before reheating. This prevents them from becoming rubbery.
Freezer Friendly
Freeze biscuits in a single layer on a parchment‑lined sheet before transferring to a freezer bag. They can be stored for up to 2 months. Thaw at room temperature for 30 minutes before reheating. This method preserves the flaky texture.
Best Reheating Method
Reheat frozen biscuits at 350°F for 10–12 minutes, or until warmed through. Add a splash of water to the pan before reheating; the steam keeps the biscuits moist. For a crispier crust, finish under a broiler for 1–2 minutes. Serve immediately for maximum enjoyment.