Picture this: it’s a rainy Saturday afternoon, the kind where the clouds look like a giant, fluffy cake batter waiting to be whisked into something spectacular. I was halfway through a marathon of Netflix reruns when a sudden craving for tiramisu hit me like a bolt of espresso‑charged lightning. I rummaged through the pantry, only to discover a half‑eaten marble pound cake that had been hiding behind the cereal boxes for weeks. Most people would toss it, but I saw potential—a canvas for a dessert that could out‑shine any restaurant version. I dared myself to transform that stale‑looking slab into a silky, coffee‑kissed masterpiece, and trust me, the result was nothing short of a culinary epiphany.
The kitchen filled with the intoxicating aroma of freshly brewed coffee mingling with the sweet, buttery scent of the pound cake as it soaked up the liquid like a sponge at a spa retreat. The sound of the electric mixer whirring, the soft thud of the heavy cream as it turned into glossy peaks, and the faint crackle of the cocoa powder dusting the top—all these sensory cues formed a symphony that made my heart race. My fingertips tingled as I lifted the bowl, feeling the weight of the cream cheese mixture, smooth and velvety, promising a melt‑in‑your‑mouth experience that would make any palate swoon. When the first spoonful hit my tongue, the contrast of the cake’s dense crumb against the airy, coffee‑infused cream was like a perfect duet of jazz and rock—unexpected, exhilarating, and utterly addictive.
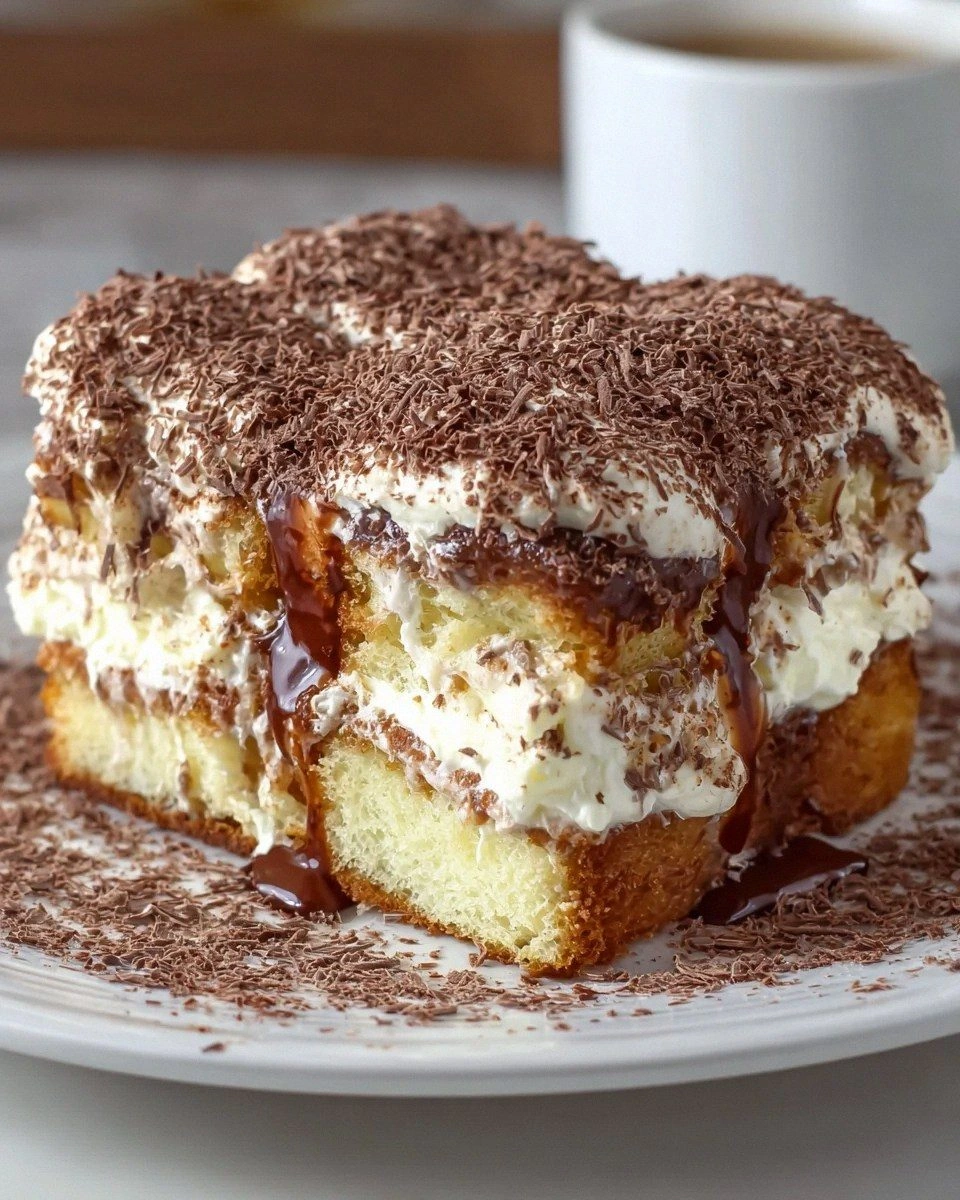
What makes this version the hands down best version you'll ever make at home is the way each component respects the other while still stealing the spotlight when it should. Most tiramisu recipes rely on ladyfingers that dissolve into mush, but here the marble pound cake holds its shape, offering a delightful bite that’s both sturdy and tender. The addition of Kahlua adds a subtle boozy depth that dances with the coffee, while the shaved chocolate on top provides a crunchy whisper of bitterness that cuts through the sweetness. And the secret? A quick‑whip technique that locks in air, turning the heavy cream into a cloud that floats above the cake like a sweet, caffeinated dream.
Okay, ready for the game‑changer? I’m about to reveal a technique that most chefs keep under their aprons: a double‑soak method that guarantees every slice is drenched just right—never soggy, never dry. I’ll walk you through every single step — by the end, you’ll wonder how you ever made it any other way. Stay with me here — this is worth it.
What Makes This Version Stand Out
- Flavor Fusion: The marriage of coffee, Kahlua, and creamy cheese creates a layered taste that evolves with each bite, delivering a bold kick followed by a sweet, velvety finish.
- Texture Triumph: The marble pound cake’s dense crumb absorbs the liquid without turning mushy, while the whipped cream adds airy lightness, giving you that perfect contrast.
- Simplicity: No fancy equipment, no need for ladyfingers—just a cake you already have and a handful of pantry staples, making it accessible for any home cook.
- Unique Visuals: The marble swirls in the cake peek through the cocoa dusting, creating a dessert that looks as impressive as it tastes.
- Crowd Reaction: I dare you to taste this and not go back for seconds; even the most skeptical guests end up begging for the recipe.
- Ingredient Quality: Using a high‑quality marble pound cake and fresh‑brewed coffee elevates the entire dish, turning simple ingredients into gourmet magic.
- Method Mastery: The double‑soak ensures uniform moisture, while the gentle folding of whipped cream preserves its airy structure.
- Make‑Ahead Potential: This tiramisu improves after a few hours in the fridge, allowing flavors to meld and the cake to fully absorb the coffee‑liqueur blend.
Inside the Ingredient List
The Flavor Base
The strong brewed coffee is the beating heart of this tiramisu. Its bold, slightly bitter notes cut through the sweetness of the cake and cream, creating balance. If you use a weak brew, the dessert will taste flat; a robust espresso shot, however, adds depth that lingers on the palate. For a non‑caffeinated version, substitute with a rich, chilled chocolate milk, but expect a different flavor profile.
The Kahlua liqueur is the mischievous sidekick that amplifies the coffee’s aroma while introducing a subtle caramel‑like warmth. It’s the secret weapon that makes this tiramisu feel like a night out at a classy Italian café. If you’re avoiding alcohol, swap it with a tablespoon of coffee‑flavored syrup; you’ll still get that sweet‑spirit vibe without the buzz.
The Texture Crew
Cream cheese provides the luscious, tangy foundation for the filling. When softened and blended with powdered sugar, it creates a silky base that holds the whipped cream together without curdling. Skipping the softening step results in a grainy texture that can ruin the entire experience, so give it a good 15‑minute sit at room temperature before mixing.
Heavy cream is the airy partner that lifts the dense cake into a cloud‑like dessert. Whipping it to soft peaks incorporates air, making each spoonful melt like butter on a hot biscuit. Over‑whipping turns it into butter, so stop at soft peaks—trust the visual cue of a glossy, slightly droopy peak.
The Unexpected Star
Shaved chocolate isn’t just a garnish; it adds a textural surprise and a hint of bitterness that cuts through the sweetness. Dark chocolate works best because its cocoa intensity complements the coffee, but feel free to experiment with milk chocolate for a sweeter profile. If you don’t have a vegetable peeler, a sharp knife works just as well—just be patient and keep the shavings thin.
The Final Flourish
Unsweetened cocoa powder provides the classic tiramisu dusting that signals “dessert” to the eyes. A light, even layer adds visual drama and a subtle chocolate note that ties the whole dish together. Be careful not to over‑dust; a thin veil is enough to create that sophisticated finish.
Everything's prepped? Good. Let's get into the real action...
The Method — Step by Step
First, slice the marble pound cake into 1‑inch thick layers. Lay them on a large baking sheet, making sure they don’t overlap. This is the moment of truth: the cake should look like a neat stack of ivory bricks, each ready to soak up the coffee mixture without crumbling. If the cake is too dry, give it a quick 30‑second microwave zap to loosen the crumb.
In a shallow bowl, combine the strong brewed coffee with Kahlua liqueur. Stir gently—don’t create a whirlpool, just a calm, aromatic pool. I dare you to sniff this blend now; the scent should hit you like a warm hug from an old friend.
Kitchen Hack: Warm the coffee slightly before mixing with Kahlua; the heat helps the alcohol integrate more smoothly.Using a pastry brush, lightly drizzle the coffee‑Kahlua mixture over each cake layer, allowing it to soak for about 20 seconds per side. The cake should absorb the liquid like a sponge, turning a soft golden hue without becoming soggy. Watch out: over‑soaking will make the cake fall apart, turning your elegant tiramisu into a soggy mess.
While the cake layers are soaking, whip the heavy cream in a chilled bowl until soft peaks form. The bowl should be icy to the touch; this keeps the cream from turning buttery. Add powdered sugar gradually, tasting as you go to achieve the perfect balance of sweetness. Once the sugar is fully incorporated, continue whipping just until the peaks hold shape—no more, no less.
In a separate bowl, beat the softened cream cheese until smooth, then blend in the remaining powdered sugar until the mixture is fluffy and free of lumps. This creates a tangy, creamy base that will marry beautifully with the whipped cream. Fold the whipped cream into the cream cheese mixture using a spatula, turning the mixture over on itself to keep the air bubbles intact. The resulting filling should look light, airy, and slightly glossy.
Now, assemble the tiramisu. Place the first soaked cake layer at the bottom of a 9×13‑inch dish. Spread a generous layer of the cream cheese‑cream mixture over it, smoothing the top with an offset spatula. Repeat the process with the remaining cake layers and filling, finishing with a thick, velvety top layer of the cream mixture.
Dust the surface liberally with unsweetened cocoa powder using a fine mesh sieve. The cocoa should settle like a soft snowfall, creating a matte contrast against the glossy cream. Then, sprinkle the shaved chocolate over the top, allowing the shavings to cascade down the sides for visual drama.
Cover the dish tightly with plastic wrap and refrigerate for at least 4 hours, preferably overnight. This resting period is pure magic: the flavors meld, the cake fully absorbs the coffee‑Kahlua infusion, and the texture becomes perfectly set. When you finally slice into it, the layers should hold together like a well‑trained ballet troupe—each component knows its place.
That's it — you did it. But hold on, I've got a few more tricks that'll take this to another level...
Insider Tricks for Flawless Results
The Temperature Rule Nobody Follows
Never whip cream straight out of the fridge unless the bowl is also chilled. A cold bowl keeps the fat stable, allowing the cream to capture air without turning buttery. I once tried whipping at room temperature and ended up with a soupy mess; lesson learned, always chill both bowl and whisk.
Why Your Nose Knows Best
When the coffee‑Kahlua mixture is ready, give it a quick sniff. If you can’t detect that rich, roasted aroma, the brew is too weak and you’ll need to up the concentration. Your nose is a better gauge than any timer—trust it to tell you when the flavor is strong enough to shine.
The 5‑Minute Rest That Changes Everything
After folding the whipped cream into the cream cheese, let the mixture rest for five minutes. This short pause lets the air bubbles settle, resulting in a smoother, more stable filling that won’t weep when sliced. Skipping this step leads to a watery top layer that can ruin the presentation.
Layer Alignment Mastery
When stacking the cake layers, use a ruler or the edge of a baking sheet to press each layer gently into place. This ensures the layers stay level, preventing a lopsided dessert that looks like a collapsed building. A straight‑edged cake looks as good as it tastes.
Chocolate Shave Perfection
For the shavings, chill the chocolate bar for 10 minutes before shaving. Cold chocolate cuts cleaner, producing fine ribbons instead of chunky chunks. If you shave too warm, the chocolate melts and clumps, ruining the elegant look.
Creative Twists and Variations
This recipe is a playground. Here are some of my favorite ways to switch things up:
Berry Burst
Swap the coffee‑Kahlua soak for a mixed‑berry puree (strawberries, raspberries, and a splash of balsamic). The tartness of the berries pairs beautifully with the cream cheese, creating a summer‑ready version that’s perfect for picnics.
Nutty Delight
Fold in ½ cup toasted hazelnut crumbs into the cream mixture and drizzle a hazelnut liqueur instead of Kahlua. The nutty undertones add depth and a crunchy surprise that elevates the dessert to a new level of sophistication.
Matcha Magic
Replace the coffee with a strong matcha tea and add a teaspoon of vanilla extract to the cream cheese mixture. The earthy green tea flavor melds with the creamy base, and a dusting of matcha powder instead of cocoa gives it an elegant, pastel hue.
Alcohol‑Free Dream
If you need to keep it booze‑free, substitute Kahlua with a tablespoon of vanilla‑flavored coffee syrup and increase the coffee strength. The result is still rich and indulgent, perfect for family gatherings where kids are present.
Chocolate Overload
Increase the shaved chocolate to 4 oz and fold in ¼ cup melted dark chocolate into the cream mixture for an ultra‑chocolatey version. Top with cocoa nibs for an added crunch that will satisfy even the most demanding chocolate lovers.
Spiced Autumn
Add a pinch of ground cinnamon and nutmeg to the coffee soak, and sprinkle a light dusting of pumpkin spice on top of the cocoa. This seasonal twist brings warm, comforting notes that are perfect for cooler evenings.
Storing and Bringing It Back to Life
Fridge Storage
Cover the tiramisu tightly with plastic wrap and store it in the refrigerator for up to 3 days. The flavors will continue to meld, making each day more flavorful than the last. Keep it on a middle shelf to avoid temperature fluctuations from the door.
Freezer Friendly
For longer storage, wrap the entire dish in a double layer of aluminum foil and then place it in a freezer‑safe container. It will keep for up to 1 month. When you’re ready to enjoy it, transfer to the fridge to thaw overnight—no microwave needed.
Best Reheating Method
When serving after refrigeration, let the tiramisu sit at room temperature for 10 minutes to soften slightly. If you prefer a warm dessert, place a slice on a plate and microwave for 10‑15 seconds, adding a tiny splash of water to the plate; the steam revives the cake’s moisture without cooking the cream.