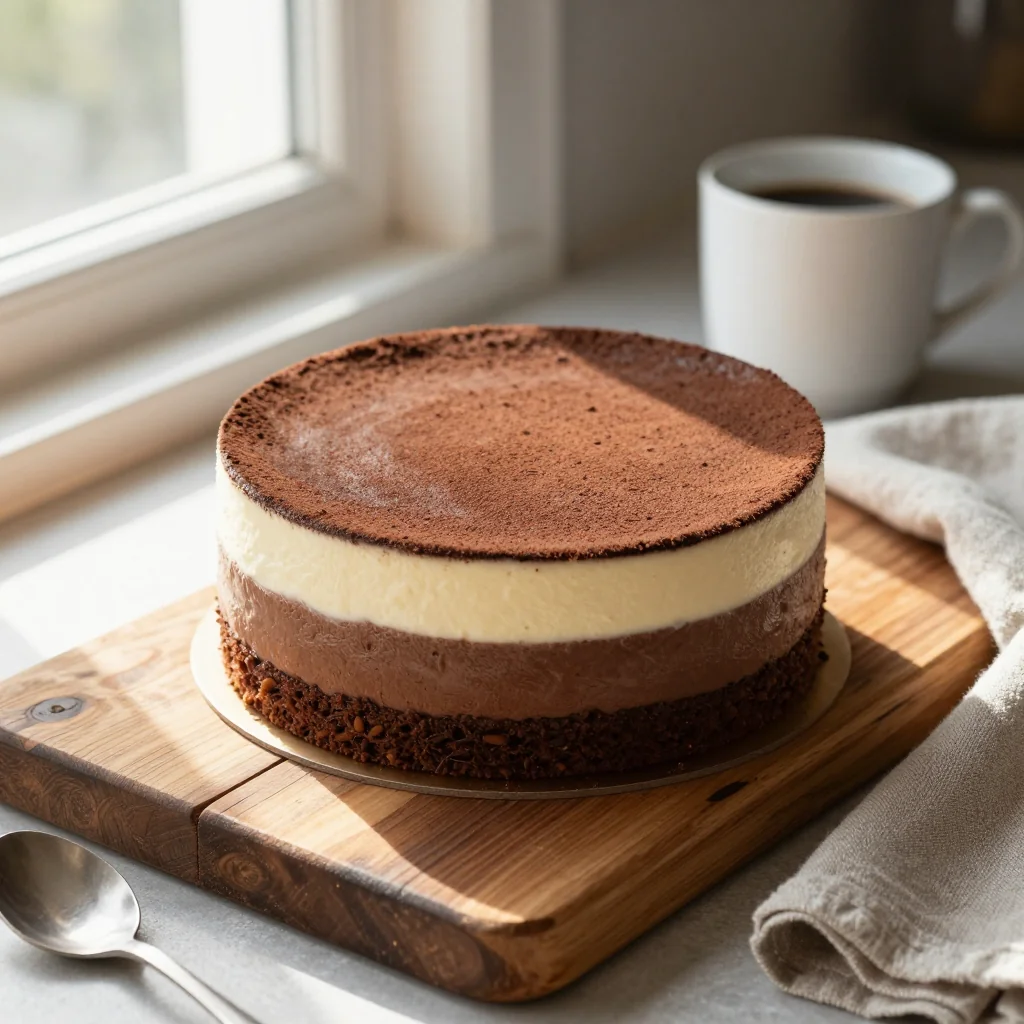
A silky, airy chocolate mousse layered over a buttery biscuit crust, finished with a glossy chocolate glaze.
When I was a child, the first time I tasted a chocolate mousse, it felt like a secret whispered by the kitchen itself – airy, rich, and impossibly smooth. I still remember the way the silky texture melted on my tongue, leaving a lingering cocoa kiss that made every other dessert pale in comparison. Years later, after countless experiments with textures and flavors, I finally perfected a version that layers that ethereal mousse over a buttery, crunchy biscuit base, topped with a glossy chocolate glaze that catches the light like a jewel.
This Chocolate Mousse Cake hails from classic French patisserie, where mousse has long been celebrated as a showcase of technique and elegance. While traditional mousse is often served in individual glasses, I wanted a cake that could be sliced, shared, and celebrated at gatherings – a centerpiece that invites both awe and indulgence.
In this guide, you’ll learn how to balance the richness of dark chocolate with the lightness of whipped cream, how to achieve a flawless crust that holds the mousse without becoming soggy, and how to finish with a mirror‑shine glaze that looks as good as it tastes. By the end, you’ll have a reliable recipe that works every time, whether you’re impressing guests or treating yourself after a long day.
Let’s dive into the world of chocolate, whisk, and patience, and create a dessert that will become a beloved staple in your culinary repertoire.
🌟 Why This Recipe Will Captivate You
From the first bite to the lingering aftertaste, this cake delivers a symphony of textures and flavors that keep you coming back for more.
- ✨ Perfect Balance of Light and Rich: The airy mousse contrasts beautifully with the dense, buttery crust, giving each forkful a satisfying bite.
- ✨ No‑Bake Simplicity: With no oven required for the mousse layers, the recipe is ideal for warm weather or kitchens without a reliable oven.
- ✨ Visual Impact: The glossy chocolate glaze creates a mirror‑like surface that looks professional and festive on any table.
- ✨ Flexible Base: You can swap digestive biscuits for gluten‑free alternatives or even almond meal for a nutty twist.
- ✨ Crowd‑Pleaser: The deep cocoa flavor satisfies chocolate lovers while the light texture keeps it from feeling overly heavy.
- ✨ Easy Scaling: Thanks to the built‑in portion adjuster, you can effortlessly scale the recipe up or down without recalculating every ingredient.
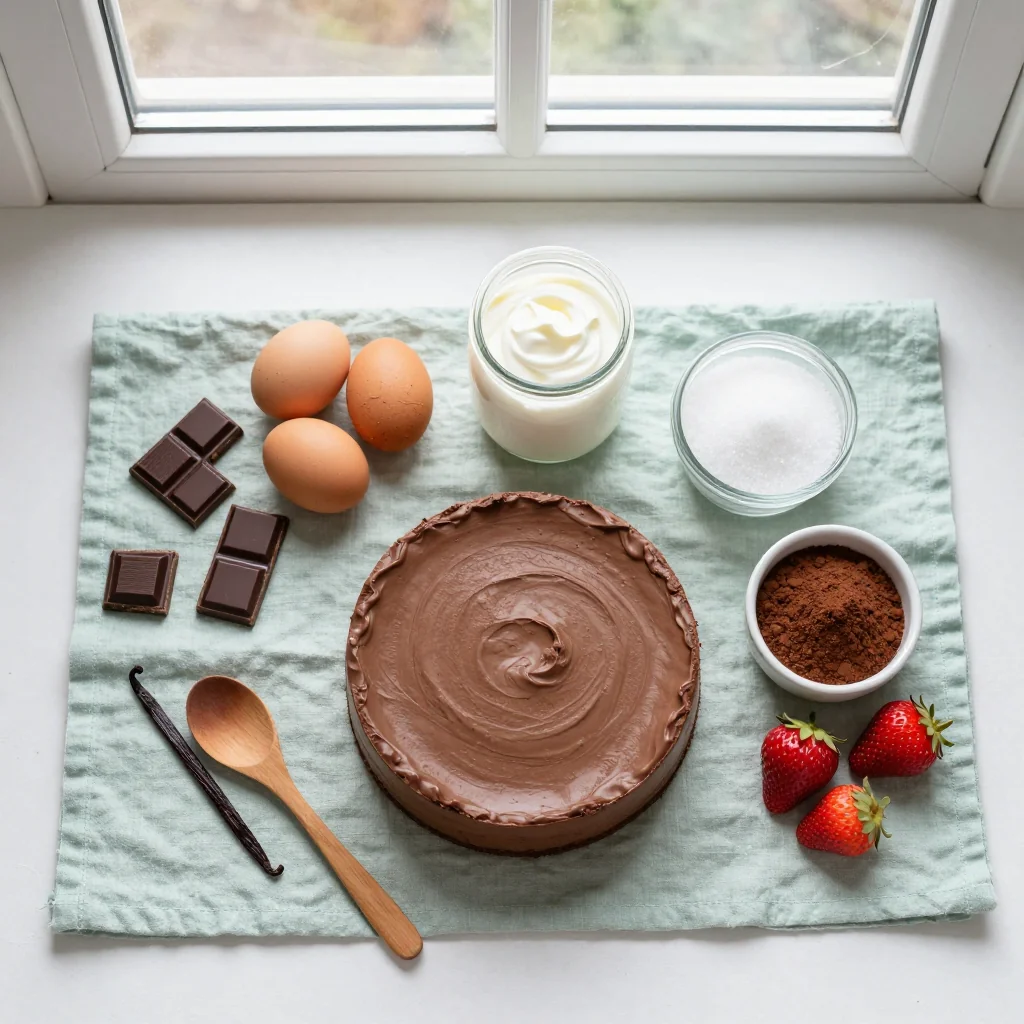
🥗 Ingredients
📝 Complete Ingredient List
For the Crust:
For the Chocolate Mousse:
For the Chocolate Glaze:
For Garnish (optional):
🔍 Focus on Key Ingredients
Dark Chocolate (70% Cocoa)
Dark chocolate provides the backbone of flavor. Its high cocoa percentage delivers a deep, slightly bitter note that balances the sweetness of the sugar and cream. Look for chocolate with a glossy finish and minimal added fats; this ensures a smooth melt and a glossy glaze. If you prefer a sweeter profile, you can use 60% cocoa, but the mousse will be less intense.
Heavy Cream
Heavy cream is essential for achieving the mousse’s airy texture. The fat content (minimum 35%) traps air when whipped, creating a stable foam that holds its shape even after chilling. For a lighter version, you can substitute with a mixture of half-and-half and a stabilizer like gelatin, but the classic richness comes from full‑fat cream.
Egg Yolks and Egg Whites
Egg yolks add silkiness and act as an emulsifier, while the beaten egg whites provide the lift that makes the mousse light. Fresh, high‑quality eggs are crucial; older eggs may not whip as well. If you’re concerned about raw eggs, you can gently temper the yolks over a bain‑marie before folding them into the chocolate.
🔄 Quick Substitutions
| If you don’t have... | Use instead... |
|---|---|
| Digestive biscuits | Gluten‑free graham crackers |
| Unsalted butter | Salted butter (reduce added salt) |
| Dark chocolate (70%) | Semi‑sweet chocolate (60%) |
👨🍳 Step‑by‑Step Instructions
Follow these detailed steps to create a flawless Chocolate Mousse Cake, from crust to glaze.
📋 Phase 1: Preparing the Crust
The crust forms the foundation; a crisp yet tender base is key.
Crush the biscuits
Place the digestive biscuits in a large zip‑top bag and crush them with a rolling pin until they form fine crumbs. For an even texture, pulse them in a food processor for 5‑6 seconds. The crumbs should resemble fine sand, not large chunks.
Combine butter and sugar
In a medium bowl, whisk together the melted butter and 2 tbsp of granulated sugar until the mixture is glossy. The sugar helps the crust set firmly once chilled.
Mix crumbs and butter
Gradually add the biscuit crumbs to the butter‑sugar mixture, stirring until the crumbs are evenly coated. The mixture should hold together when pressed between your fingers.
Press into the pan
Transfer the crumb mixture into a 23‑cm (9‑inch) springform pan. Using the back of a spoon or the bottom of a flat glass, press the crumbs firmly and evenly across the bottom, creating a compact layer about 5 mm thick.
Chill the crust
Place the pan in the refrigerator for at least 15 minutes. This firms the crust, preventing it from becoming soggy when the mousse is added.
🔥 Phase 2: Making the Chocolate Mousse
This phase builds the airy heart of the cake.
Melt the chocolate
Set a heat‑proof bowl over a pot of simmering water (double boiler). Add the 300 g of chopped dark chocolate, stirring gently until fully melted and smooth. Remove from heat and let cool slightly, aiming for a temperature around 40 °C (104 °F).
Whisk yolks and sugar
In a separate bowl, whisk the 4 egg yolks with 50 g of sugar until the mixture turns pale yellow and doubles in volume, about 3‑4 minutes using an electric mixer on medium speed.
Combine chocolate and yolk mixture
Slowly pour the warm melted chocolate into the yolk‑sugar mixture while continuously whisking. The temperature should stay below 45 °C to avoid cooking the yolks. Add the vanilla extract and a pinch of salt, then mix until fully incorporated.
Whip the cream
In a chilled bowl, whip the 200 ml heavy cream with a pinch of sugar (optional) until soft peaks form. The cream should be thick but still pliable, ready to fold into the chocolate mixture.
Fold chocolate‑cream mixture
Using a spatula, gently fold the whipped cream into the chocolate‑yolk blend in two additions. Fold until the mixture is homogenous and no white streaks remain. Over‑mixing will deflate the mousse.
Beat egg whites to stiff peaks
In a clean, dry bowl, whisk the 4 egg whites until they form stiff, glossy peaks. This usually takes 3‑4 minutes on high speed. Ensure no yolk residue is present, as it will inhibit volume.
Incorporate egg whites
Fold the beaten egg whites into the chocolate‑cream mixture in three gentle motions, rotating the bowl as you go. The mousse should become light and airy, with a glossy sheen.
Assemble the cake
Remove the chilled crust from the refrigerator. Pour the mousse over the crust, smoothing the top with an offset spatula. Tap the pan gently on the counter to release any air bubbles.
Chill the assembled cake
Cover the springform pan with plastic wrap and refrigerate for at least 2 hours, preferably overnight. This allows the mousse to set firmly while the flavors meld.
✨ Phase 3: Glaze and Finish
The final shine that turns a great cake into a show‑stopper.
Prepare the chocolate glaze
Combine 100 g of dark chocolate and 30 g of butter in a heat‑proof bowl. Melt together over a double boiler, stirring until smooth. Remove from heat and let cool to about 30 °C (86 °F) – the glaze should be fluid but not too hot.
Glaze the cake
Place the chilled mousse cake on a wire rack set over a tray. Gently pour the warm glaze over the top, allowing it to flow down the sides. Use a spatula to smooth any uneven spots.
Set the glaze
Re‑refrigerate the glazed cake for 30 minutes to let the chocolate set. The glaze should become firm and glossy.
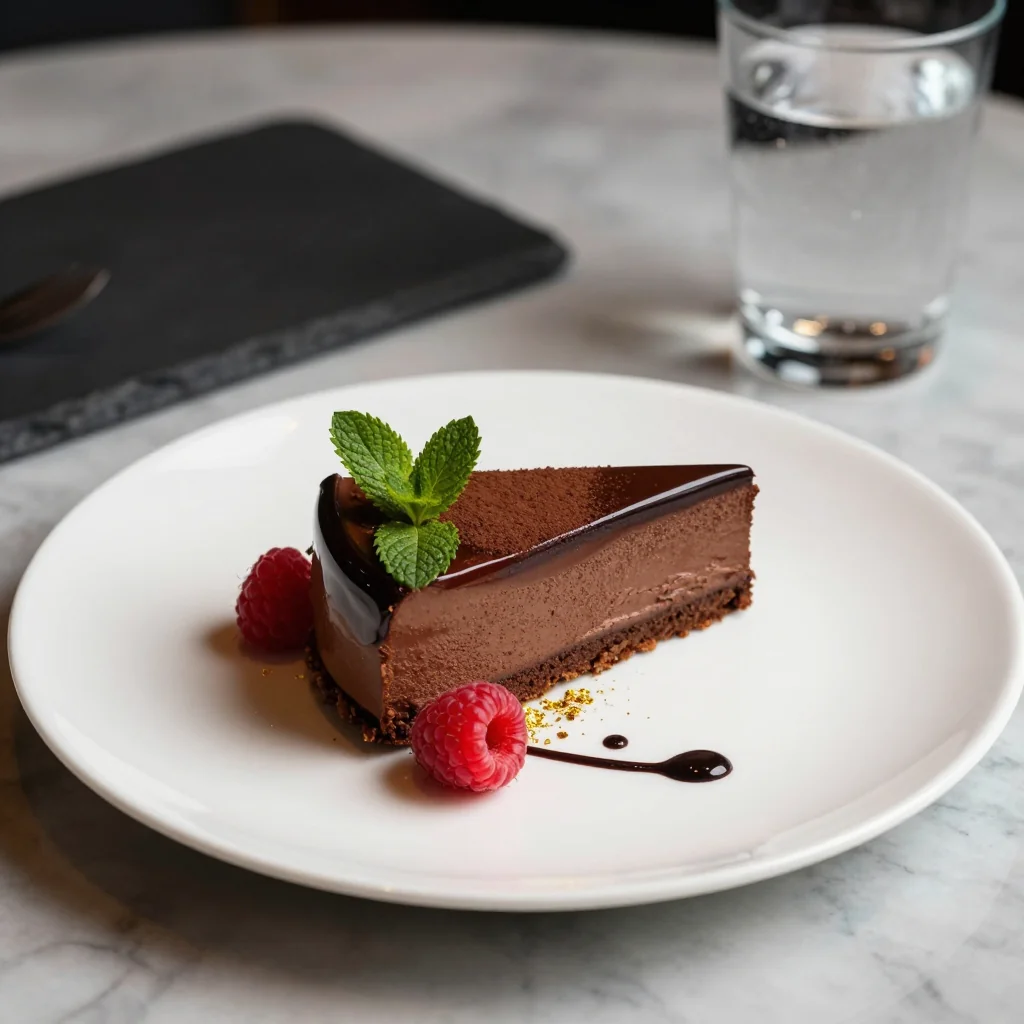
Unmold and garnish
Run a thin knife around the edge of the springform pan, release the latch, and gently lift the cake. Transfer to a serving platter. Dust lightly with cocoa powder and scatter fresh berries if desired.
Serve
Slice with a warm, wet knife for clean cuts. Serve chilled, optionally with a dollop of whipped cream or a scoop of vanilla ice cream.
💡 Expert Tips & Tricks
🛒 Choosing the Right Ingredients
Invest in premium dark chocolate with a high cocoa percentage; it provides depth and a glossy finish. When selecting biscuits, look for those that are lightly sweetened and have a fine texture, as overly sweet biscuits can dominate the flavor. Fresh, cold cream whips more easily, so keep it refrigerated until just before use. Finally, always use eggs at room temperature for better incorporation.
🔪 Preparation Techniques
Crush biscuits uniformly to avoid pockets of hardness. When melting chocolate, avoid direct heat to prevent scorching – a double boiler or microwave in short bursts works best. For the egg whites, ensure the bowl is completely clean and free of any grease; even a small amount can prevent the whites from reaching stiff peaks.
🌡️ Mastering the Chill
The mousse needs time to set; a minimum of 2 hours is required, but overnight chilling yields the best texture. If you’re short on time, place the cake in the coldest part of the fridge and cover tightly to prevent it from absorbing other odors. When glazing, the chocolate must be warm enough to flow but cool enough not to melt the mousse – aim for 30‑35 °C.
🍽️ Presentation & Service
Before serving, let the cake sit at room temperature for 10 minutes; this softens the glaze slightly for a smoother bite. Use a hot, wet knife to slice cleanly, wiping it between cuts. Pair the cake with a drizzle of raspberry coulis for a tart contrast, or serve alongside espresso for a classic French café experience.
🏆 Pro Secrets
Elevate your Chocolate Mousse Cake from delicious to extraordinary with these professional insights.
- 🎯 Temper the Chocolate for the Glaze: By gently heating chocolate to 45 °C, cooling to 27 °C, then reheating to 31 °C, you achieve a glossy, snap‑ready glaze that stays shiny at room temperature. This technique prevents bloom and gives a professional sheen.
- 🎯 Use a Silicone Ring for Uniform Height: Placing a 2‑inch silicone ring inside the springform pan ensures the mousse maintains a consistent thickness, resulting in even slices and a polished look.
- 🎯 Incorporate a Touch of Espresso Powder: Adding ½ tsp of instant espresso powder to the melted chocolate intensifies the chocolate flavor without imparting a coffee taste, a secret used by many pastry chefs.
- 🎯 Whisk Egg Yolks Over a Bain‑Marie: Gently cooking the yolks with sugar over steam creates a custard base that stabilizes the mousse, reducing the risk of curdling when combined with warm chocolate.
- 🎯 Freeze the Crust Slightly Before Adding Mousse: A quick 10‑minute freeze firms the butter, preventing the crust from becoming soggy as the mousse settles.
- 🎯 Finish with a Salted Caramel Drizzle: A thin line of salted caramel on the plate adds a sweet‑salty dimension that surprises the palate and balances the bitterness of dark chocolate.
"Chocolate is the ultimate comfort food, and when you master its textures, you unlock a world of endless possibilities." — Pierre Gagnaire
🔄 Variations & Adaptations
The versatility of this cake invites endless creativity. Below are several ways to tailor it to different diets and flavor preferences.
🥬 Vegetarian / Vegan Version
Swap dairy and eggs while preserving the mousse’s lightness. Use coconut cream (chilled) in place of heavy cream, and replace egg yolks with silken tofu blended smooth. For the egg whites, whisk aquafaba (the liquid from canned chickpeas) with a pinch of cream of tartar until stiff peaks form. Use a vegan dark chocolate (free from dairy) for both mousse and glaze.
- Replace 4 egg yolks with 200 g silken tofu.
- Replace 4 egg whites with 120 ml aquafaba.
- Use 300 ml coconut cream (chilled) instead of dairy cream.
🌶️ Flavor Variations
Experiment with additional flavor layers to suit seasonal moods or personal cravings.
Spicy Chili Version
Add ½ tsp of fine chili powder or a dash of cayenne to the melted chocolate. Garnish with a thin slice of fresh red chili for visual heat.
Mediterranean Olive & Orange Zest
Infuse the melted chocolate with a teaspoon of orange zest and a pinch of sea salt. Pair with a garnish of candied orange peel for a bright, aromatic twist.
Asian Matcha Fusion
Stir 1 tsp of high‑grade matcha powder into the whipped cream before folding. The subtle green tea flavor complements the chocolate and adds a striking color contrast.
⚠️ Dietary Adaptations
Gluten‑Free
Use gluten‑free biscuits or almond meal for the crust. Ensure the chocolate is certified gluten‑free.
Lactose‑Free
Swap regular butter with lactose‑free butter and heavy cream with coconut cream. Choose dairy‑free dark chocolate.
Low‑Calorie
Reduce sugar in the crust to 1 tbsp, use 70% dark chocolate (lower sugar content), and replace half of the heavy cream with low‑fat Greek yogurt for added protein.
👶 Kid‑Friendly Version
For younger palates, use milk chocolate (45% cocoa) for a sweeter taste, and omit the espresso powder. Top with colorful sprinkles instead of berries for visual appeal.
📦 Storage & Reheating
🧊 Conservation
Refrigerator
- Duration: 3 days
- Recommended container: airtight cake dome or sealed plastic container
- Tip: Place a sheet of parchment between the cake and the lid to prevent condensation from soaking the glaze.
Freezer
- Duration: 1 month
- Method: Wrap the cake tightly in plastic wrap, then a layer of aluminum foil.
- Defrosting: Transfer to the refrigerator overnight; avoid rapid thawing to keep the glaze intact.
💡 For best texture, consume within 48 hours of chilling; prolonged storage may cause the mousse to lose some of its airy lift.
♨️ Reheating
🔥 Oven (Recommended)
- Preheat to 150 °C (300 °F).
- Cover the cake loosely with aluminum foil.
- Warm for 10 minutes, then remove foil and continue for 5 minutes to revive the glaze.
⚡ Microwave (Quick)
- Place a slice on a microwave‑safe plate.
- Cover with a microwave‑safe lid or another plate.
- Heat on medium power for 20‑30 seconds; check and repeat if needed.
🍳 Stovetop (Rarely Needed)
If you prefer a gentle reheating, place a slice in a non‑stick skillet over low heat, cover, and warm for 1‑2 minutes, flipping once.
🍷 Perfect Pairings
🥗 Side Accompaniments
- Fresh Berries: A handful of raspberries or strawberries adds acidity that cuts through the richness.
- Light Citrus Salad: Thinly sliced orange segments with a drizzle of honey provide a bright contrast.
- Whipped Mascarpone: A dollop lightly sweetened with vanilla offers a creamy counterpoint.
🍷 Wine & Beverage Matches
- Ruby Port: Its sweet, fortified profile amplifies the chocolate’s depth.
- Late Harvest Riesling: The honeyed notes balance the bitterness of dark chocolate.
- Non‑Alcoholic: A chilled glass of espresso‑infused cold brew provides a bitter edge without alcohol.
🍰 Completing the Meal
Start with a crisp mixed green salad dressed in a light vinaigrette, move to a savory entrée such as seared duck breast with orange glaze, and finish with this mousse cake accompanied by a scoop of vanilla bean ice cream for a harmonious progression.
❓ Frequently Asked Questions
Q: Can I use milk chocolate instead of dark chocolate?
A: Yes, but milk chocolate contains more sugar and less cocoa butter, which can affect the firmness of the glaze. If you prefer a sweeter cake, use milk chocolate for the mousse and a higher‑cocoa dark chocolate for the glaze to maintain a glossy finish.
Q: How do I ensure the mousse doesn’t collapse?
A: The key is gentle folding and proper chilling. Over‑mixing deflates the air incorporated by the whipped cream and egg whites. Also, make sure the crust is well‑chilled before adding the mousse, and keep the assembled cake refrigerated for at least 2 hours to set the structure.
Q: Is it safe to consume raw egg yolks and whites?
A: If you’re concerned about salmonella, you can temper the yolks over a bain‑marie (heat them gently while whisking) until they reach 71 °C (160 °F). For the whites, use pasteurized egg whites available in most supermarkets, or substitute with aquafaba for a vegan alternative.
Q: What can I do if the glaze cracks?
A: Cracking usually occurs when the glaze is too cool or applied to a cake that isn’t fully chilled. Ensure the glaze is warm (30‑35 °C) and the cake is cold but not frozen. If cracks appear, gently re‑heat the glaze and smooth it over the surface.
Q: Can I make this cake ahead of time for a party?
A: Absolutely. Assemble the cake up to the glazing step and store it covered in the refrigerator overnight. Apply the glaze a few hours before serving to keep it shiny. The cake can be prepared up to 24 hours in advance.
Q: How do I adjust the recipe for a different number of servings?
A: Use the portion adjuster at the bottom of the recipe card. The JavaScript will automatically recalculate each ingredient marked with a data‑base attribute. For example, increasing from 8 to 12 servings multiplies each quantity by 1.5.
🎉 Let’s Get Baking!
This Chocolate Mousse Cake brings together the elegance of French patisserie with the comfort of a home‑made dessert. Its airy mousse, buttery crust, and glossy glaze make it a show‑stopper for celebrations, intimate dinners, or simply a well‑earned indulgence after a busy day. Remember, the secret lies in gentle folding, precise temperature control, and a good chill.
Now that you have all the tools, ingredients, and pro tips, it’s time to create a masterpiece that will delight every palate. Share your photos, ask questions in the comments, and let the world know how you’ve made this cake your own.
Have you tried this recipe?
Leave a comment and a rating below! Share your photos on Instagram with #MousseCakeMagic to be featured on our page.
Chocolate Mousse Cake
A silky chocolate mousse layered over a buttery biscuit crust, finished with a glossy chocolate glaze.
📝 Ingredients
Crust
Chocolate Mousse
Chocolate Glaze
👨🍳 Instructions
- 1 Crush the biscuits into fine crumbs and mix with melted butter and sugar.
- 2 Press the crumb mixture into the base of a 23 cm springform pan and chill for 15 minutes.
- 3 Melt the dark chocolate over a double boiler, let it cool slightly.
- 4 Whisk egg yolks with sugar until pale, then combine with melted chocolate and vanilla.
- 5 Whip heavy cream to soft peaks and fold into the chocolate mixture.
- 6 Beat egg whites to stiff peaks and gently fold them into the mousse.
- 7 Pour mousse over the chilled crust, smooth the surface, and refrigerate for at least 2 hours.
- 8 Melt chocolate and butter for the glaze, let it reach 30 °C.
- 9 Pour glaze over the set mousse, allowing it to coat the sides.
- 10 Chill again until glaze sets, then unmold, garnish, and serve.
🥗 Nutritional Information (per serving)
*Nutritional values are estimates based on standard ingredients.
📚 You Might Also Like
Raspberry Cheesecake
Lemon Tart
Vanilla Panna Cotta
💬 Comments & Reviews
Leave a Comment
No comments yet. Be the first to share your thoughts!