
Indulge in a velvety molten chocolate heart paired with silky vanilla ice cream – a perfect romantic dessert for any occasion.

The first time I tasted a molten chocolate cake, I was sitting on a tiny balcony in Paris, the Eiffel Tower glittering in the distance, and a gentle drizzle turning the cobblestones into mirrors. My date, a shy yet adventurous soul, stared at the glossy surface of the cake, and when the knife sliced through, a river of dark, glossy chocolate surged out, mingling with the cool vanilla ice cream I had placed beside it. The contrast of temperatures and textures sparked a memory that still makes my heart flutter.
Originating from the French “fondant au chocolat,” this dessert has traveled across continents, evolving from a simple bakery treat to a sophisticated plate that restaurants showcase as a signature indulgence. Its allure lies in the perfect balance between a crisp outer crust and a luscious, flowing interior that seems to defy the laws of baking.
In this guide, I will walk you through every nuance—from selecting the finest chocolate to mastering the timing that guarantees a perfectly molten center. You’ll discover why a modest 15‑minute prep and 12‑minute bake can yield a dessert that feels like a celebration, and how to pair it with premium vanilla ice cream for a harmonious finish.
Let’s dive into the world of molten magic together, and I promise you’ll finish this recipe with a smile as wide as the Seine.
🌟 Why This Recipe Will Captivate You
A chocolate lava cake is more than a dessert; it’s an experience that engages all your senses. Below are the reasons this particular version stands out.
- ✨ Simplicity Meets Elegance: Only eight ingredients are required, yet the result feels restaurant‑grade. The technique is straightforward, making it accessible without sacrificing sophistication.
- ✨ Perfect Portion Control: Designed for two, the recipe eliminates waste and ensures each serving receives an equal share of molten goodness.
- ✨ Texture Contrast Mastery: A crisp, buttery crust embraces a silky, flowing chocolate core, while the cold vanilla ice cream adds a refreshing counterpoint.
- ✨ Flexible Flavor Base: The use of 70% dark chocolate provides depth, but you can easily swap for milk chocolate for a sweeter profile without losing the lava effect.
- ✨ Speedy Execution: From start to finish in under half an hour, this dessert fits perfectly into a dinner party schedule or a spontaneous romantic night.
- ✨ Visual Drama: The dramatic oozing of chocolate when the cake is cut creates a show‑stopper moment that impresses guests and makes for stunning photography.
🥗 Ingredients
📝 Complete Ingredient List
For the Cake Batter:
- 56 g 70% dark chocolate, chopped
- 28 g unsalted butter
- 2 large eggs
- 30 g granulated sugar
- 8 g all‑purpose flour
- a pinch salt
For the Molten Center:
- 56 g 70% dark chocolate, chopped
- 14 g unsalted butter
For Serving:
- 100 g premium vanilla ice cream (2 scoops)
- a handful fresh berries (optional)

🔍 Focus on Key Ingredients
Dark Chocolate (70% Cocoa)
Dark chocolate provides the backbone of flavor in this lava cake. Its high cocoa content contributes a deep, slightly bitter note that balances the sweetness of the sugar and ice cream. When selecting chocolate, look for a glossy finish and a snap when broken – signs of quality cocoa butter content. If you prefer a milder taste, a 60% bar works well, but avoid chocolate chips that contain stabilizers which can affect the melt.
Unsalted Butter
Butter adds richness and creates the delicate crust that holds the molten interior. Unsalted butter lets you control the salt level precisely. For the best flavor, choose European‑style butter with a higher butterfat percentage (82% or more). Let it soften at room temperature before melting with the chocolate to ensure a smooth emulsion.
Eggs
Eggs act as the structural backbone, trapping air when whisked and giving the cake its light, airy rise. Fresh, large‑grade eggs are ideal; they provide the perfect balance of protein and fat. If you’re substituting, use a combination of whole egg plus a teaspoon of xanthan gum to mimic the binding properties, though the texture will differ slightly.
🔄 Quick Substitutions
| If you don’t have... | Use instead... |
|---|---|
| Dark chocolate (70%) | 60% dark chocolate or high‑quality milk chocolate |
| Unsalted butter | Salted butter (reduce added salt) |
| All‑purpose flour | Pastry flour for a lighter crumb |
👨🍳 Step‑by‑Step Instructions
Follow these detailed steps to create a perfectly molten chocolate cake that impresses every palate.
📋 Phase 1: Preparation & Mise en Place
Gather, measure, and pre‑heat before you begin the magic.
Preheat the Oven and Prepare Ramekins
Set your oven to 220°C (425°F). While it warms, butter two 6‑ounce ramekins thoroughly and dust each with a thin layer of cocoa powder. This coating prevents sticking and adds a subtle chocolate aroma to the final presentation.
Melt Chocolate and Butter for the Batter
In a heat‑proof bowl, combine 56 g dark chocolate and 28 g butter. Place the bowl over a pot of simmering water (double boiler) and stir gently until smooth and glossy. Remove from heat and let cool slightly—this prevents the eggs from cooking when added.
🔥 Phase 2: Mixing, Baking, and Creating the Lava Core
This stage builds the structure and the molten heart.
Whisk Eggs and Sugar
In a separate bowl, whisk together the two eggs and 30 g granulated sugar until the mixture becomes pale, thick, and triples in volume (about 3‑4 minutes with an electric mixer). This aeration is crucial for a light interior.
Combine Chocolate and Egg Mixture
Gently fold the slightly cooled chocolate‑butter mixture into the whisked eggs using a rubber spatula. Incorporate in two additions, preserving as much air as possible. The batter should be silky and slightly glossy.
Stir in Flour and Salt
Sift 8 g flour over the batter, add a pinch of salt, and fold just until incorporated. Over‑mixing will develop gluten, resulting in a denser cake.
Prepare the Molten Center
Melt the remaining 56 g dark chocolate with 14 g butter using the same double‑boiler method. Once smooth, spoon an even half‑teaspoon of this mixture into the bottom of each prepared ramekin. This creates the liquid core that will flow outward during baking.
Fill Ramekins with Batter
Divide the batter evenly between the two ramekins, filling each to about three‑quarters full. The batter will rise, enveloping the chocolate center.
Bake the Cakes
Place the ramekins on a baking sheet and bake for 12 minutes. The edges should be set and lightly crisp, while the center remains soft and slightly jiggles when gently shaken.
✨ Phase 3: Finishing Touches and Plating
Final checks and the spectacular reveal.
Check for Doneness
Insert a thin skewer near the edge; it should come out clean. The center will still be soft – this is the desired state for a lava flow.
Unmold and Plate
Let the cakes rest for 1 minute, then run a thin knife around the edges and invert each onto a warm dessert plate. The molten chocolate should cascade outward, creating a glossy river.
Add Ice Cream and Garnish
Place a generous scoop of vanilla ice cream beside each cake. Sprinkle fresh berries and a dusting of powdered sugar for visual contrast and a hint of acidity.
💡 Expert Tips & Tricks
🛒 Choosing the Right Ingredients
Opt for couverture chocolate, which contains a higher percentage of cocoa butter, ensuring a silky melt. When buying butter, look for a label that lists “European style” or “high butterfat.” Fresh, free‑range eggs provide better emulsification, leading to a smoother batter. For the ice cream, select a custard‑based vanilla that contains real vanilla beans rather than artificial flavor.
🔪 Preparation Techniques
Before melting chocolate, chop it into uniform pieces; this guarantees even melting and prevents scorching. When whisking eggs and sugar, start on low speed and gradually increase to avoid splattering. Use a rubber spatula for folding – a gentle motion preserves the air you’ve incorporated.
🌡️ Mastering the Cooking Process
Oven temperature is critical. Use an oven thermometer to verify that 220°C is accurate; many home ovens run hotter. Rotate the baking sheet halfway through the bake for even heat distribution. Do not over‑bake; the cake should still wobble slightly in the center when you tap the plate.
🍽️ Presentation & Service
Warm the plates in the oven for 2 minutes before plating; this helps keep the molten center flowing longer. Add a small drizzle of caramel or raspberry coulis for a color contrast. Serve immediately while the center is still liquid; the ice cream will soften the heat and create a luscious mouthfeel.
🏆 Pro Secrets
Professional chefs distinguish themselves by mastering subtle details that elevate a good dish to an unforgettable one.
- 🎯 Temperature Shock: After baking, briefly place the ramekin on a hot skillet for 10 seconds. This creates a crispier crust while preserving the molten interior.
- 🎯 Precise Portion Scaling: Use a digital scale to weigh chocolate and butter to the gram. Small variations in fat content dramatically affect the flow of the lava.
- 🎯 Air Incorporation Science: Whisking the eggs and sugar creates a foam that traps air bubbles. These bubbles expand during baking, giving the cake its rise without the need for leavening agents.
- 🎯 Butter Temperature Control: Softened butter (room temperature) integrates better with melted chocolate, preventing grainy texture.
- 🎯 Ramekin Material Choice: Ceramic ramekins retain heat evenly, whereas glass can cause uneven baking and affect the lava’s consistency.
- 🎯 Serving Timing: Serve the cake within 2 minutes of removal from the oven to ensure the center remains fluid; after that, the lava will solidify.
“The secret to a perfect lava cake is not just the chocolate, but the timing; a chef’s intuition turns a simple batter into a river of indulgence.” — Chef Jacques Lambert
🔄 Variations & Adaptations
This recipe is a canvas for creativity. Below are several ways to tailor it to dietary preferences, flavor cravings, or seasonal themes while preserving the iconic molten core.
🥬 Vegetarian / Vegan Version
Replace butter with a 1:1 ratio of coconut oil or vegan butter, and use a high‑quality dark chocolate that’s dairy‑free. Substitute eggs with a blend of 2 Tbsp aquafaba (chickpea liquid) whisked until frothy, combined with 1 tsp cream of tartar to mimic egg structure. The texture will be slightly lighter but still delivers a luscious flow.
- Vegan butter (or coconut oil) – provides the same fat content without dairy.
- Aquafaba – creates the necessary foam for lift.
🌶️ Flavor Variations
Play with complementary flavors to create themed experiences. Below are three popular twists:
Spicy Chili Chocolate
Add ¼ tsp cayenne pepper to the chocolate‑butter mixture and a pinch of smoked paprika to the batter. The heat amplifies the chocolate’s depth and pairs beautifully with the cool ice cream.
Mediterranean Orange‑Rose
Infuse the melted chocolate with 1 tsp orange zest and a few drops of rose water. This floral‑citrus profile brightens the richness and works well with a scoop of honey‑sweetened ricotta ice cream.
Asian Matcha Twist
Mix 1 tsp high‑grade matcha powder into the batter for a subtle green hue and earthy note. Serve with green tea ice cream and garnish with toasted sesame seeds.
⚠️ Dietary Adaptations
Gluten‑Free
Substitute all‑purpose flour with an equal amount of almond flour or a certified gluten‑free blend. Almond flour adds a nutty undertone that complements the chocolate.
Lactose‑Free
Use lactose‑free butter or a blend of coconut oil and dairy‑free cream. Ensure the chocolate you select is dairy‑free; many premium brands label this clearly.
Low‑Calorie
Reduce sugar to 20 g, use 40 % dark chocolate (less fat), and replace ice cream with a dollop of Greek yogurt sweetened with stevia. The result is lighter but still maintains the signature molten center.
👶 Kid‑Friendly Version
For younger palates, swap the dark chocolate for milk chocolate and add a splash of vanilla extract to the batter. Serve with a fun-shaped cookie instead of ice cream, and omit any strong spices. The texture remains soft, and the sweetness is more approachable for children.
📦 Storage & Reheating
🧊 Conservation
Refrigerator
- Duration: 2 days
- Recommended container: Airtight glass or plastic container
- Tip: Keep the ramekins covered with parchment to avoid absorbing fridge odors.
Freezer
- Duration: 1 month
- Method: Wrap each ramekin tightly in plastic wrap, then place in a freezer bag.
- Defrosting: Transfer to the refrigerator overnight, then let sit at room temperature for 20 minutes before baking.
💡 Note: For best texture, bake from a fully thawed state; frozen batter may produce a denser crust.
♨️ Reheating
🔥 Oven (Recommended)
- Preheat to 180°C (350°F).
- Cover each ramekin loosely with aluminum foil.
- Reheat for 8‑10 minutes.
- Remove foil and bake an additional 2 minutes to restore a crisp crust.
⚡ Microwave (Quick)
- Place the cake on a microwave‑safe plate.
- Heat on medium power for 30 seconds.
- Check; if not fully warmed, add 10‑second intervals.
🍳 Stovetop
Place the ramekin in a skillet with a thin layer of water, cover, and heat on low for 5‑6 minutes. The steam gently warms the cake without drying the exterior.
🍷 Perfect Pairings
🥗 Side Dishes
- Fresh Mixed Berries: Their acidity cuts through the richness, offering a bright contrast.
- Light Citrus Salad: A salad of orange segments, mint, and a drizzle of honey balances the dessert’s heaviness.
- Caramelized Bananas: Warm bananas add a sweet, buttery note that harmonizes with the chocolate.
🍷 Wine & Beverage Pairings
- Ruby Port: Its sweet, fortified character mirrors the chocolate’s depth.
- Late Harvest Riesling: The honeyed acidity refreshes the palate between bites.
- Non‑Alcoholic: A chilled glass of sparkling pomegranate juice offers a festive, tart counterpoint.
🍰 Completing the Meal
Begin with a light appetizer such as a goat cheese and fig crostini, followed by a crisp green salad with vinaigrette. After the lava cake, serve a palate‑cleansing sorbet—perhaps lemon or raspberry—to finish the dining experience on a refreshing note.
❓ Frequently Asked Questions
Q: Can I use a different size of ramekin?
Yes, you can use 8‑ounce ramekins for a larger portion, but you’ll need to increase the batter and chocolate center proportionally (about 1.5×). Adjust baking time to 14‑15 minutes to ensure the interior stays molten.
Q: Why does my cake sometimes turn out solid instead of liquid?
Over‑baking is the most common cause. The cake continues to cook from residual heat after removal, so it’s crucial to stop the bake when the edges are set but the center still jiggles. Also, ensure the oven temperature is accurate; an oven that runs hot will solidify the center faster.
Q: How can I make the chocolate center even richer?
Incorporate a tablespoon of heavy cream into the molten chocolate mixture before spooning it into the ramekins. This creates a ganache‑like core that is smoother and more luxurious.
Q: Is it possible to prepare the batter ahead of time?
Absolutely. You can whisk the egg‑sugar foam and melt the chocolate‑butter mixture, then combine them and refrigerate the batter for up to 24 hours. Bring the batter to room temperature before filling the ramekins to ensure even baking.
Q: What’s the best way to melt chocolate without burning it?
Use a double‑boiler or a microwave in short 15‑second bursts, stirring between each burst. This gentle heat prevents scorching and preserves the chocolate’s glossy texture.
Q: Can I substitute the ice cream with something dairy‑free?
Yes, coconut‑milk ice cream or a cashew‑based vanilla “ice cream” works beautifully. Choose a brand with a creamy texture to maintain the contrast between hot cake and cold accompaniment.
🎉 To Your Oven!
This Chocolate Lava Cake for Two is a celebration of contrasts—warm and cold, crisp and liquid, bitter and sweet—all wrapped in a single bite. By following the precise steps and embracing the pro tips, you’ll achieve a dessert that feels like it belongs in a five‑star restaurant, yet it’s simple enough for a cozy night at home. The molten heart, paired with velvety vanilla ice cream, creates a harmonious dance that will leave you and your guest craving more.
I invite you to experiment with the variations, share your personal twists, and let the aroma of chocolate fill your kitchen. Your feedback fuels my culinary journey, so please leave a comment, rate the recipe, and spread the love on social media.
Have you tried this recipe?
Leave a comment and rating below! Share your photos on Instagram with #LavaLove to be featured on our blog.
Chocolate Lava Cake for Two with Ice Cream
A decadent molten chocolate cake served with velvety vanilla ice cream – perfect for a romantic indulgence.
📝 Ingredients
For the Cake Batter
For the Molten Center
For Serving
👨🍳 Instructions
- 1 Preheat oven to 220°C (425°F) and butter two 6‑ounce ramekins, then dust with cocoa powder.
- 2 Melt 56 g chocolate and 28 g butter together in a double‑boiler; set aside to cool slightly.
- 3 Whisk 2 eggs with 30 g sugar until pale and tripled in volume.
- 4 Fold the melted chocolate into the egg mixture, then sift in 8 g flour and a pinch of salt.
- 5 Melt the remaining chocolate and butter for the center; spoon half‑teaspoon into each ramekin.
- 6 Divide batter evenly between ramekins, filling three‑quarters full.
- 7 Bake for 12 minutes until edges are set and the center still jiggles.
- 8 Let rest 1 minute, then invert onto plates; the lava should flow outward.
- 9 Add a scoop of vanilla ice cream and garnish with fresh berries.
- 10 Serve immediately and enjoy the contrast of hot chocolate and cold ice cream.
🥗 Nutritional Information (per serving)
*Values are estimates based on standard ingredient brands.
📚 You Might Also Like
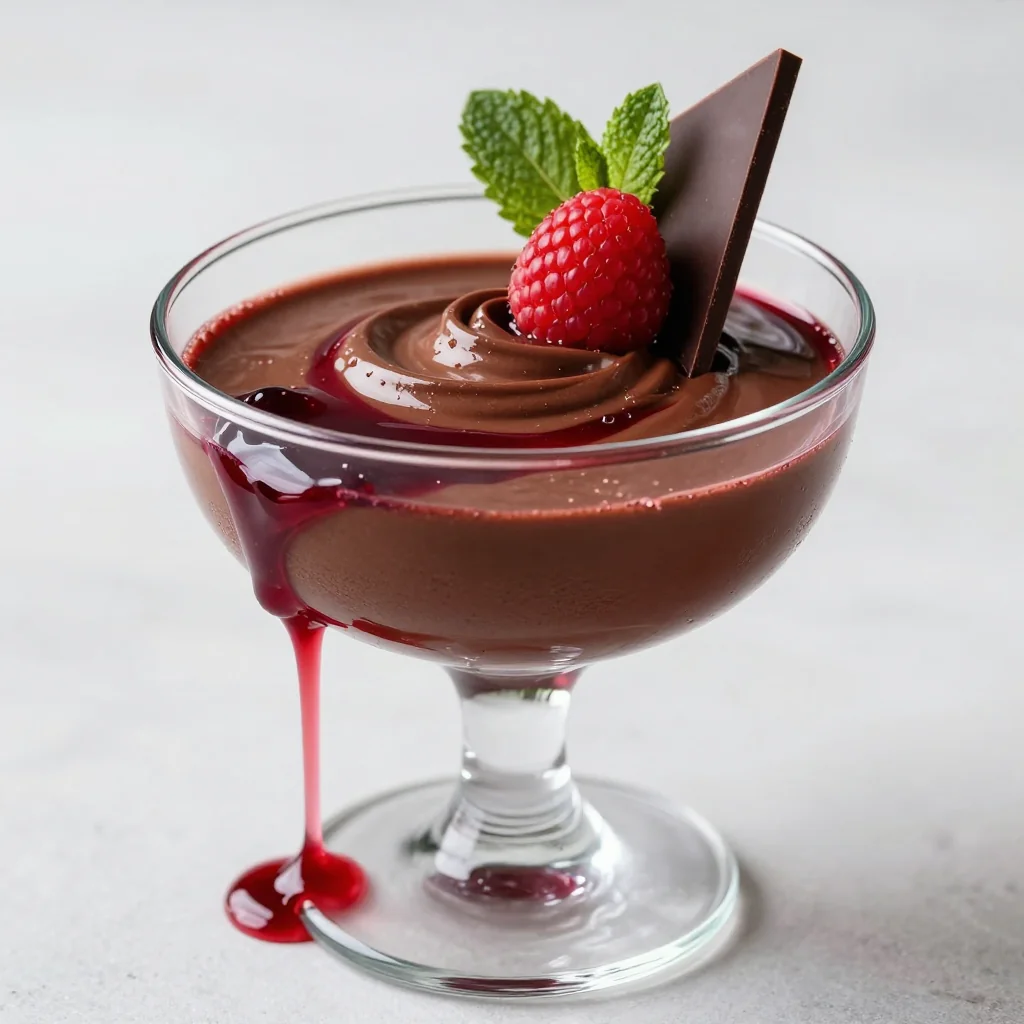
Raspberry Chocolate Mousse
Classic Tiramisu
Pistachio Panna Cotta


💬 Comments & Reviews
Leave a Comment
Comments from readers will appear here.