Picture this: a quiet Saturday afternoon, a pot of marinara simmering, and the faint aroma of freshly baked bread drifting through the kitchen. I was in the midst of a culinary experiment—trying to turn a classic chicken parm into a handheld, crowd‑pleasing bite. The first time I cracked the chicken into the pan, the sizzle was so loud it sounded like a drum solo, and the golden crust was begging for a bite. But I kept it whole, wrapped it in cheese, and slid it onto a bun. That moment, the kitchen exploded with aroma, flavor, and a hint of triumph. I dare you to taste this and not go back for seconds.
The first bite was a revelation: the chicken was tender, the bread was crisp, and the mozzarella was molten, oozing into the marinara like a warm, cheesy waterfall. The sauce was thick and tangy, coating the chicken like velvet, while the fresh basil added a bright, herbal note that cut through the richness. My taste buds were in a state of blissful confusion—was this comfort food or gourmet? It was both, and it felt like the universe had finally answered my culinary prayers. If you've ever struggled with the classic chicken parm, you're not alone, and I've got the fix. This is hands down the best version you'll ever make at home.
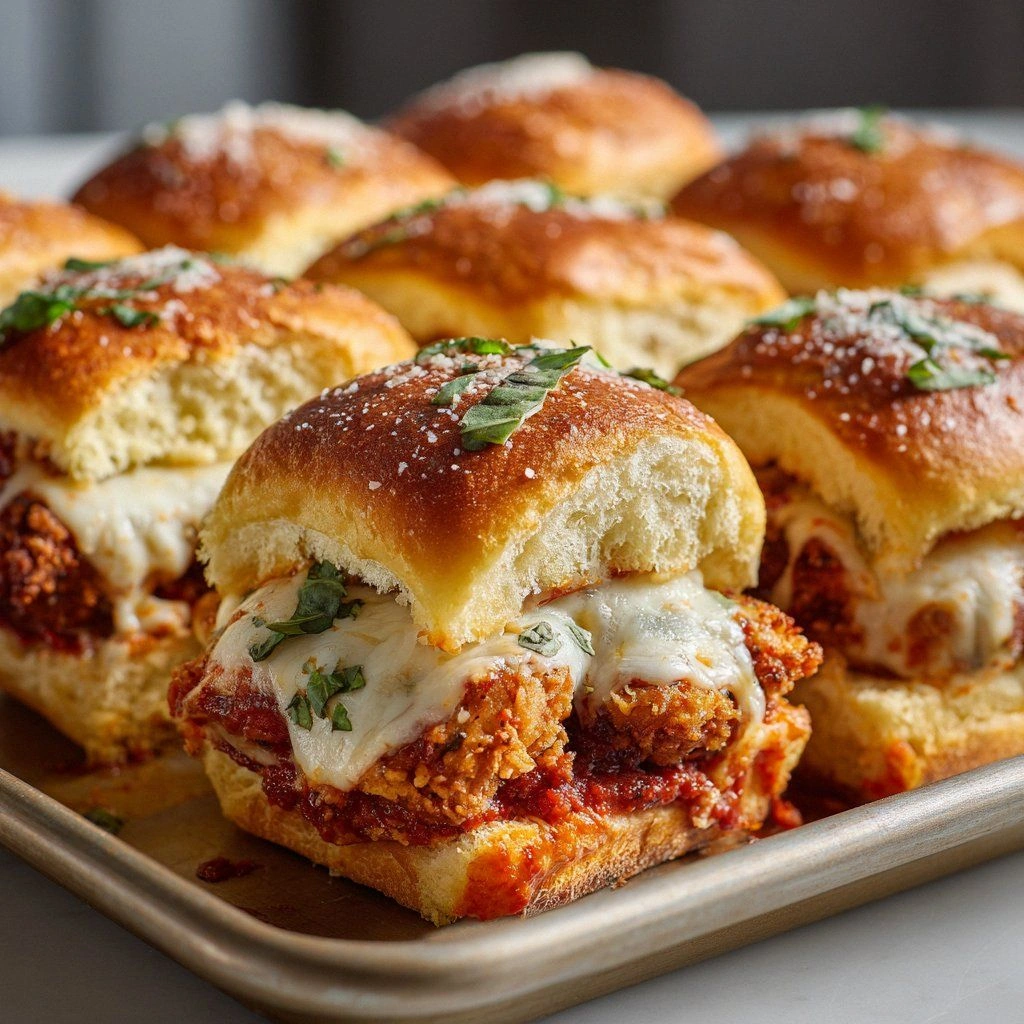
What sets these sliders apart is the meticulous layering of textures and flavors. The bread isn’t just a carrier; it’s a crunchy canvas that holds the sauce without getting soggy. The chicken is marinated just enough to keep it juicy but not so much that it loses its bite. The mozzarella, combined with a generous dusting of Parmesan, creates a gooey, cheesy halo that melts into every corner of the bun. The marinara sauce is homemade, with a hint of garlic and basil, giving it depth and a touch of sweetness. The final flourish? A drizzle of olive oil that adds a glossy sheen and a subtle peppery kick. Picture yourself pulling these out of the oven, the whole kitchen smelling incredible, and the first bite delivering that perfect crunch.
Now, let’s walk through every single step together. By the end, you’ll wonder how you ever made chicken parm in any other way. I’ll guide you through the prep, the batter, the cooking, and the assembly, peppering the process with my favorite hacks, warnings, and little secrets that will elevate your sliders from good to unforgettable.
What Makes This Version Stand Out
- Crunch Factor: The panko breadcrumbs give a light, airy crunch that doesn’t turn soggy, even when stacked.
- Cheese Fusion: Combining mozzarella and Parmesan creates a melt that’s both stretchy and flavorful, unlike the single-cheese approach.
- Sauce Depth: A homemade marinara with fresh tomatoes, garlic, and basil delivers a richer taste than store‑bought.
- Easy Assembly: The sliders come together in minutes, making them ideal for busy weeknights or last‑minute gatherings.
- Make‑Ahead Friendly: You can assemble them a day ahead and bake just before serving, saving time on the day of the event.
- Kid‑Friendly: The mild flavor and fun shape make them a hit with children and adults alike.
Alright, let’s break down exactly what goes into this masterpiece…
Inside the Ingredient List
The Flavor Base
The marinara sauce is the heart of these sliders. Made from crushed San Marzano tomatoes, a splash of red wine, and fresh basil, it offers a sweet‑savory profile that lingers on the palate. If you’re short on time, a good quality jarred sauce works, but adding a pinch of sugar and a splash of balsamic vinegar can elevate it instantly. Skipping the sauce would strip the sliders of their signature moisture and depth, turning them into bland bread and chicken.
The Texture Crew
The combination of all‑purpose flour, beaten eggs, and panko breadcrumbs creates a batter that crisps up beautifully without becoming heavy. The flour provides structure; the eggs bind the mixture; and the panko gives that airy crunch. If you substitute regular breadcrumbs, the sliders will become denser and less airy, which can overwhelm the delicate flavors. For a gluten‑free option, use a 1:1 gluten‑free flour blend.
The Unexpected Star
Fresh basil isn’t just a garnish; it’s a flavor enhancer that brightens the sauce and complements the cheese. Adding chopped basil to the sauce while it simmers infuses it with aromatic oils, giving the sliders an herbaceous finish. Without basil, the dish would feel flat and one‑dimensional. A handful of fresh basil leaves on top before serving gives a pop of color and freshness.
The Final Flourish
A drizzle of olive oil and a pat of butter on the buns before baking adds a glossy sheen and a subtle peppery note that balances the richness. The butter melts into the bread, creating a buttery crust, while the olive oil keeps the cheese from drying out. Skipping this step would leave the sliders feeling dry and less appetizing.
Everything’s prepped? Good. Let’s get into the real action…
The Method — Step by Step
- Begin by preheating your oven to 400°F (200°C). While the oven warms, lay out the slider buns on a baking sheet. The heat will help the buns brown slightly, giving them a firm base. Watch Out: Over‑baking the buns can make them hard; keep an eye on them after 8 minutes.
- Pat the chicken breasts dry with paper towels, then season both sides with salt, pepper, and Italian seasoning. A light coating of seasoning ensures every bite is flavorful. If you prefer a spicier kick, sprinkle a pinch of red pepper flakes.
- Set up a breading station: place flour in one shallow dish, beaten eggs in a second, and panko breadcrumbs in a third. This setup keeps the process organized and prevents the batter from getting soggy. Coat each chicken breast first in flour, shaking off excess, then dip in eggs, and finally coat with breadcrumbs. Press the crumbs onto the chicken to ensure a firm crust.
- Heat olive oil in a large skillet over medium heat. Once hot, add the breaded chicken and cook for 3–4 minutes per side, until golden brown. The sizzle is the first clue that the crust is forming correctly. Flip carefully to avoid tearing the coating.
- Transfer the seared chicken to a baking dish. Spoon a generous ladle of marinara sauce over each piece, then top with shredded mozzarella and a sprinkle of Parmesan. The cheese will melt into the sauce, creating a luscious, gooey layer.
- Pop the dish into the preheated oven and bake for 10–12 minutes, or until the cheese is bubbly and the chicken reaches an internal temperature of 165°F (74°C). The cheese should be slightly browned at the edges, indicating a perfect melt.
- While the chicken bakes, melt the butter in a small saucepan and drizzle it over the buns. This step adds a buttery crunch and prevents the buns from absorbing too much sauce. Let the butter sit for a minute; the heat will create a subtle glaze.
- As soon as the chicken is done, remove it from the oven and let it rest for 3 minutes. This resting period allows the juices to redistribute, keeping the meat moist. Then, place each chicken patty onto a bun, top with fresh basil leaves, and serve immediately. The contrast of the hot, melty cheese against the cool, fresh basil is the secret to an unforgettable bite.
That’s it — you did it. But hold on, I've got a few more tricks that'll take this to another level…
Insider Tricks for Flawless Results
The Temperature Rule Nobody Follows
Cooking at the right temperature is crucial. Many people bake these at 375°F, but that can cause the buns to over‑brown before the chicken is cooked. 400°F ensures a crisp exterior while keeping the interior moist. If you’re using a convection oven, lower the temperature by 25°F to avoid over‑browning.
Why Your Nose Knows Best
Close your eyes and sniff the sauce. The aroma of simmering tomatoes and basil is a sign of a well‑seasoned sauce. If it smells flat, add a splash of red wine or a pinch of sugar to enhance the depth. A well‑aromaed sauce translates to a more flavorful bite.
The 5‑Minute Rest That Changes Everything
Letting the chicken rest for five minutes after baking allows the juices to settle. This simple step prevents the meat from drying out and ensures each bite stays succulent. If you’re short on time, a quick 2‑minute rest still offers noticeable benefits.
Bun Buttering Brilliance
Melt butter with a teaspoon of olive oil and brush it over the buns before baking. The butter adds flavor and creates a crisp, golden crust that holds the sauce without becoming soggy. Without this step, the buns can become limp and less enjoyable.
The Crispy Edge Trick
After breading, lightly dust the chicken with a mixture of flour and a pinch of baking powder. The baking powder creates tiny air pockets during frying, giving an extra crunch that’s impossible to replicate with flour alone. This trick elevates the texture from good to spectacular.
Creative Twists and Variations
This recipe is a playground. Here are some of my favorite ways to switch things up:
Spicy Jalapeño Kick
Add sliced fresh jalapeños to the marinara sauce for a fiery punch. The heat pairs wonderfully with the creamy cheese, creating a layered flavor profile that excites the palate. Ideal for those who love a bit of spice.
Mediterranean Pesto Slider
Swap the marinara for a basil pesto sauce and add sun‑dried tomatoes. The pesto’s nutty flavor complements the chicken, while the sun‑dried tomatoes add a sweet, chewy bite. This version brings a Mediterranean flair to the table.
BBQ Buffalo Blend
Use a smoky barbecue sauce in place of marinara, and drizzle hot sauce over the cheese before baking. The combination of sweet, tangy, and spicy flavors creates a bold, adventurous slider that’s sure to wow.
Vegan Version
Replace chicken with grilled portobello mushrooms, use plant‑based mozzarella and Parmesan, and bake in a vegan marinara. The earthy mushroom flavor pairs beautifully with the rich sauce, offering a hearty, plant‑based alternative.
Breakfast Slider
Swap the chicken for a fried egg and top with a drizzle of hollandaise sauce. The buttery sauce and runny yolk create a decadent breakfast treat that’s perfect for brunch gatherings.
Storing and Bringing It Back to Life
Fridge Storage
Store assembled sliders in an airtight container in the refrigerator for up to 2 days. Keep the sauce separate until just before serving to prevent sogginess. Reheat in a 350°F oven for 5 minutes to restore crispness.
Freezer Friendly
For longer storage, freeze individual components: buns, chicken, and sauce. Reheat separately in a toaster oven or microwave, then assemble fresh. This method preserves texture and flavor better than freezing assembled sliders.
Best Reheating Method
The key to a great reheated slider is a quick bake at 375°F for 4–5 minutes. Adding a splash of water to the bottom of the pan creates steam, preventing the cheese from drying out and keeping the buns tender.