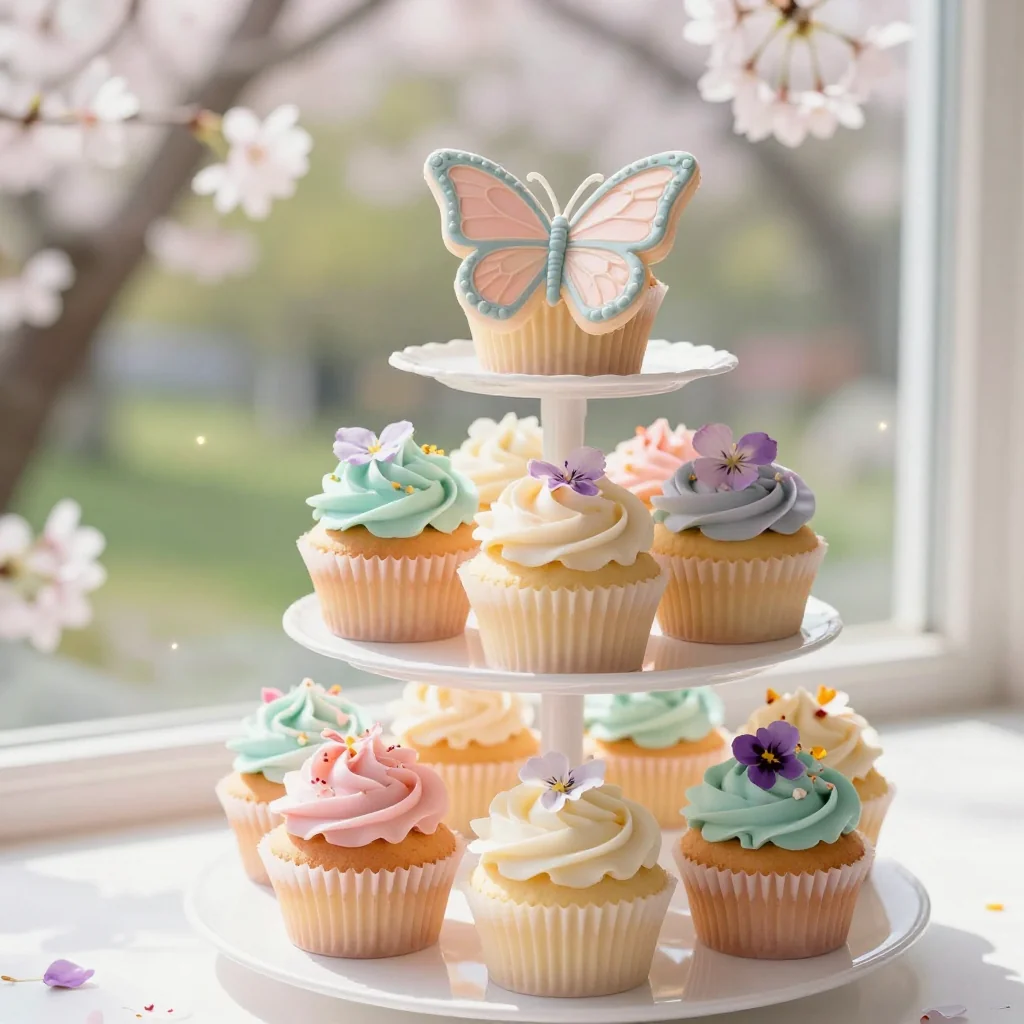
The first time I saw a butterfly cupcake, it was at a sun‑drenched garden party in early April, when the lilacs were just beginning to perfume the air. A gentle breeze carried the sweet scent of vanilla and fresh strawberries, and the cupcakes—delicately perched on pastel plates—seemed to flutter as if they were real insects. I remember the soft, buttery crumb melting on my tongue, the velvety buttercream that hinted at citrus, and the surprise burst of raspberry jam hidden in the center. The sight of the pastel‑colored frosting swirled like a sunrise, and the faint sparkle of edible glitter caught the light, turning each bite into a miniature celebration of spring. That moment taught me that a dessert can be both a visual marvel and an emotional memory, and it inspired the butterfly cupcake that I now bake every season.
Butterfly Cupcakes – Spring’s Sweetest Flight
At a Glance
Why You'll Love This
These cupcakes are a celebration of color, texture, and the fleeting joy of spring. Each bite balances airy sponge, silky buttercream, and a surprise jam center that awakens the palate.
🦋 Eye‑Catching Design – The butterfly wings are piped with precision, turning every cupcake into a miniature work of art.
🍓 Fresh Flavor Profile – Raspberries, lemon zest, and a hint of vanilla create a bright, spring‑forward taste.
⚡ Quick Assembly – With a few simple tools you can pipe, fill, and decorate in under an hour.
💚 Seasonal Ingredients – Uses fresh strawberries and lemon, perfect for the first farmers’ market finds.
Ingredients
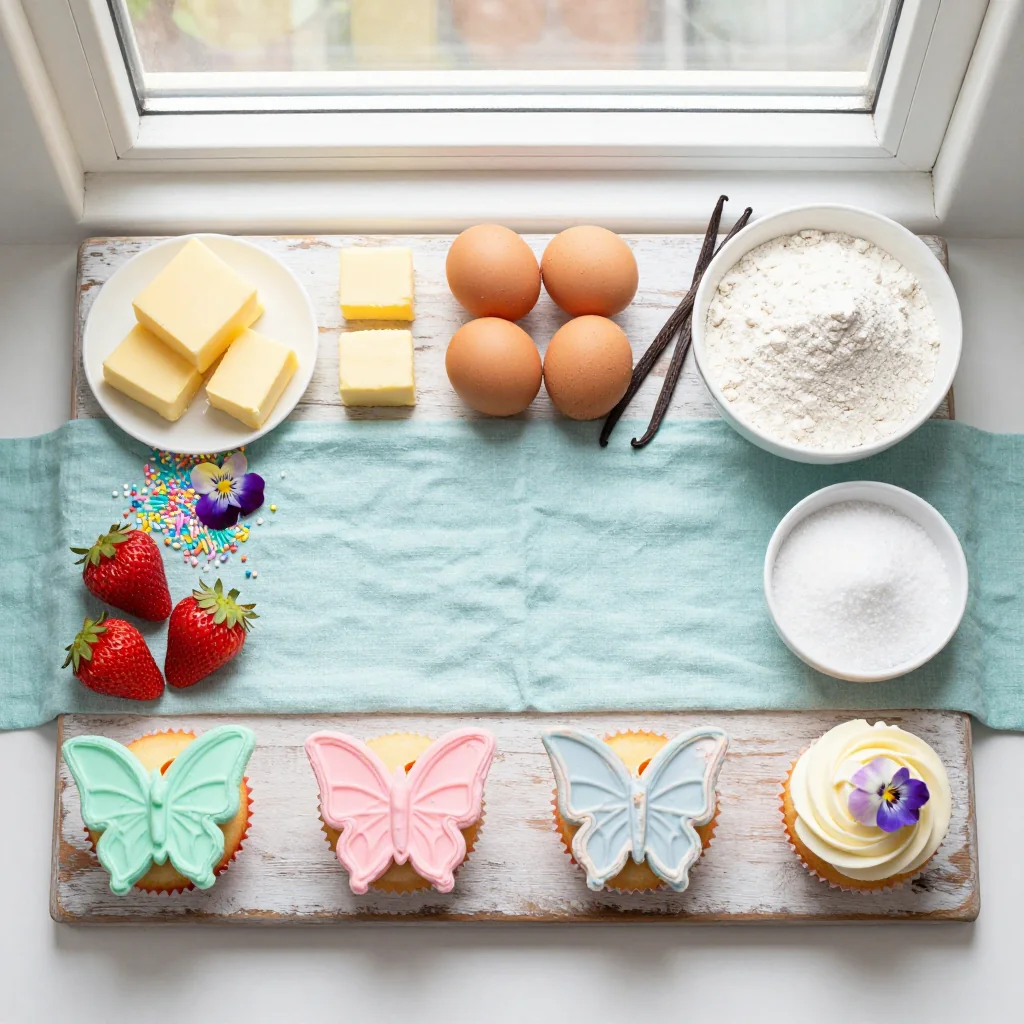
Main Ingredients
- 1 ½ cups (190 g) all‑purpose flour
- ½ cup (115 g) unsalted butter, softened
- ¾ cup (150 g) granulated sugar
- 3 large eggs, room temperature
- ¼ cup (60 ml) whole milk
- 1 tsp vanilla extract
- 1 ½ tsp baking powder
- ¼ tsp salt
- Natural food coloring (pink & teal)
- Edible glitter (optional)
For the Filling & Frosting
- ½ cup (120 ml) heavy cream
- 8 oz (225 g) cream cheese, softened
- ¼ cup (50 g) powdered sugar
- 1 tsp lemon zest
- ½ cup (120 g) fresh raspberry jam
- 2 tbsp unsalted butter, melted (for glaze)
- Pinch of sea salt
Shopping Tips
- Choose unsalted butter so you can control the salt level.
- For the brightest frosting, buy a small bottle of gel food coloring rather than liquid.
- Fresh, ripe raspberries give the jam a natural sweetness and less need for added sugar.
- If you’re allergic to dairy, substitute the cream cheese with a vegan cream cheese and use coconut cream for the whipped topping.
Equipment
Instructions
Prep the Dry Ingredients
In a medium bowl whisk together flour, baking powder, and salt. This ensures an even rise and prevents any gritty pockets in the crumb.
Look for: a smooth, uniform powder without clumps.
5 minCream Butter & Sugar
Using the stand mixer on medium speed, beat the softened butter with granulated sugar until the mixture is light, fluffy, and pale yellow—about 3–4 minutes.
Look for: a ribbon that falls off the beaters slowly.
7 minIncorporate Eggs & Vanilla
Add eggs one at a time, beating well after each addition, then stir in vanilla extract. The batter should look glossy and slightly thickened.
Look for: a batter that coats the back of a spoon.
5 minCombine Wet & Dry
Gradually add the dry flour mixture to the butter‑egg blend, alternating with milk. Begin and end with the flour. Mix on low speed just until incorporated; over‑mixing will make the cupcakes dense.
Look for: a batter that moves as a single, smooth sheet.
4 minAdd Color & Fill Liners
Divide the batter in two bowls. Tint one portion with pink food coloring and the other with teal. Fill each silicone liner about two‑thirds full, alternating colors for a marbled effect.
Look for: a vibrant, evenly colored batter.
3 minBake to Perfection
Place the tray in a pre‑heated oven at 175 °C (347 °F) and bake for 18–20 minutes, or until a toothpick inserted into the center emerges clean. The tops should be lightly golden and spring back when touched.
Look for: a firm crust with a slight dome.
20 minCool & Fill
Allow cupcakes to cool in the pan for 5 minutes, then transfer to a wire rack. Once completely cool, use a small spoon or a piping tip to create a shallow well in the center of each cupcake and fill with raspberry jam.
Look for: a smooth, glossy jam surface.
10 minPipe the Butterfly Frosting
Beat heavy cream, softened cream cheese, powdered sugar, and lemon zest until soft peaks form. Transfer to a piping bag fitted with a butterfly tip, then pipe elegant wings over each cupcake. Finish with a drizzle of melted butter and a pinch of edible glitter if desired.
Look for: smooth, defined wings that hold their shape.
12 minMaster This Technique
The secret to the flawless butterfly wing lies in mastering the art of piping with a small, stiff tip. Begin by chilling your piping bag for at least 10 minutes; a cold bag holds the buttercream firmer, allowing you to draw sharp, crisp lines. When you pipe, start at the base of the wing and move outward in a steady, fluid motion, applying consistent pressure. This creates the illusion of a natural wing curve without gaps.
If you find the frosting spreading too much, add a touch more powdered sugar to stiffen it, or briefly refrigerate the bowl for 5 minutes. Practice on a sheet of parchment before moving to the cupcakes; the muscle memory you develop will make each batch look gallery‑ready.
Chef's Tips
Eggs, butter, and milk should be at room temperature to blend seamlessly and create a tender crumb.
Mix just until the flour disappears; extra mixing develops gluten and yields a dense cupcake.
A cold buttercream holds its shape longer, especially when piping delicate wings.
A tiny amount of sea salt brightens the sweet flavors and balances the richness of the buttercream.
A light dusting adds a magical sparkle that catches the light, perfect for spring celebrations.
Avoid These Mistakes
- Over‑Baking – Cupcakes become dry. Remove them when a toothpick comes out clean and the tops are just set.
- Under‑Mixing the Frosting – Leads to lumps. Beat until smooth and glossy.
- Using Too Much Liquid Color – Weakens the batter structure. Use gel colors for vibrant hue without extra moisture.
- Skipping the Chill – Warm frosting won’t hold the butterfly shape; refrigerate for at least 15 minutes before piping.
Try These Variations
Replace pink coloring with lavender and fold dried lavender buds into the batter; finish with honey‑sweetened buttercream.
Add ¼ cup cocoa powder to the batter and swap raspberry jam for blackberry preserves for a richer, earthy twist.
Incorporate orange zest into the batter and use a citrus‑infused cream cheese frosting; garnish with candied orange peel.
What to Serve With
Side Dishes
- Fresh mixed greens with a light lemon vinaigrette
- Strawberry‑spinach salad with toasted almonds
- Mini quiche bites (spinach & feta)
- Herb‑infused buttered croissants
Drinks
- Cold‑brew hibiscus tea with a splash of elderflower
- Rosé spritzer with fresh raspberry garnish
- Light vanilla chai latte (served iced for brunch)
Storage Guide
Questions & Answers
Thank you for joining me on this buttery, blossom‑kissed journey. I hope these butterfly cupcakes flutter their way onto your spring tables and bring as much joy to your guests as they have to me. Snap a photo, share your variations, and let the world see how you’ve turned a simple dessert into a seasonal masterpiece.
Butterfly Cupcakes Spring Baking
Ingredients
- 1 ½ cups all‑purpose flour
- ½ cup unsalted butter, softened
- ¾ cup granulated sugar
- 3 large eggs
- ¼ cup whole milk
- 1 tsp vanilla extract
- 1 ½ tsp baking powder
- ¼ tsp salt
- Natural pink & teal food coloring
- ½ cup heavy cream
- 8 oz cream cheese
- ¼ cup powdered sugar
- 1 tsp lemon zest
- ½ cup raspberry jam
- 2 tbsp melted butter (glaze)
Instructions
- Whisk dry ingredients together.
- Cream butter and sugar until light.
- Add eggs one at a time, then vanilla.
- Combine wet and dry, alternating with milk.
- Divide batter, tint pink & teal, fill liners.
- Bake at 175 °C (347 °F) for 18‑20 min.
- Cool, fill centers with raspberry jam.
- Pipe buttercream wings, finish with glitter.
Tips
- Chill the buttercream before piping for sharper wings.
- Use gel food coloring to avoid thinning the batter.
- Store in an airtight container; cupcakes stay fresh for up to 4 days.
Nutrition (per serving)
Calories
Protein
Carbs
Fat