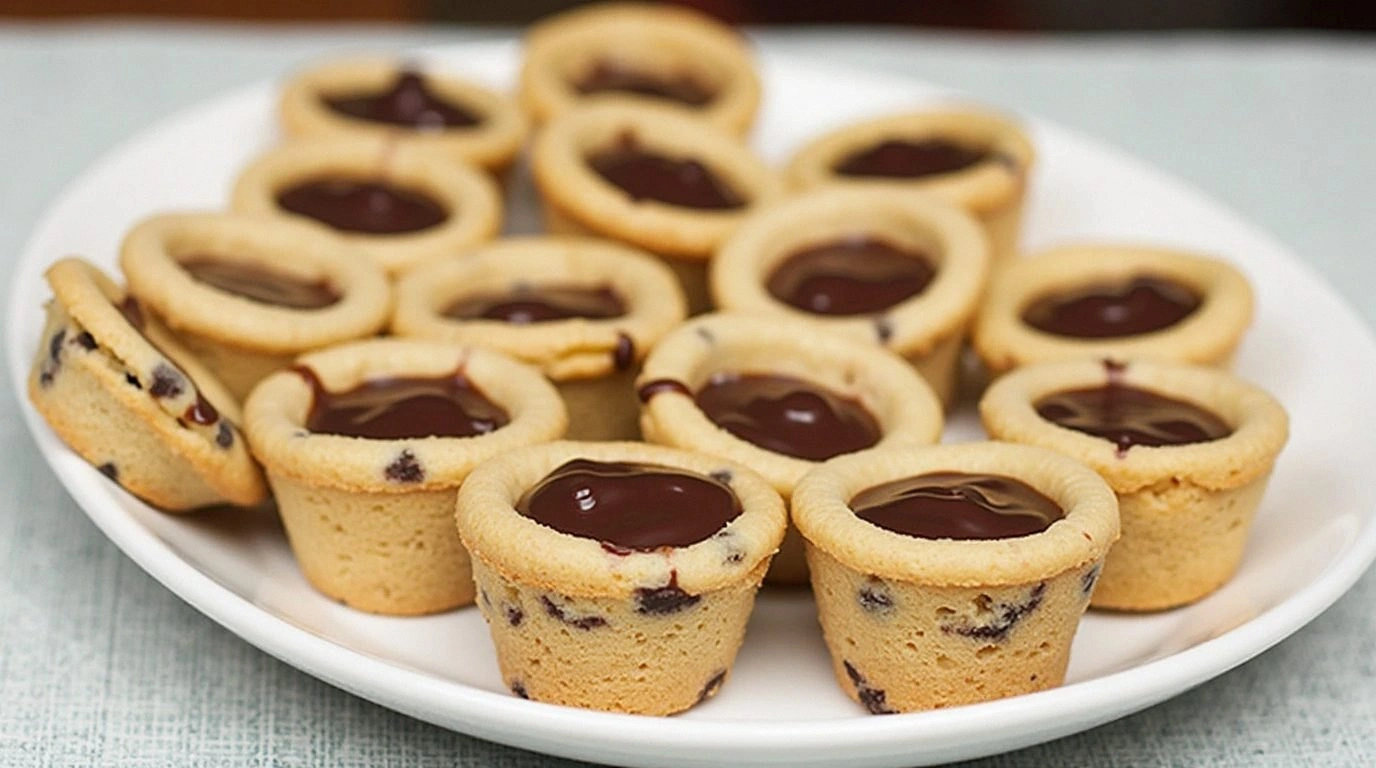
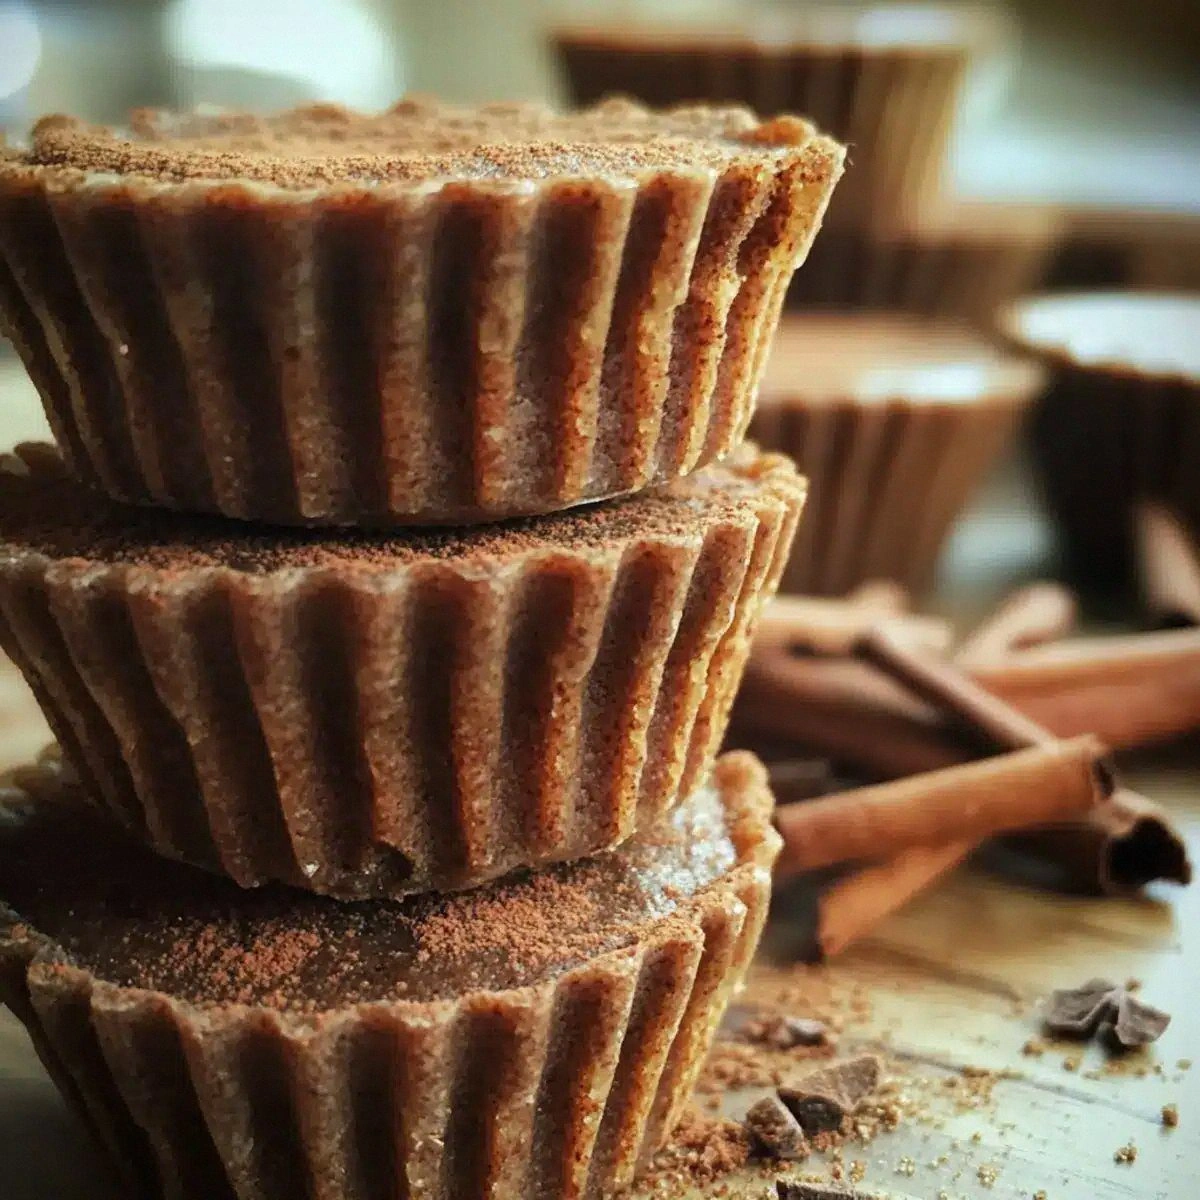
Picture this: it’s a rainy afternoon, the kettle whistles, and the kitchen smells like a cinnamon‑spiced dream. I’ve been chasing the perfect holiday treat for months, and every batch of gingerbread I’ve made felt like a lukewarm attempt, a half‑hearted homage to the classic. Then one night, a dare from a friend—“I dare you to taste this and not go back for seconds”—sent me scrambling in the pantry. The result? A batch of cinnamon gingerbread cups that are so irresistibly moist, buttery, and spiced that even the most seasoned bakers will admit they’ve never seen anything like it.
When the first cup slides from the pan, the aroma is a warm, spicy hug that envelopes the entire house. The golden crust crackles like a small, edible snowflake, while the inside remains tender, almost custardy, with a hint of molasses that lingers on the tongue. Every bite is a sensory rollercoaster—sweet, spicy, and comforting, with the subtle bitterness of cloves that keeps the flavor from tipping into cloying. The texture is a paradox: crisp on the edges, soft in the center, and the perfect balance of chewy and airy, like a gingerbread cookie that’s been given a hug.
What makes this version stand out is not just the recipe, but the meticulous attention to detail that turns an ordinary batch into a masterpiece. I’ve refined the spice blend to achieve a depth that feels both nostalgic and fresh. The dough is thick enough to hold its shape in a cup, yet light enough to bake evenly. The addition of molasses gives a rich, almost caramelized undertone that complements the cinnamon, ginger, and cloves. I’ve also perfected the baking time and temperature to ensure the cups rise just right—no underbaked center, no over‑dry crust. The result is a treat that feels like a holiday memory in every bite, and it’s hands down the best version you’ll ever make at home.
And here’s the kicker: I’ve discovered a trick that most recipes get completely wrong. Instead of whisking the wet ingredients separately, I fold them into the dry mix in one go, which locks in the moisture and creates an even, tender crumb. The final touch? A dusting of powdered sugar that melts into a sweet glaze when you dip the cup in hot cocoa. If you’re ready to elevate your gingerbread game, let me walk you through every single step—by the end, you’ll wonder how you ever made it any other way.
What Makes This Version Stand Out
- Flavor: The spice blend is balanced to highlight cinnamon, ginger, and cloves without overpowering the molasses sweetness.
- Texture: A tender crumb that holds its shape in a cup while offering a crisp, buttery crust.
- Simplicity: No elaborate techniques—just a single mixing step that delivers professional results.
- Uniqueness: The fold‑in method and molasses infusion give a depth of flavor rarely seen in traditional gingerbread.
- Crowd Reaction: Friends keep asking for the recipe after every gathering—proof that this is the crowd‑pleaser you need.
- Ingredient Quality: Fresh, high‑quality spices and real molasses make all the difference in taste.
- Cooking Method: A single baking step at 350°F ensures even baking and a perfect rise.
- Make‑Ahead Potential: The cups stay fresh for a week in the fridge, making them ideal for holiday parties.
Inside the Ingredient List
The Flavor Base
Cinnamon, ginger, and cloves form the heart of this recipe. Cinnamon provides the sweet, woody undertone that is the hallmark of gingerbread, while ginger adds a fresh, peppery bite that cuts through the sweetness. Cloves bring a subtle warmth and depth, ensuring the spice blend feels complex rather than flat. If you skip any of these spices, the flavor profile becomes one‑dimensional, and the cups lose their signature character.
The Texture Crew
Brown sugar and molasses are the duo that keeps the cups moist and chewy. Brown sugar adds a caramel note and a hint of acidity, which balances the richness of the molasses. Molasses, with its thick, syrupy consistency, locks in moisture and gives the cups a deep, almost chocolatey flavor. Swapping brown sugar for white sugar will make the cups crisper but less complex. For a lighter texture, reduce the molasses to 1/4 cup, but you’ll lose that signature depth.
The Unexpected Star
Unsalted butter is the unsung hero that brings richness and a tender crumb. The butter’s fat content creates steam pockets during baking, giving the cups their airy interior. Using salted butter can alter the balance of flavors, making the spices feel too sharp. If you’re dairy‑free, a high‑quality vegan butter can substitute, but be sure it’s at room temperature for a smooth blend.
The Final Flourish
Egg, milk, and vanilla extract tie the batter together and add depth. The egg’s proteins give structure, while the milk adds moisture and helps the spices distribute evenly. Vanilla extract’s subtle sweetness rounds out the spice profile, preventing the molasses from tasting overly sweet. If you prefer a lower‑fat version, replace the milk with oat milk and reduce the butter by 25%, but the texture may become slightly denser.
Everything’s prepped? Good. Let’s get into the real action.
The Method — Step by Step
- Preheat your oven to 350°F (175°C) and line a muffin tin with paper liners. The paper liners keep the cups from sticking and make cleanup a breeze. Make sure your oven rack is in the middle position so heat circulates evenly.
- In a large mixing bowl, whisk together the flour, cinnamon, ginger, cloves, baking soda, and salt. This dry blend is the backbone of the flavor. The baking soda reacts with the molasses to create lift, so don’t skip it.
- In a separate bowl, beat the butter until creamy, then add the brown sugar and molasses. Beat until the mixture is light and fluffy, which incorporates air and helps the cups rise. If the butter is too soft, the batter may become too runny.
- Add the egg to the butter mixture and whisk until fully blended. The egg binds the wet ingredients together and gives the cups structure. A cracked egg can introduce bacteria, so use a clean, fresh egg.
- Pour the wet mixture into the dry mix and stir with a wooden spoon until just combined. Over‑mixing can develop gluten, resulting in a tough crumb. The batter should be thick but pourable.
- Fold in the milk and vanilla extract gently. The milk hydrates the flour and helps the spices disperse evenly. The vanilla adds a subtle sweetness that balances the molasses.
- Fill each paper liner about three‑quarters full with batter. This ensures the cups rise without overflowing. The batter should look glossy, indicating proper butter integration.
- Bake for 25–28 minutes, or until a toothpick inserted in the center comes out clean. The edges should pull away slightly from the paper, a sign of a perfectly baked cup.
- Let the cups cool in the tin for 5 minutes before transferring them to a wire rack. Cooling allows the crumb to set, preventing them from breaking apart.
- Optional: Dust the cooled cups with powdered sugar or drizzle with melted chocolate. The sugar melts into a sweet glaze when dipped in hot cocoa, adding an extra layer of indulgence.
That’s it—you did it. But hold on, I’ve got a few more tricks that will elevate this from great to unforgettable.
Insider Tricks for Flawless Results
The Temperature Rule Nobody Follows
Many bakers bake gingerbread at 375°F, thinking higher heat means a quicker bake. In reality, 350°F gives the cups a slow, even rise and a tender crumb. I’ve baked at 350°F for years, and the difference in texture is unmistakable—no more rubbery centers.
Why Your Nose Knows Best
When the batter starts to rise, the aroma will shift from sweet to warm, spiced. Trust that scent as a cue for when the cups are ready to go into the oven. If you’re still unsure, use a timer and check at the 22‑minute mark.
The 5‑Minute Rest That Changes Everything
Letting the cups rest for 5 minutes in the tin after baking allows the steam to settle. This prevents the cups from cracking and keeps the edges from becoming too dry. A quick rest also makes them easier to remove from the liners.
The Perfect Dusting
A light dusting of powdered sugar or a drizzle of melted chocolate creates a glaze that melts into a sweet sauce when dipped in hot cocoa. The sugar should be sifted to avoid clumps, and the chocolate should be tempered for a glossy finish.
The Secret to a Soft Center
Add a splash of cold water to the batter before filling the cups. The cold water cools the butter, which reduces the amount of steam produced during baking, resulting in a softer interior.
The Quick Chill
If you need to serve these cups immediately, place them in the fridge for 15 minutes to firm up the crumb. This also helps the powdered sugar glaze set, preventing it from sliding off.
Creative Twists and Variations
This recipe is a playground. Here are some of my favorite ways to switch things up:
Citrus Zest Explosion
Add one tablespoon of orange or lemon zest to the dry mix. The citrus brightens the spices and adds a refreshing contrast to the molasses.
Chocolate‑Infused Cups
Fold in 1/4 cup of melted dark chocolate into the batter. The chocolate deepens the flavor and makes the cups feel like a decadent dessert.
Nutty Crunch
Stir in 1/2 cup of chopped walnuts or pecans before baking. The nuts add texture and a buttery flavor that pairs wonderfully with the spices.
Spiced Apple Compote
Serve the cups with a warm apple compote spiced with cinnamon and a splash of rum. The compote adds moisture and a fruity layer of flavor.
Vegan Version
Replace the butter with coconut oil, the egg with a flaxseed egg, and the milk with oat milk. The result is a vegan cup that still delivers on flavor and texture.
Mini Cupcake Surprise
Use a mini muffin tin to bake smaller cups. They’re perfect for portion control and make great party favors.
Storing and Bringing It Back to Life
Fridge Storage
Store the cooled cups in an airtight container at room temperature for up to 3 days. The airtight seal keeps them moist and prevents them from drying out. If you need to keep them longer, transfer to the fridge for up to a week.
Freezer Friendly
Wrap each cup individually in plastic wrap, then place them in a freezer bag. Freeze for up to 3 months. When ready to eat, let them thaw at room temperature for 15 minutes before reheating.
Best Reheating Method
To revive frozen cups, preheat your oven to 350°F and bake for 8–10 minutes. Add a tiny splash of water to the bottom of the baking sheet to create steam, which keeps the cups from drying out. This trick brings back the original moisture and flavor.